M12S - Slaughtershed
Mortal Slayer
The Lindwurm will repeat one mechanic first, which is the Mortal Slayer you've seen at the start of the fight, in order to give your party an opportunity to choke here and wipe to its balls. There's no difference between this one and the first one you saw in this fight, so deal with it the same way.
If your party did not choke here, great! Onto the final mechanic, which is Slaughtershed.
Slaughtershed
The attack, Slaughtershed, has multiple layers to it, which includes stack/spread, knockbacks, arena cleaves and more lumps of flesh that are thrown around the arena. In order to understand what is going on, we will have to break it down into sections.
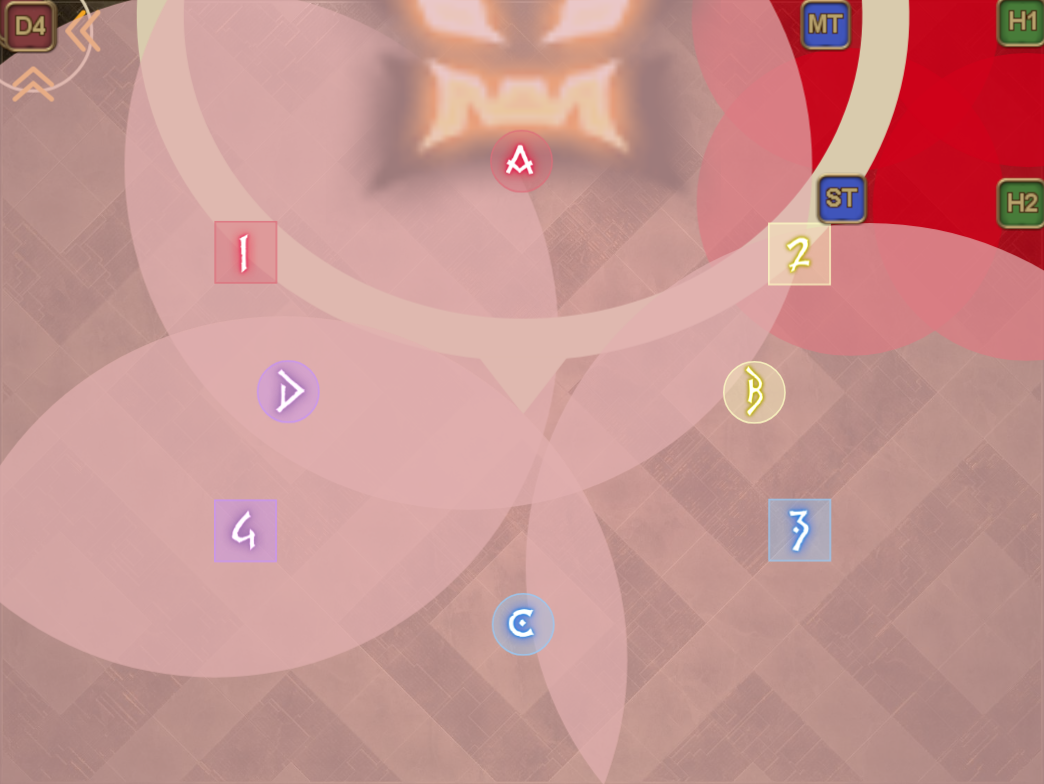
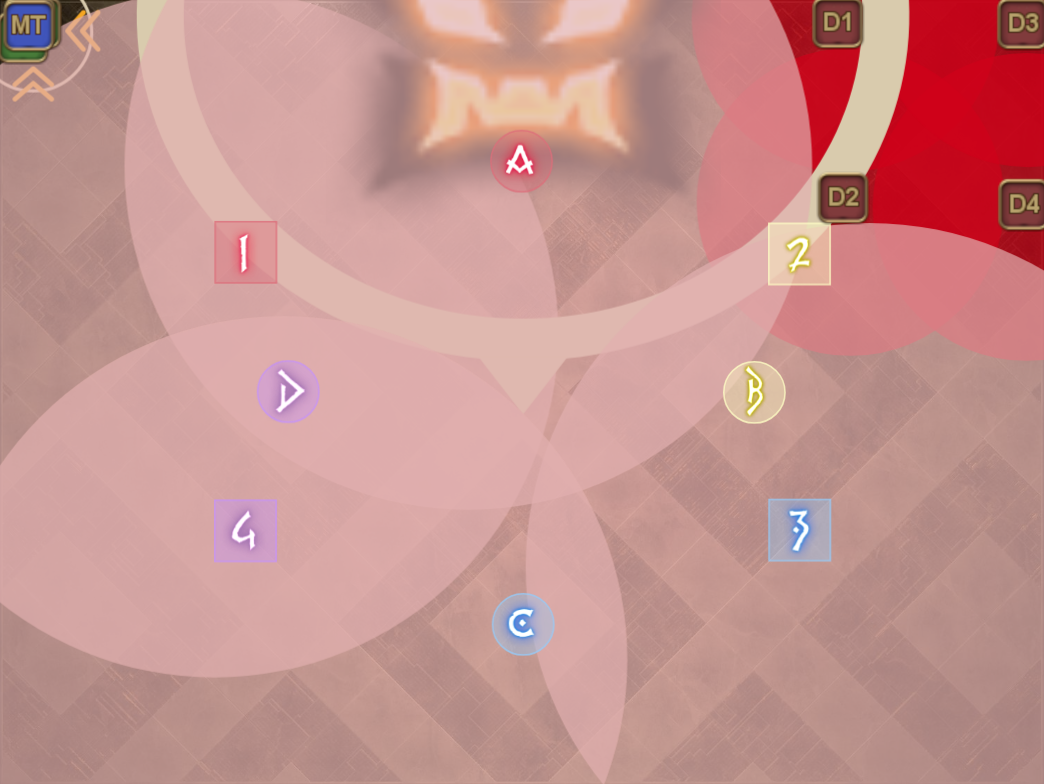
Before the boss finishes its cast though, do try to separate the two role groups like this in order to avoid confusion.

You do not have to spread out exactly like this, just make sure that supports and DPS aren't clumped up together. This will help make it easier to determine which group is spread and which group is stack, something which will become relevant later.
Lumps of flesh
First, the boss will scatter lumps of flesh around the arena, which will detonate in a large AoE later. There are only two patterns for this mechanic, which is shown below.
| Pattern 1 | Pattern 2 |
|---|---|
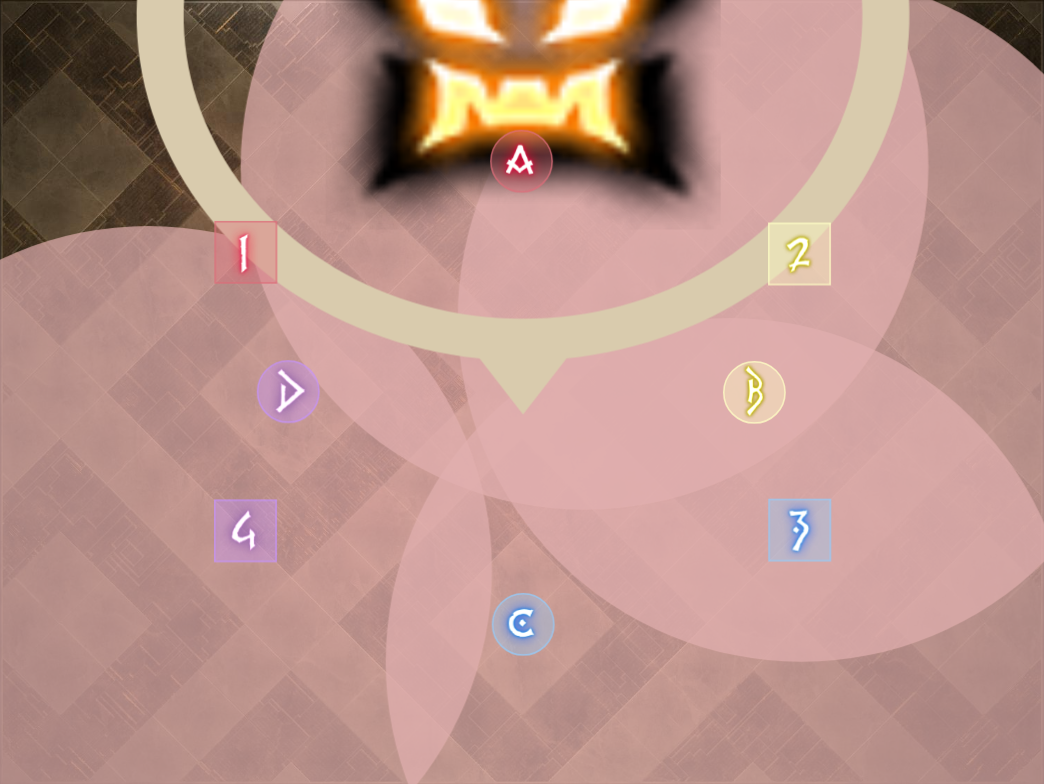 | 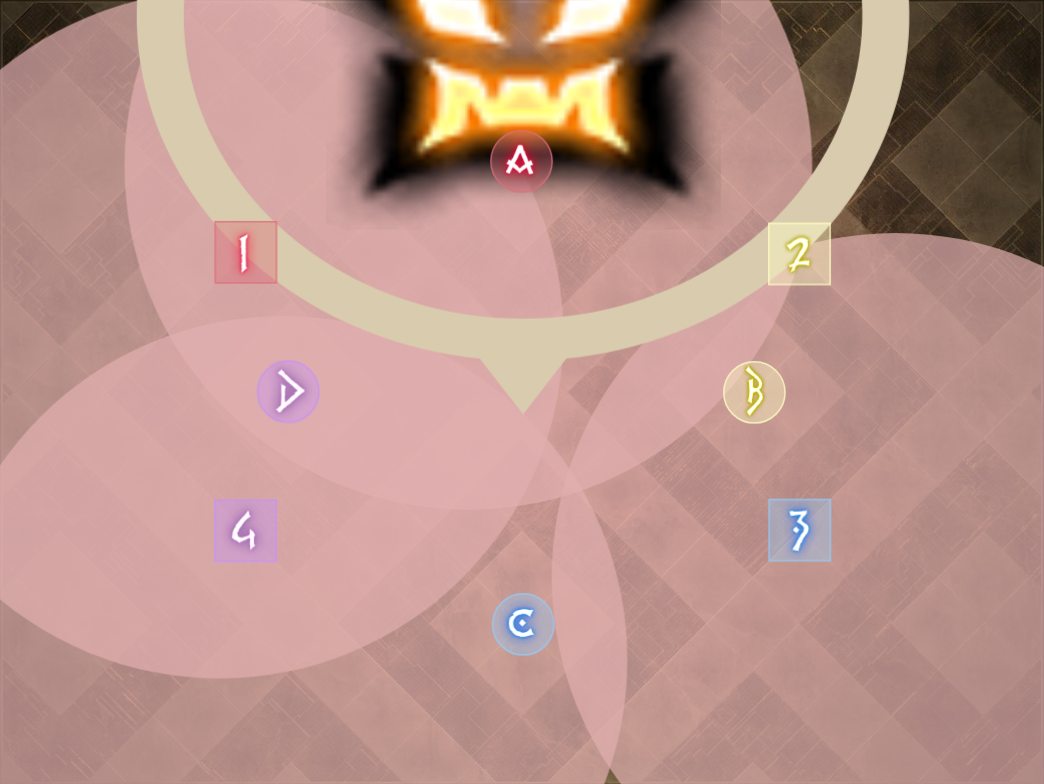 |
The safe areas are always northwest and northeast, but the size of the safe spot is different for each side. The relevancy of this detail becomes obvious soon, as the Lindwurm will target either all support or all DPS players with a targeted AoE marker. The other role group that did not get selected will receive a stack marker instead.
Resolving stack and spread
The role group who received the targeted AoE marker must resolve their spread in the larger safe spot, while the group with stack will go to the smaller safe spot. While the stack is self explanatory, the spread positions are carefully set up so that melees will still be able to maintain their uptime while doing the mechanics.
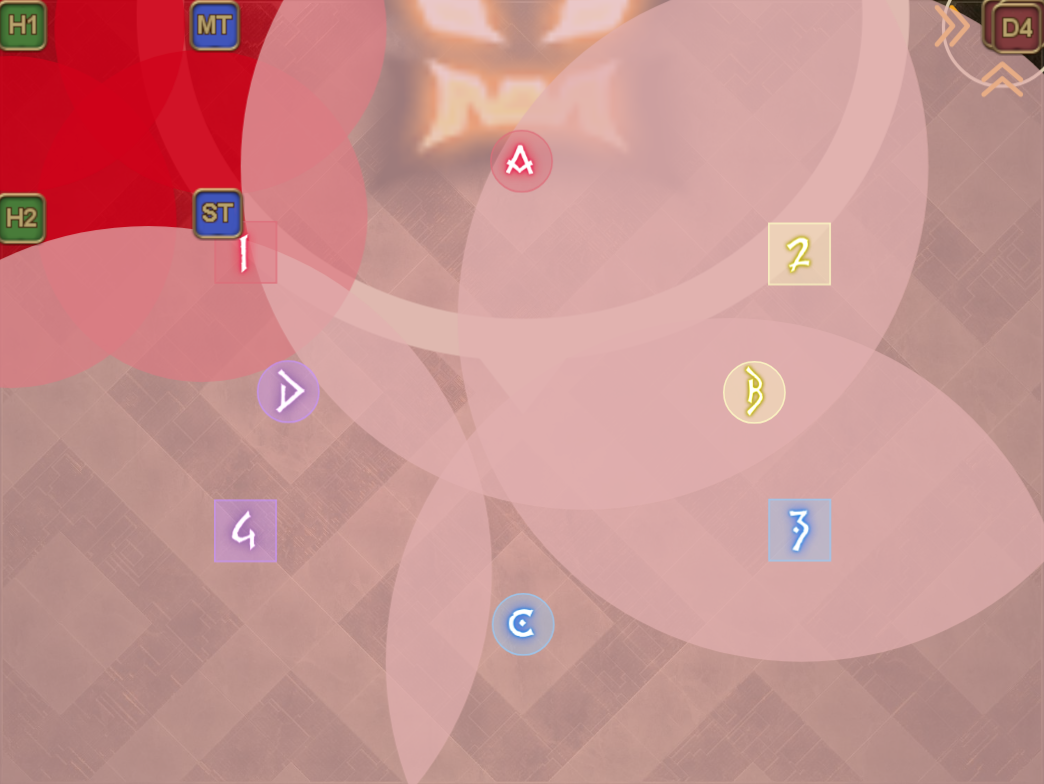 | 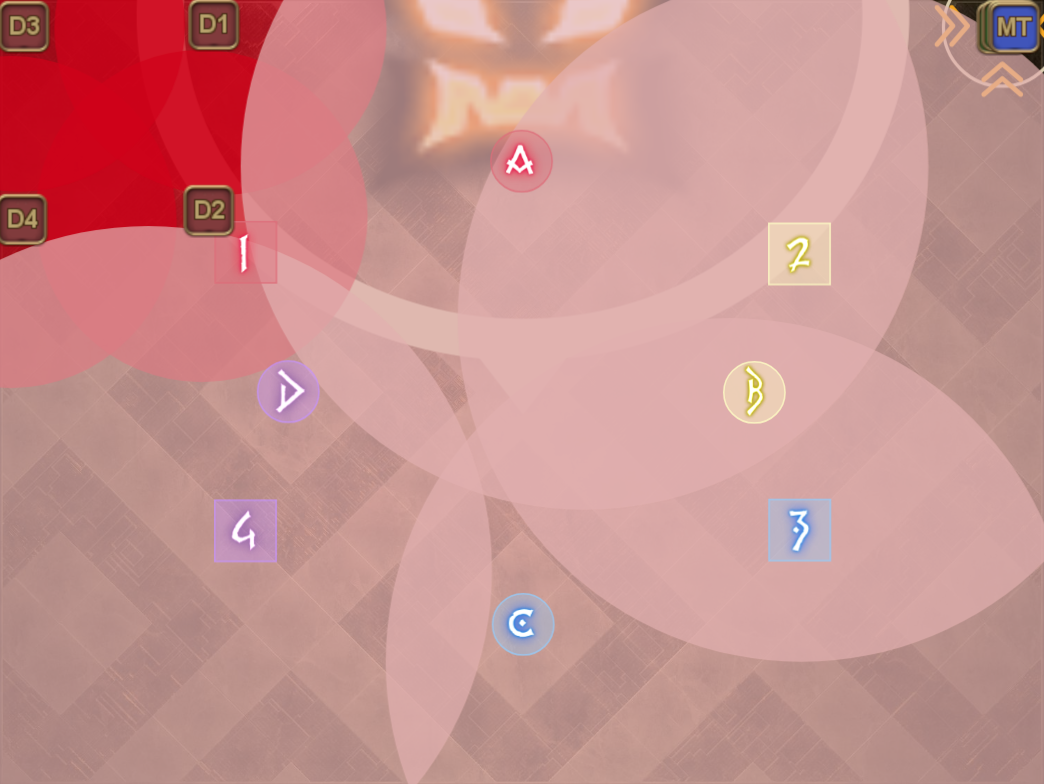 |
 |  |
Knockback or cleave
Its not over yet after you've resolved the spread or stack, because the boss will now either do a knockback or a half arena cleave, which is always alternated between left and right. You can determine which attack it will be doing by looking at the hands, which can either be small hands (knockback) or a giant dragon head (cleave).
| Knockback Can be resisted with anti-kb! | Cleaves |
|---|---|
But, how do you know whether the boss attacks left or right first? Well, while you were running to the stack/spread positions, the boss was also transforming its hands in a certain order. The order of transformation determines in which order the attack will be coming, e.g. if the boss transforms its left arm first, then the first attack will be coming from the left arm.
The transformation is fairly slow, but easily missed due to the players more likely being focused on getting to their stack/aoe positions. If you are unable to catch a glance as to which arm transformed first, then you can also rely on looking at which arm transformed second in order to work through your process backwards.
In case nobody was paying attention, then this part can very easily cause a wipe, which usually involves multiple people getting thrown off the arena by the knockback. Without a doubt, having a shotcaller would help immensely in resolving this mechanic, whether it be through voice or through the use of macros.
Refreshing Overkill
The boss will repeat Slaughtershed up to 3 times, after which it will cast Refreshing Overkill.
Example 1 | Example 2 | Example 3 |
|---|---|---|
Send everything you have, because if the boss's hp is not reduced to 1 before it gets this cast off, then it will wipe your party on the spot. However, if you do succeed, then congratulations, the boss will explode in a spectacular fashion and a cutscene will play, leading to Lindwurm II.