M12S - Grotesquerie Curtain Call
Another act of Grotesquerie, which means another set of debuffs once the Lindwurm finishes casting Grotesquerie: Curtain Call. Unlike the previous acts though, this act has no delay as to when the mechanic starts once the boss finishes casting, so immediately preposition to the topleft corner once you've dealt with the The Fixer.
The arena remains destroyed, so the way you handle this mechanic will also differ depending on which pattern you got.
| 十 Cardinal | X Intercardinal |
|---|---|
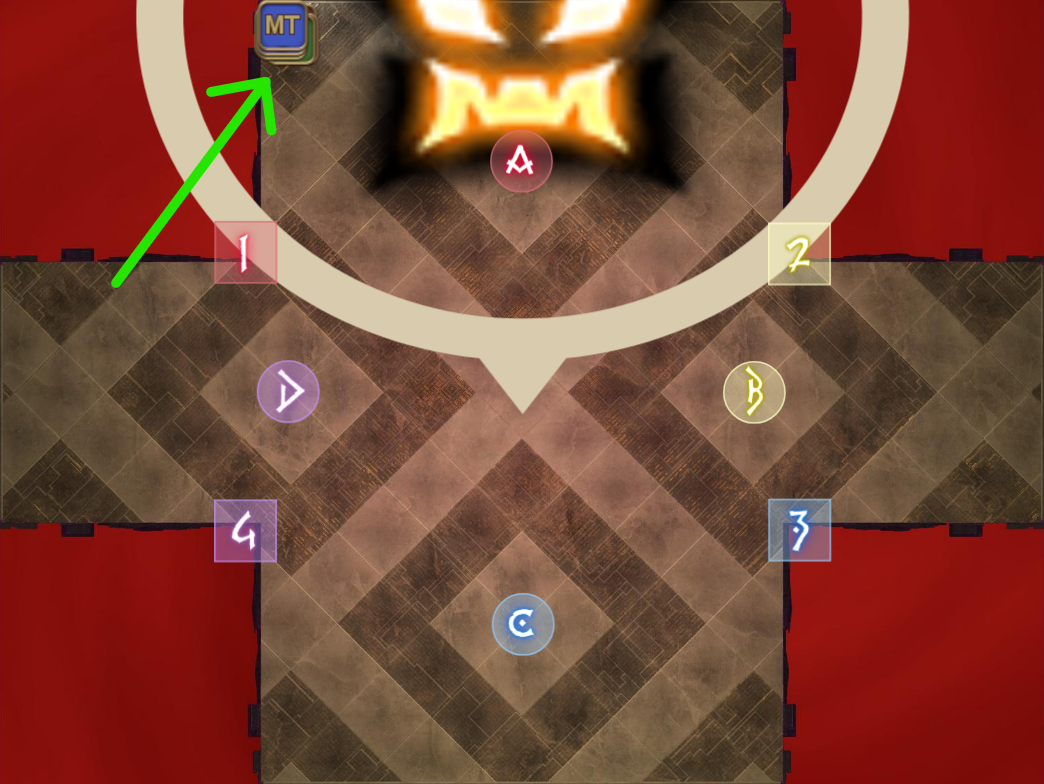 | 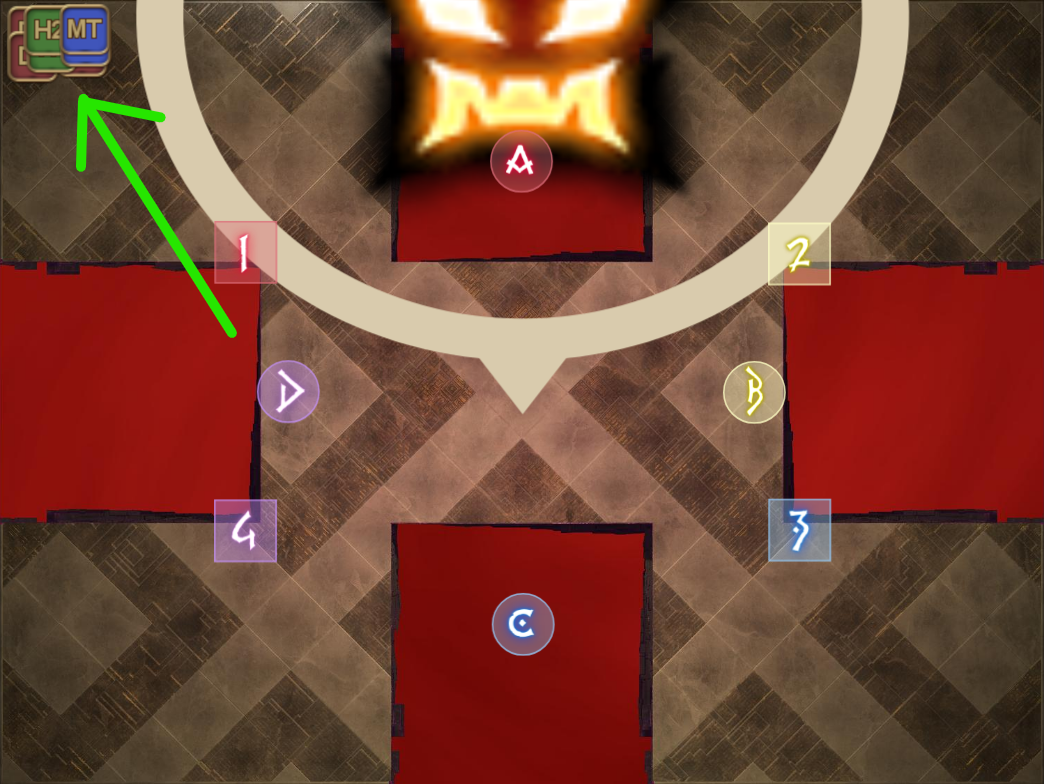 |
Once the boss finishes casting Grotesquerie: Curtain Call, your party will be inflicted with the final set of the Grotesquerie debuffs.
| Debuff | Description | Additional note |
|---|---|---|
  | Upon the timer running out, the player with this debuff will form a fleshy chain with their partner. This chain can be destroyed by stretching it long enough, which will cause both players involved in the chain to explode in a small AoE. There is no Beta counterpart in this mechanic, so your partner instead would be a random player of the opposite role group. This debuff essentially functions as a body check, so try not to die during Curtain Call. |  |
 | Upon the debuff expiring, the player will explode in a small AoE. This is the exact same debuff you've seen in Act 1, so you should know how this debuff works. This debuff will target either all supports or all DPS, whichever that wasn't targeted by Rotting Flesh. | |
 | This debuff will instantly kill you if you let this debuff expire. In order to cleanse this debuff, you will have to intentionally take a hit from the dragon cone cleave that is shot through the middle of the arena. Upon cleansing this debuff, the player will explode in a small AoE, which means you cannot be close to another player when this happens. This debuff will target either all supports or all DPS, whichever that wasn't targeted by Bursting Grotesquerie. |
Curtain Call
As mentioned earlier, this mechanic has no delay. Once the boss finishes casting Grotesquerie: Curtain Call, your party will immediately be targeted by five baited puddles in a row that your party needs to mariokart.
This mechanic has two patterns, with the intercardinal pattern being arguably harder due to the narrower passageways on the arena. The more stringent puddle placements required, which can be argued that it is caused by game8 picking an inferior strategy, makes the intercardinal more prone to accidents when people try to free for all it.
| 十 Cardinal | X Intercardinal: Max melee |
|---|---|
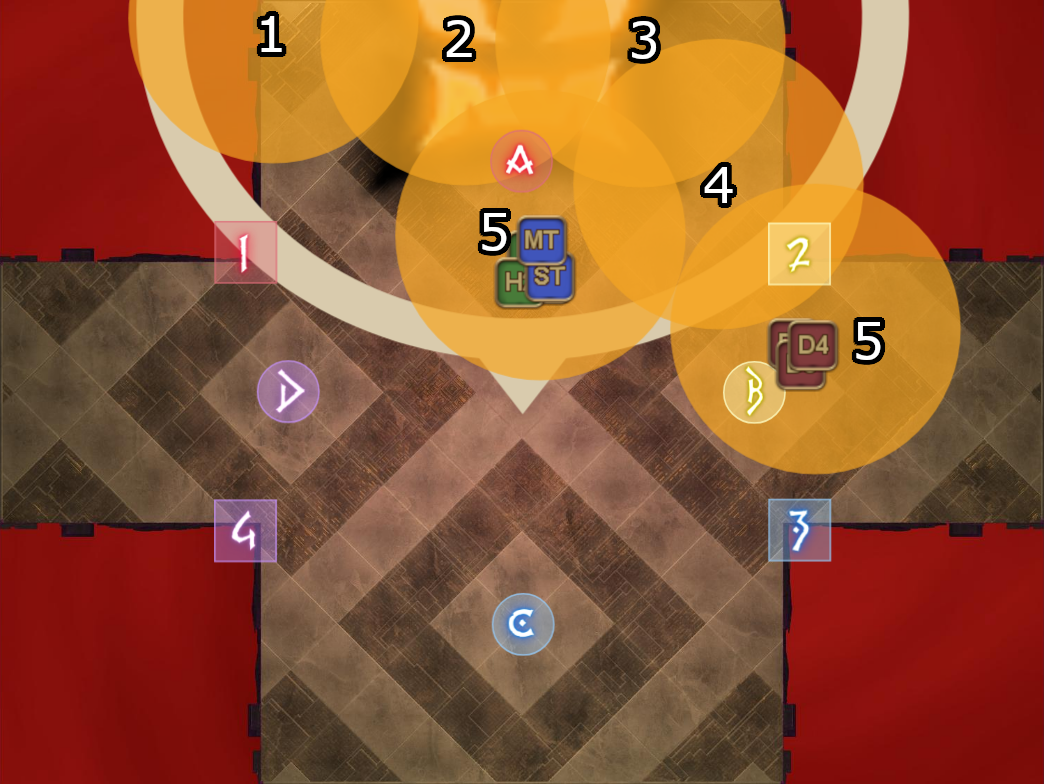 | 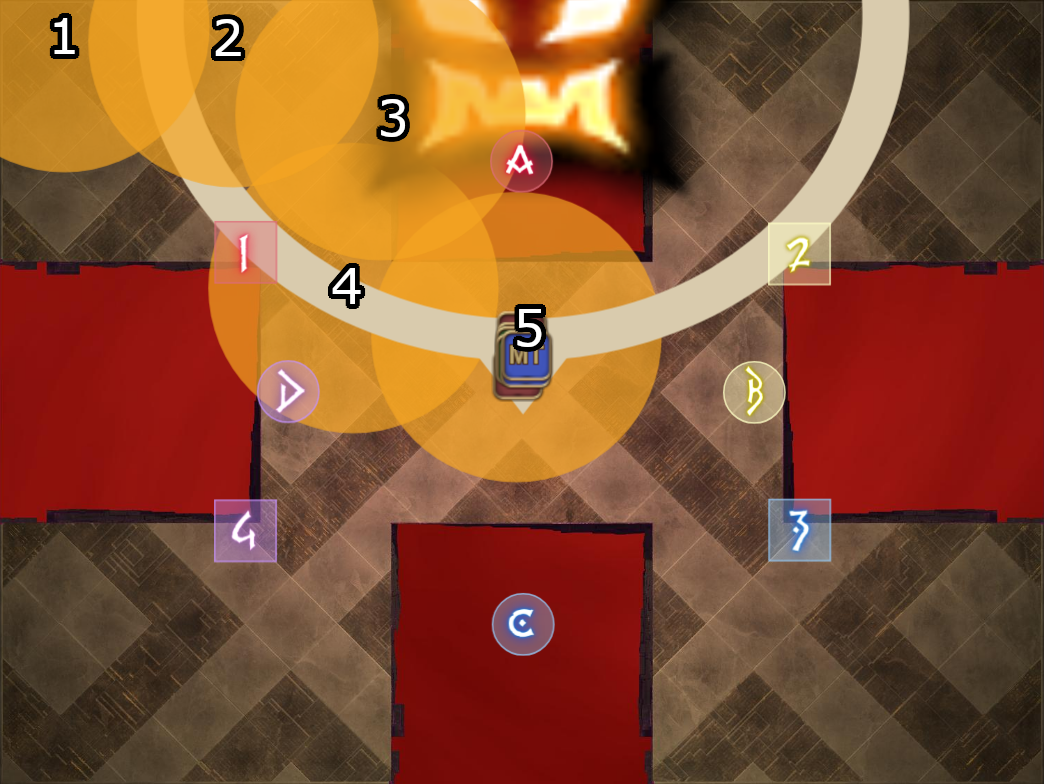 |
| X Intercardinal: Sloppy but acceptable | X Intercardinal: Terrorism edition |
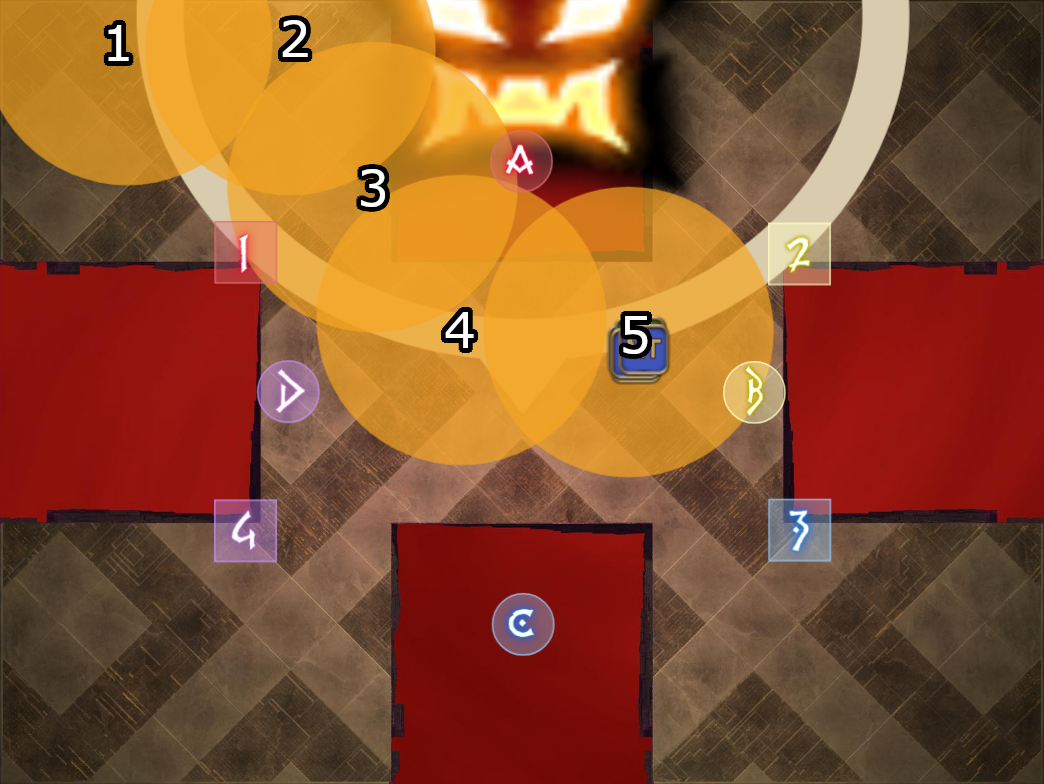 |  |
The way to do the intercardinal pattern is to max melee, which will allow you to get the results similar to what Nukemaru's guide says, but while retaining uptime. You will know that its done correctly when the 5th puddle is dropped cleanly around the middle of the arena.
You want to avoid the terrorism example, which is a worst case scenario where the majority of the players are doing whatever they want. Even in a scenario where someone didn't max melee properly, you can still do this mechanic rather cleanly by continuing to trace the upper edge when dropping your puddles. You can maintain uptime no matter what, so prioritize dropping the fifth puddle properly before you do anything else.
Go with the assumption that not everyone does X-pattern properly, learning how to survive the terrorism will also be part of the prog.
Honorable mention: Toxic Friends mariokart
The way Toxic Friends raidplan does this strategy is by starting outside and then looping the northwest square in order to get rid of all the baits there. By far not perfect, but it is a cleaner approach compared to how nukemaru wants you to do it, while still allowing everyone their max melee uptime.
 |
Unfortunately, this has been largely phased out, but it should give you an idea as to why the current PF strategy isn't optimal.
Ravenous Reach
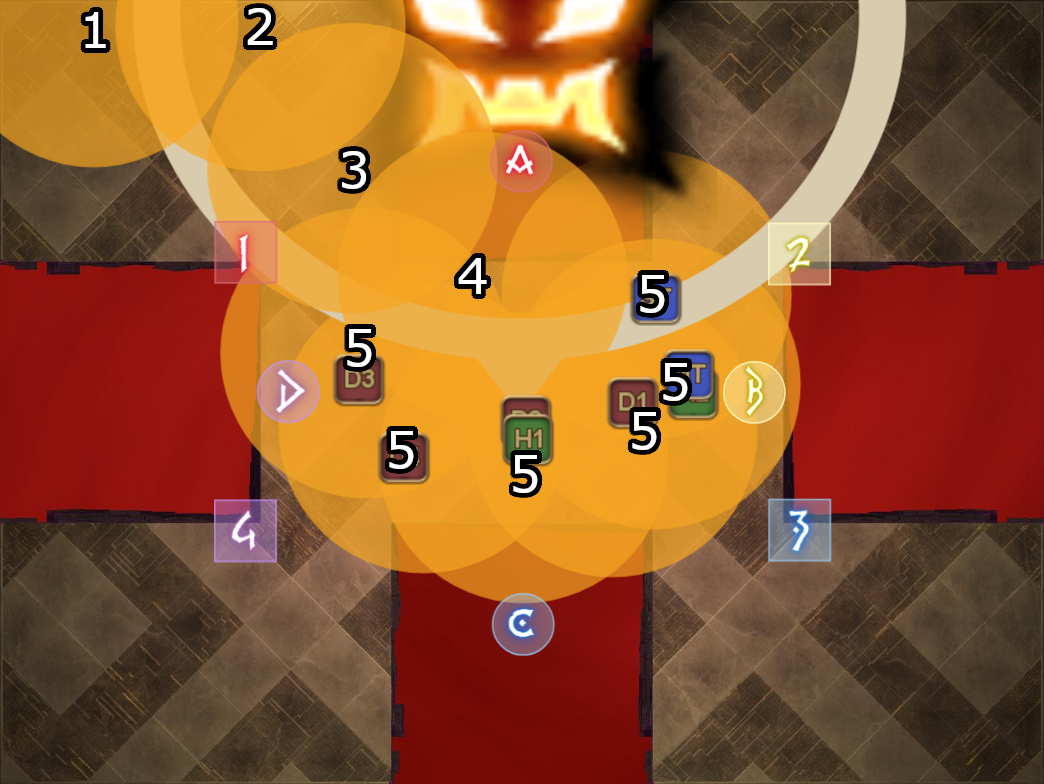
Right as you are about to drop your 4th puddle, you will notice that the boss is casting Ravenous Reach, which is the dragon cone cleave that you've seen in Act 1. The players with rotting flesh must intentionally get themselves hit by the cleave, while the other players must avoid it at all costs.
Identify which way the dragonhead is cleaving, and go to that side of the area depending on what you need. Once in place, you want to spread out in a line formation from top to bottom by using your role priority system.
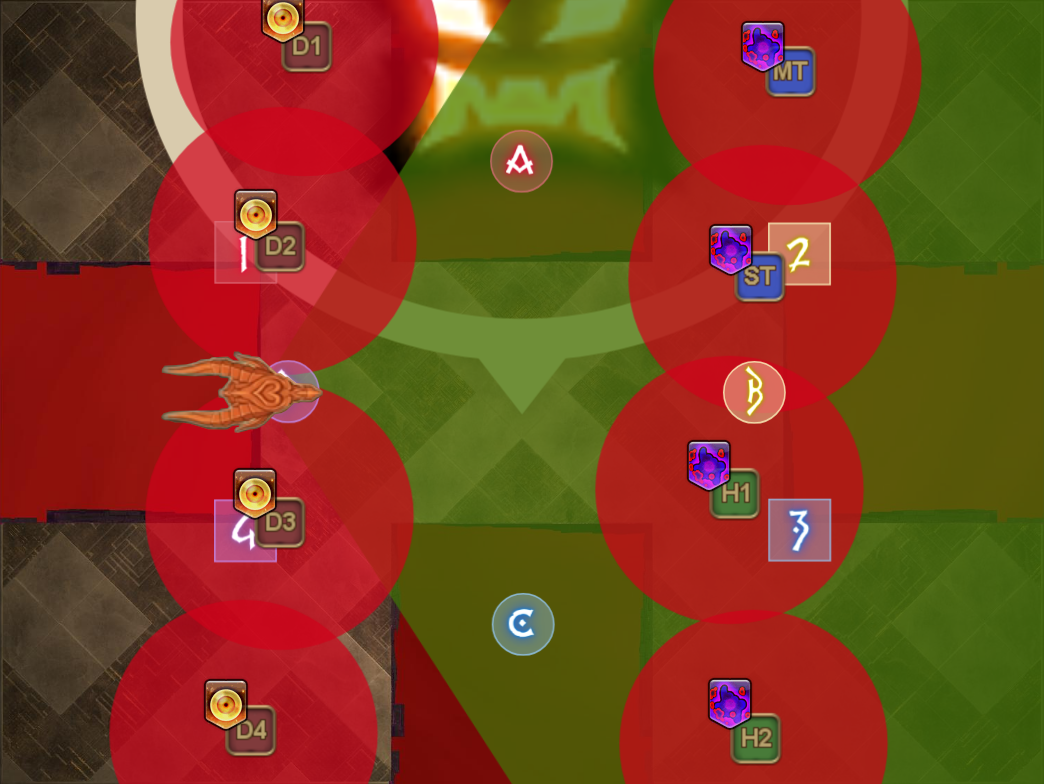
By far the most common cause of wipes in this part is that there is not enough mitigations in place in order for the party to soak the dragon cleave. Surviving this attack requires at least 4-5 mitigations, so assuming that there is one tank 90s and one H1 mitigation, the H2 should be able to take care of the rest afterwards.
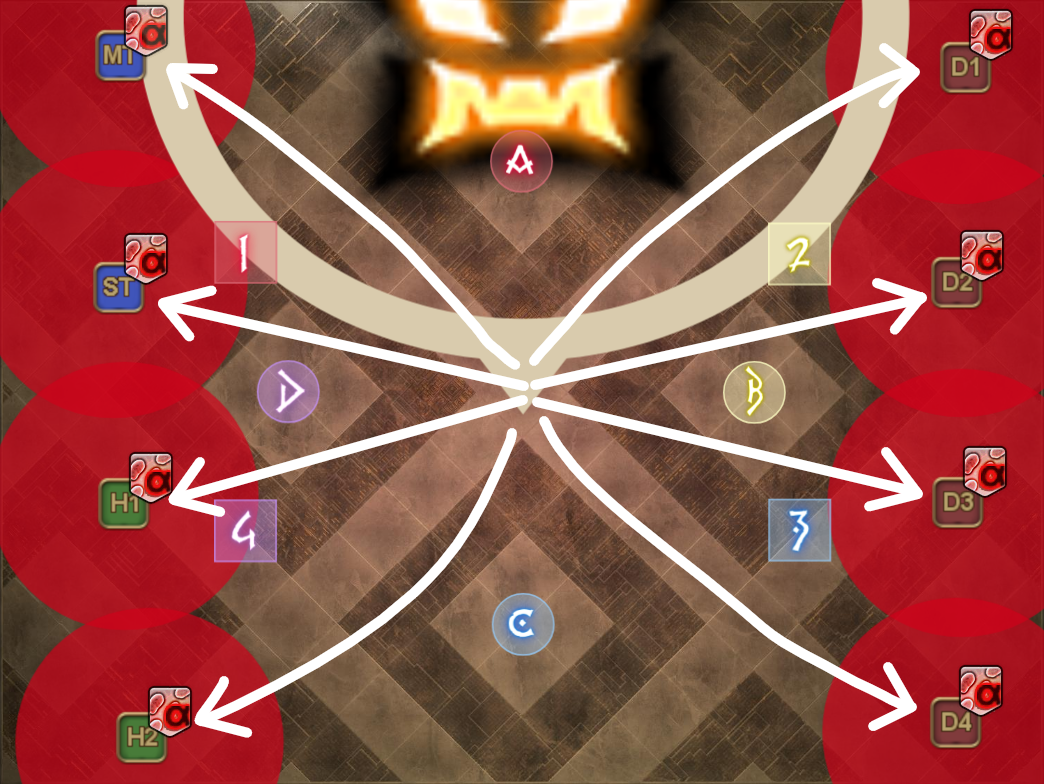
Bonds of Flesh
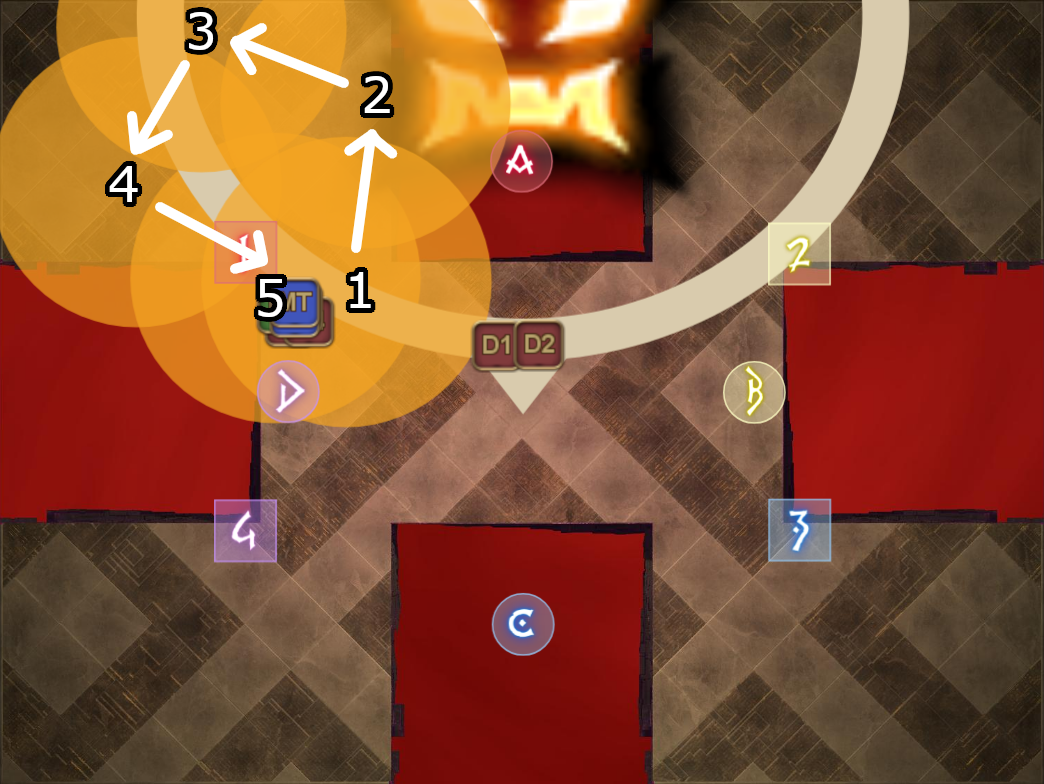
Immediately run to the center of the arena, because the chains are about to be formed due to the debuff timer expiring. Immediately start running once the chain has formed, with the support going west while DPS goes east. Popping your sprint here is recommended, especially if you do not have any movement skills.
Each player will explode in a spread AoE once the chain breaks, so line up as before using the role priority system to make sure that everyone has sufficient space to properly break their chain.
You might have noticed that there are lumps of flesh scattered across the arena, which will explode very soon. There are two possible patterns, which is either NW/SE safe or NE/SW safe, so identify quickly where the safe spots are and move out immediately once your chain has been broken.
Once again, you are recommended to pop your sprint here, because getting to the safe spot without sprint will be almost impossible in some scenarios, unless you have movements skills like dash or gapclosers.
| NW/SE safe | NE/SW safe |
|---|---|
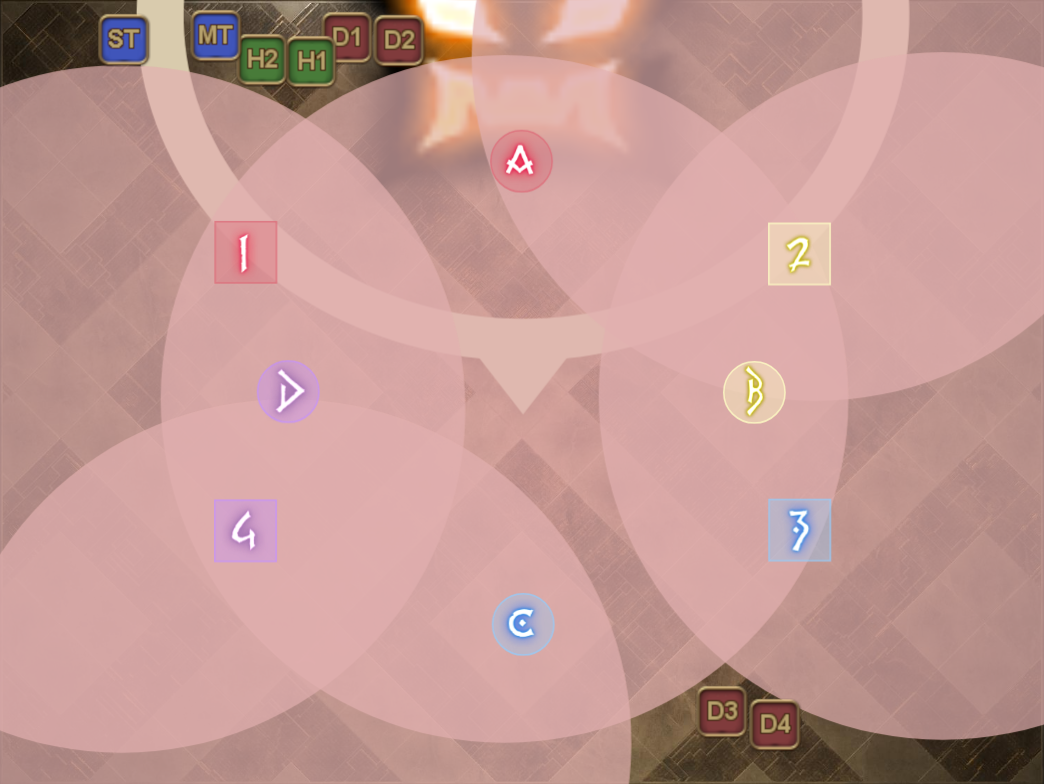 | 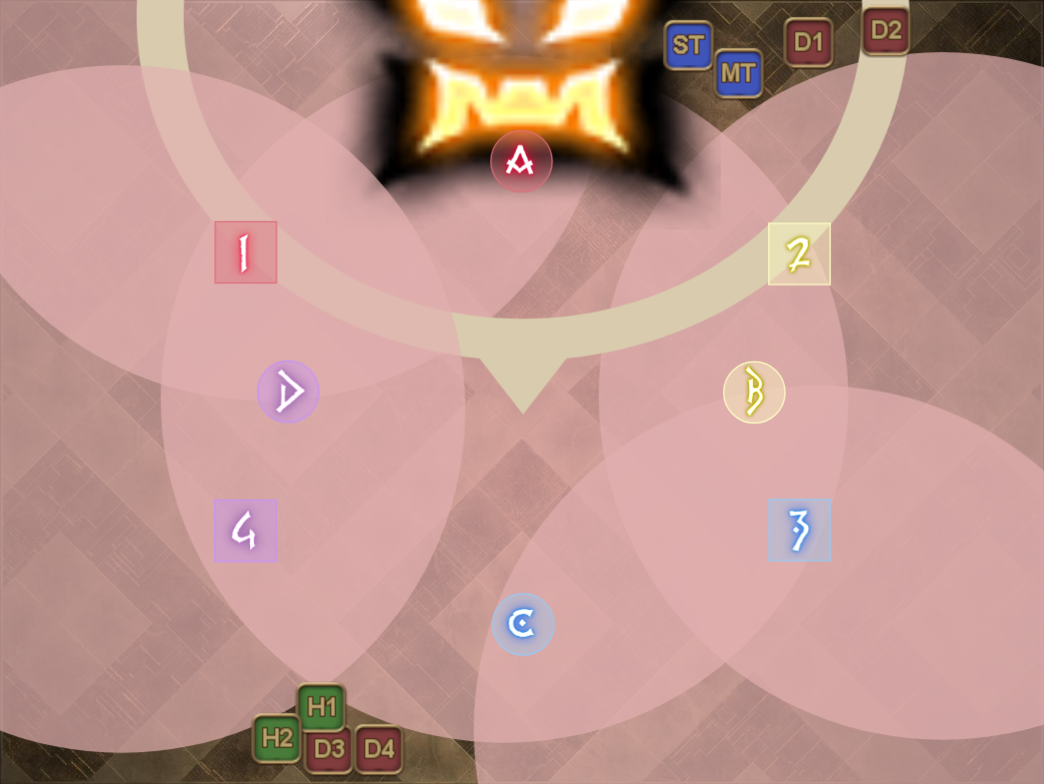 |
Overally, this mechanic is difficult because of how fast everything happens in sequence, on top of having an actual mitigation check outside of the raidwides. The game8 strategy used for the X-pattern does not help make this easier either, because it requires insight of the mechanic, something which is not common knowledge in PF, in order to execute the mariokart properly.
You will likely spend some time progging in this mechanic, so you can use the PoVs below if you want to prepare yourself as much as you can.
| Example 1 Cardinal  | Example 2 Intercardinal  | Example 3 Cardinal  |
|---|---|---|
Upon successfully dealing with all the mechanics, the boss will end this phase with Splattershed.