M12S - Grotesquerie Act 1
After surviving the barrage of balls from the Lindwurm, the first real major mechanic starts with the cast of Grotesquerie: Act 1, which will apply debuffs on your party.
| Debuff | Description | Additional note |
|---|---|---|
 | A red blob will be attached to the player, which can either be at your front, back or one of your sides. Once the debuff expires, the blob will explode, spraying a cone in the direction it is facing. The blob will change direction with wherever the player is facing, so your goal is to aim the cone in a way that it does not blast other players. |  |
 | Upon the debuff expiring, the player will explode in a small AoE. Avoid overlapping the AoE with other players by spreading out properly. This debuff will target either all supports or all DPS. | |
 | Upon the debuff expiring, the player will explode in a small 4-man stack AoE. Unless your party has optimized on their mitigations, you can assume the party will likely die instead if this stack is taken as a 3-man instead. This debuff will target one random player of the group that did not receive the Bursting Grotesquerie. |
Begin at the top left corner at the ring of the boss, as quite some things will happen in this mechanic.
Act 1
The debuffs are fairly straightforward, as one role group has to deal with a spread while the other role group has to deal with a stack. However, the boss will try to make this mechanic a bit harder by throwing some attacks at your party, in the hope that in the confusion your party members will PvP each other with the cone shooting debuff.
| 1. | First, the boss will throw four baited puddles at your party members, forcing the group to mariokart. The way game8 does it is to run along the edge of the boss's hitbox to drop those puddles. | 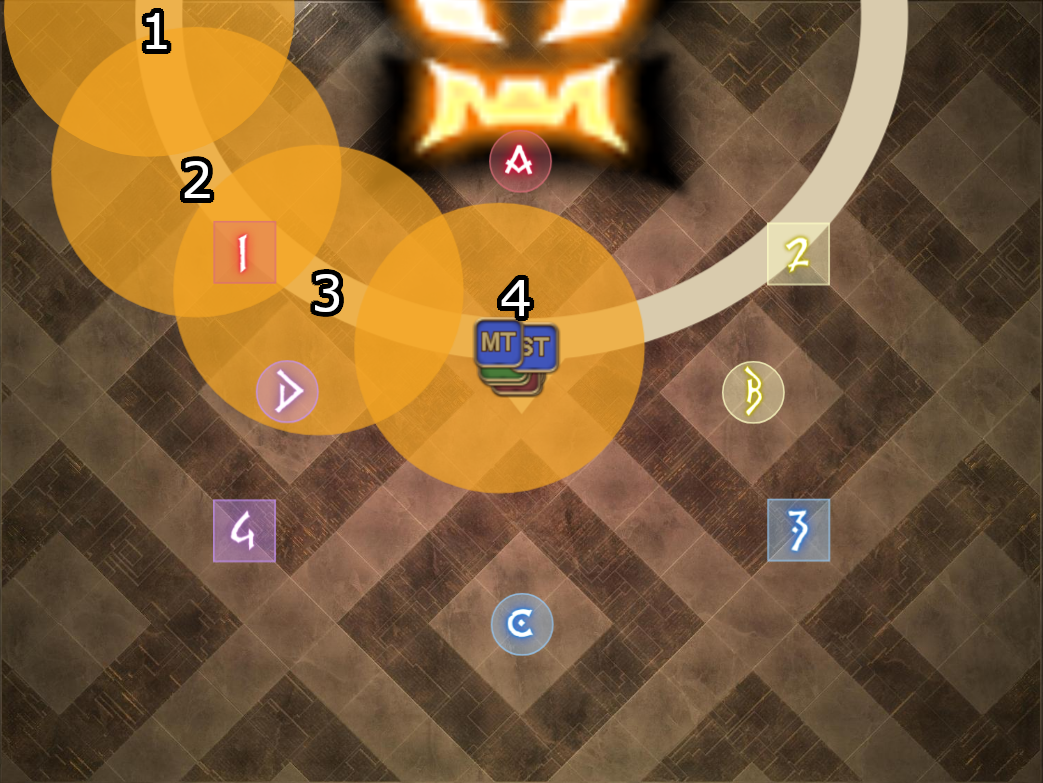 |
|---|---|---|
| 2. | The Lindwurm will now send its dragon head with Ravenous Reach to either cleave the west or the east side of the arena with a cone AoE. This will also determine whether your party are to resolve their debuffs on the west or the east side. Once you get into positions, you want to avoid blasting your teammates with the cone by positioning the blob to face somewhere that its safe to shoot at. Consider dropping your uptime for a second or two if you do not know the uptime tech. | 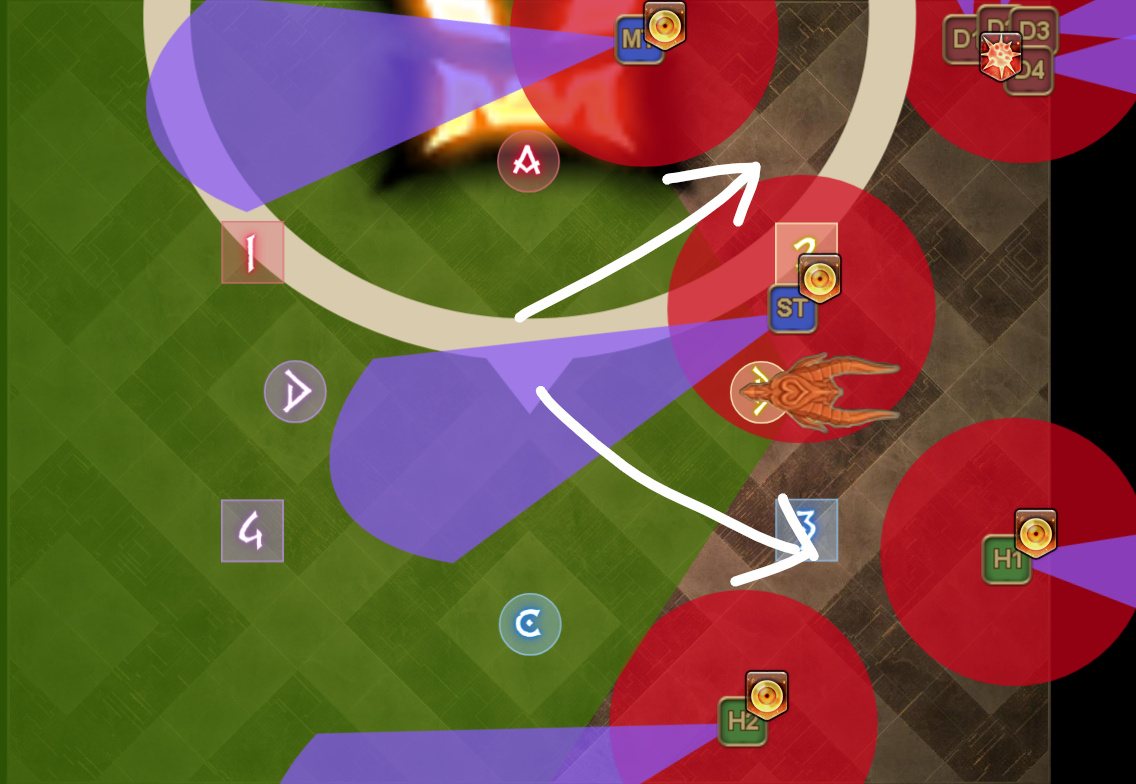 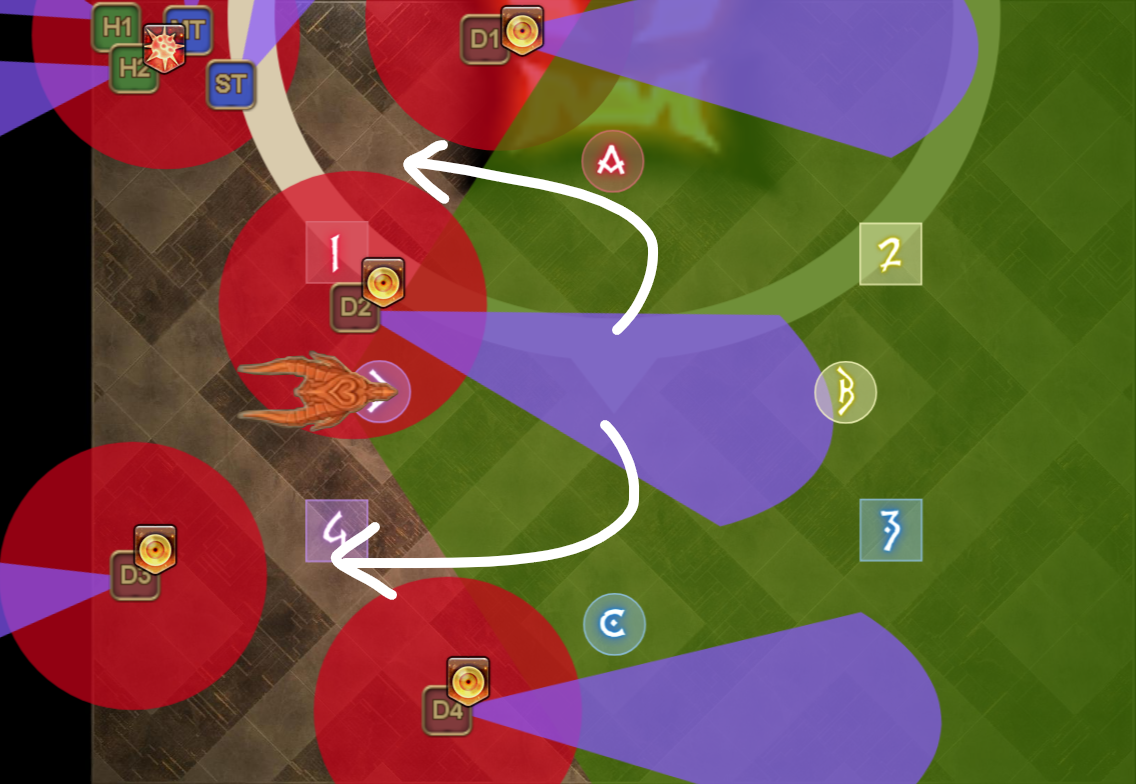 |
| 3. | After resolving the debuffs, one non-tank will be targeted by a stack, while both tanks will be targeted by an AoE tankbuster. At the same time, the arena will be littered with blobs which will explode in large AOEs soon. No matter how the blobs spawn, theres always one safe spot on each edge of the arena. The nontanks will resolve their stack on the same side as where they resolved their debuffs, while the tanks will always adjust by moving to the other side. The tankbuster does not inflict any form of vulnerability and it is actually quite weak by itself, so it is safe to stack both tanks on top of each other provided they have sufficient mitigations. Something like 40% + short mitigation + Reprisal should be sufficient enough to survive. The AoEs in the arena will explode half a second earlier than the tankbuster, so with proper timing, it is actually possible to also spread out without overlapping the tankbusters! | 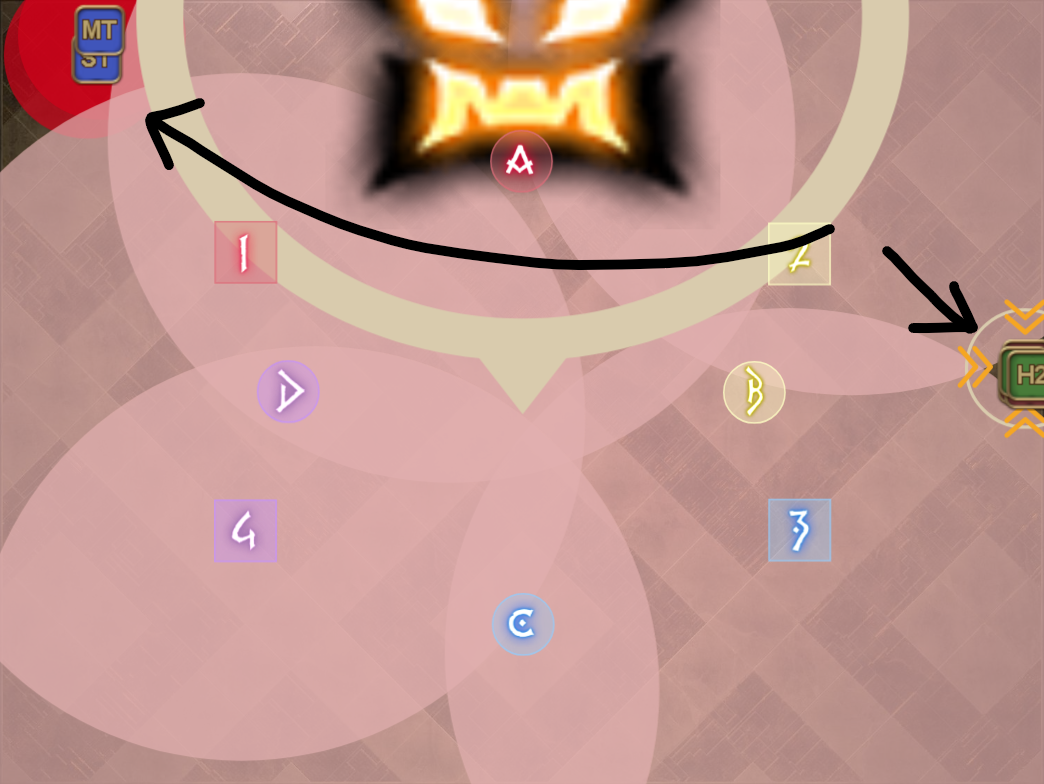 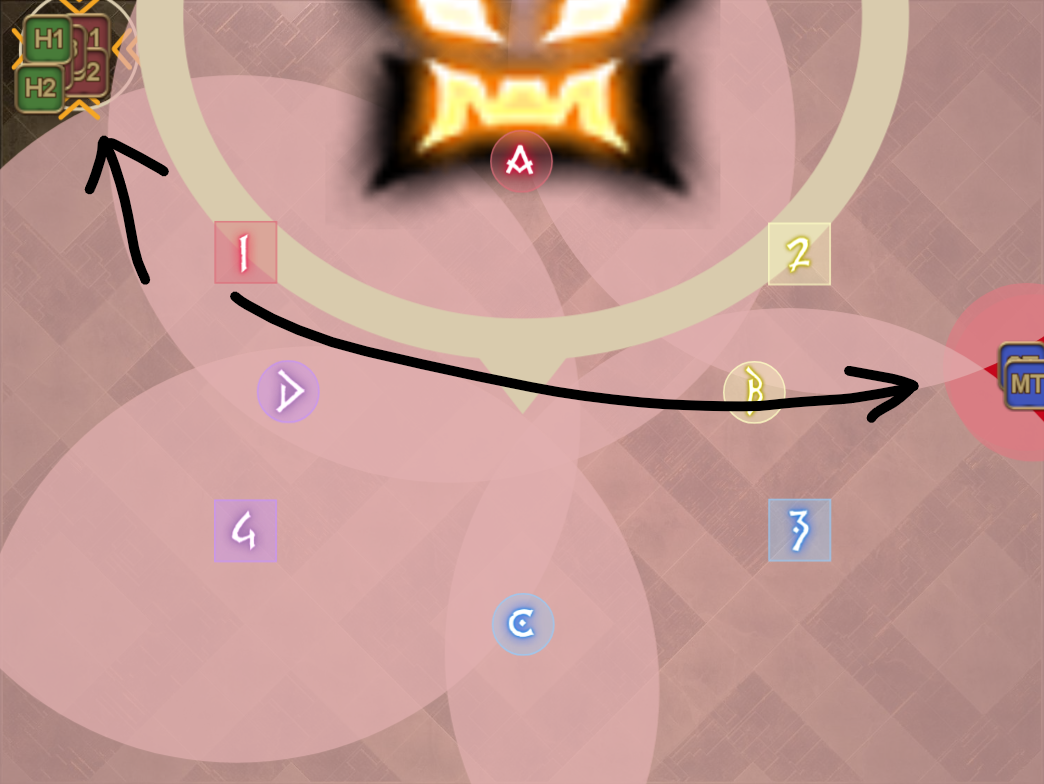 |
| 4. | As a reference, the image on the right shows all possible safespots for every iterations. Once you're at the edge of the arena, identify the blob closest to you to determine whether the corner or the middle side is safe. Once you're done with this mechanic, the boss will end Act 1 with The Fixer. Heal up and mitigate as necessary. | 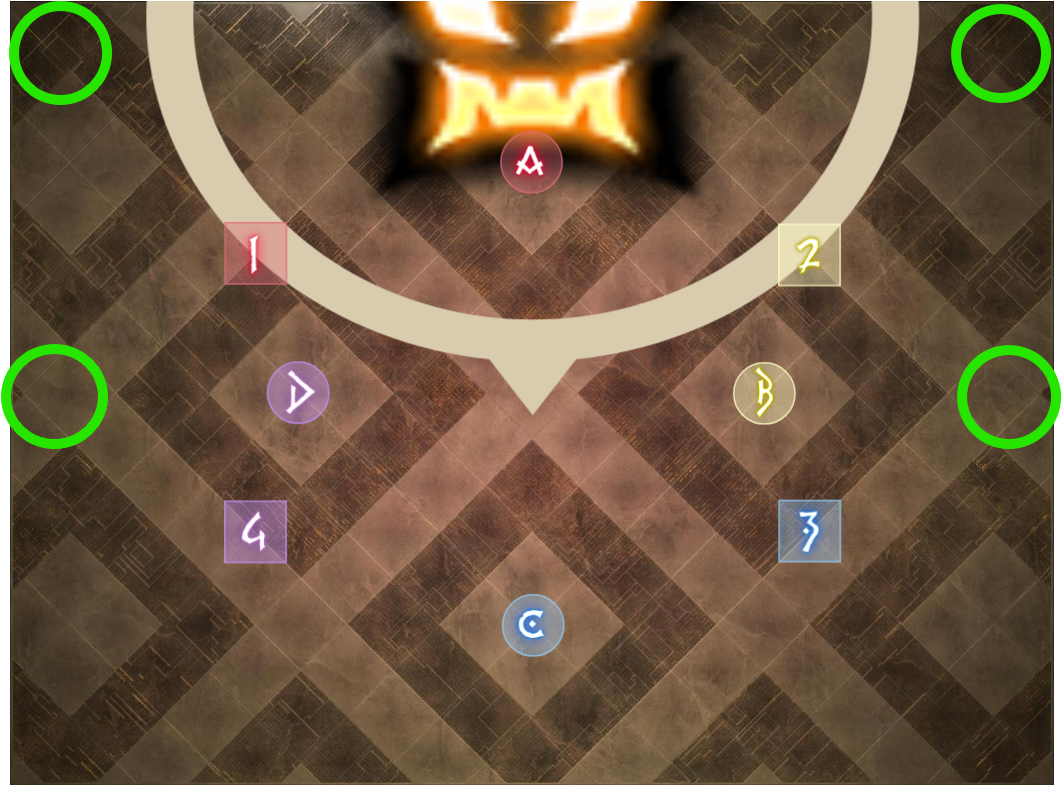 |
Overally, an easy first mechanic which is very likely hindered by some PvP action from your party members. Killing your party members by accident is very easy here and this is usually the first wall when it comes to getting a clean run in order to meet the strict DPS check in case of an undergeared party.
For some more references, you can use the below examples.
Example 1 | Example 2 | Example 3 |
|---|---|---|