M12S - Replication 1
Upon pulling the Lindwurm, the boss will do a few auto attacks before it casts Arcadia Aflame (370k damage), which is the generic raidwide of this phase. This raidwide is weaker than the phase 1 The Fixer (420k damage), but not by much, so it will still put your party down on the floor if your party members are neglecting in their mitigations.
After the raidwide, the boss will move to the center of the arena and cast Replication, signaling to your party that the first major mechanic is about to arrive.
Replication
The Lindwurm will create four clones of himself on each cardinal waymark. These clones will do one of the following:
- Two clones opposite of each other will shoot a cone north/south or west/east.
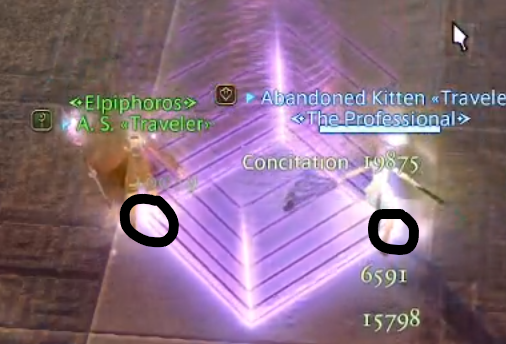
- One clone will shoot a dark ball, which is a spread AoE attack that inflicts dark vulnerability, to the two closest players.
- One clone that is opposite of the dark clone will jump on the closest player, the jump being a two-man stack that inflicts a fire vulnerability.
You will not know which clone does what at the start until the clones start attacking, so the first step in this process is baiting the attacks in a way that doesn't kill your party.
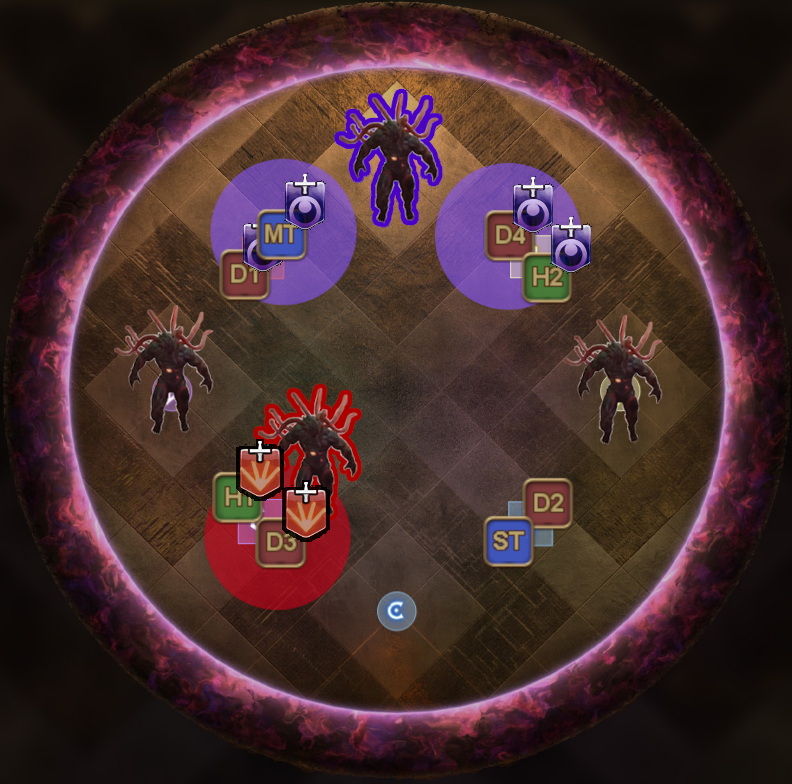
Bait setup
All clones are on the cardinal markers, so spread out in groups of two on each intercardinal markers. You want two members at each intercardinal waymarks to ensure that whoever soaks the fire clone will not die instantly from taking a 2-man stack alone.
 |  |
Once assigned to your intercardinal waymark, while looking at the boss, have the support take the left corner while the DPS takes the right corner. This setup prevents one group from accidentally baiting two dark balls, which will oneshot the group. Make sure to be evenly spread out, even if you're trying to greedily uptime the boss!
Identifying the dark and fire clones
With the assumption that everyone is standing on their waymarks, the cones will never hit you no matter whether it cleaves west/east or north/south. Now, one of the three things wlil happen to your pair:
- Your pair will get hit by a dark ball, giving you a dark vulnerability.
- Your pair gets slammed by the fire clone, giving you a fire vulnerability.
- Your pair does not get attacked by anything, pretend as if you have the fire vulnerability.
| Attacked by dark clone | Attacked by fire clone |
|---|---|
After the clones have attacked, be careful of the Snake Kick! The boss will face a random player and do a halfroom cleave in the direction its facing. You have time to identify which clone is which later, but prioritize on dodging the kick first before you do anything else.
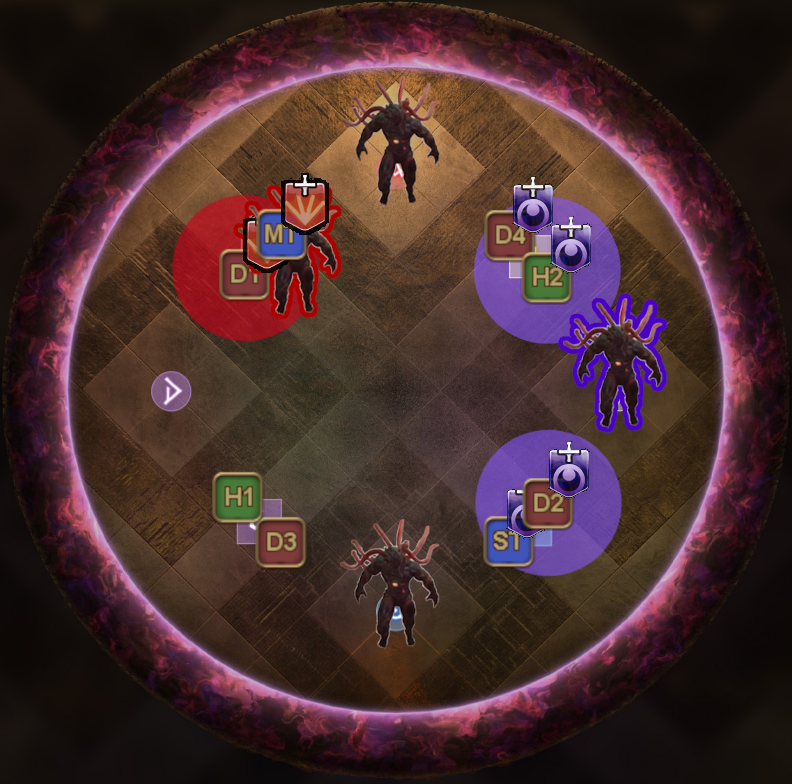
Now it is time to identify the dark and fire clones. The fire clone is very easy to identify, because that clone literally jumps on top of a player, leaving its cardinal spot. The dark clone on the other hand, is always opposite to that of the fire clone, meaning that if you have identified the fire clone, you will naturally also be able to find the dark clone.
Of course you can also identify the dark clone by looking at the clone right as it is shooting the dark balls or using process of elimination by looking at which two groups got shot by the dark ball, but looking for the fire clone is way easier and thus the recommended approach if you're still progging.
| Example 1 Clone at C jumped, dark clone is at A | Example 2 Clone at D jumped, dark clone is at B |
|---|---|
 |  |
They are multiplying!
All the clones will now split up into two exact copies of themselves, which means there are now 2 fire clones, 2 dark clones and four clones that shoot cones.
Hopefully you've been diligently keeping track of your clone. After they create a copy of themselves, the clones will split and preposition themselves in a predetermined pattern. The dark/fire clones will always dash first, which is then followed by the cone shooting clones which will dash second.
The clones are always positioned in an X-formation and the dark/fire clones always make up one of the lines in the X in an alternating formation. See below for the four possible positions of the clones.
 |  | 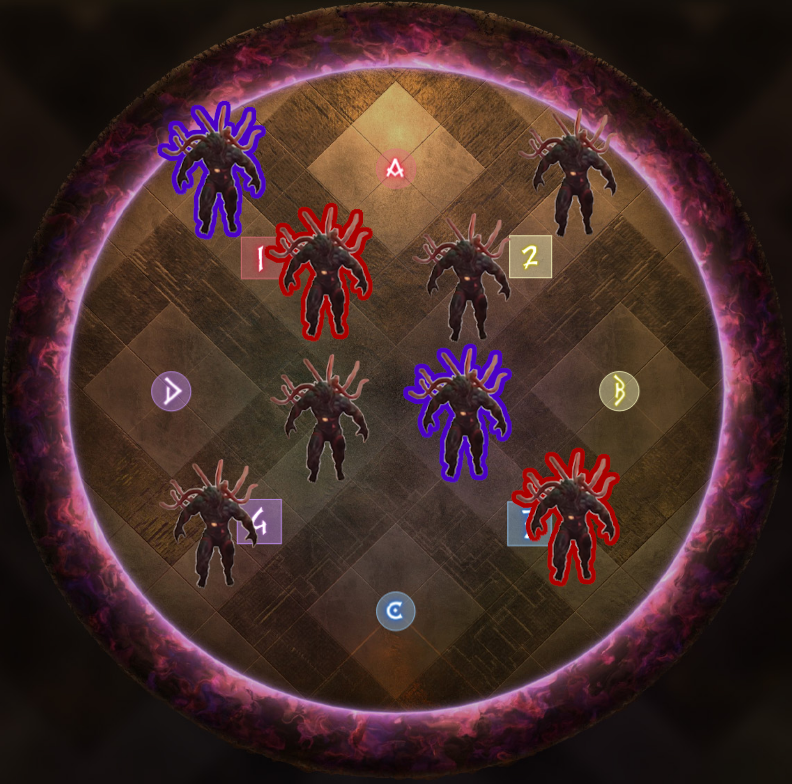 |  |
With this, your objective has now become clear: Each pair must soak the attack of a clone, one that they are not vulnerable to, to successfully resolve this mechanic. Now the question, how are we going to split up the priorities?
Garou static positions
The original strategy involves assigning melees for the inner clones for uptime, while the ranged are to take the outer clones. However, this strategy has the notable issue in which people still have to remember whether the clones cleaved north/south or east/west. That is a thing of the past however, because Garou came up with a static positions strategy where you can completely disregard the cone cleaves, further simplifying this mechanic.
| Outer dark clone is north | Outer fire clone is north |
|---|---|
 |  |
Track either the dark or the fire clone, whichever you prefer, then identify which one went to the outer edge of the arena. That clone now becomes the new north, which you can use as a reference to determine your static positions. The new north is always at an intercardinal spot, so keep in mind that you might have to rotate your camera by 45 degrees to adjust to this while tracking the clone.
Check your debuff, and then go to your position. If you're ranged, then you should always be standing on a letter waymark. As melee, use the lines on the floor to determine your position accurately. Once in position, the mechanic should resolve on its own without causing any casualties.
| Melee PoV | |
|---|---|
| Dark vulnerability | Fire vulnerability |
| Ranged PoV | |
| Dark vulnerability | Fire vulnerability |
If you happen to be standing inside a cone as ranged, then you have a split second to adjust before you will inevitably get hit. If there happen to be casualties, then double check where the people died, and double check the positions of the people who didn't get attacked by anything to see where it went wrong. Overally, the mechanic is fast paced but it shouldn't be an issue with some practice.
Double Sobat
Immediately once the clones resolve, the Lindwurm will do a combo attack that starts with a Double Sobat on the player with the highest aggro. Double Sobat is a 2-man half room cleave tankbuster that will make the boss face in the direction of where the tank is.
As the tank, face the boss either north or in the direction where the boss is already looking at, with the latter being more common in order to avoid confusion. After the initial kick, the boss will randomly spin either 90, 180, 270 degrees, or not spin at all, to do an untelegraphed Snake Kick, before finishing it off with an Esoteric Finisher.
Esoteric Finisher is an untelegraphed defamation tankbuster that targets the two players with the highest aggro, which is hopefully the two tanks. The tanks will have to run out in the direction where the boss kicked, with MT going left while ST goes right. If one of the tanks forgot to manage their aggro here, then this is where you will likely wipe.By far the most common way of handling these tankbusters is to have one of the tanks use their invuln to soak the 2-man tankbuster. The invuln can cover both the Double Sobat and Esoteric Finisher, leaving you 2-3 seconds leeway to time your invuln.
As mentioned in the intro, any non-PLD can invuln the first and last Double Sobat, but make sure to communicate this with your cotank if there are any uncertainties.