M11S - Majestic Meteor
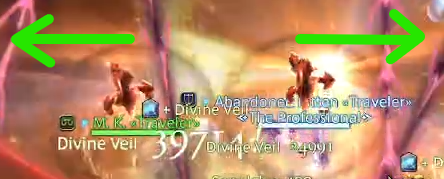
For this mechanic, the Tyrant will split the arena in half by using Flatliner, which is a physical raidwide that also knocks up everyone into the air. Have the MT group go west, while the ST group go east. You will take damage no matter what, so stay inside the AoE area to ensure that you don't get thrown off the arena.
This is by far the most infamous mechanic of this fight, because while this mechanic should be easy due to the existence of ZiZieZip braindead markers, the mechanic being a bodycheck-by-design means that a wipe is usually inevitable if even one player in the party makes a mistake. Hopefully, you are not that person.
Majestic Meteor
This mechanic is split into two phases: Towers and Fire Breath.
During the tower phase, two towers will spawn on each island which needs to be soaked by two players each. Similar to normal mode, these towers will knock up the player when soaked, giving the players the opportunity to switch islands if necessary. At the same time during this phase, two player on each island will be targeted by a tether from the portal, which needs to be stretched.
In the Fire Breath phase, which occurs shortly after each player has landed after soaking the tower, the boss will target four players that are closest to the boss with a prey marker. Once the boss finishes casting, the boss will shoot a fireball in a line towards the marked players, while the portals will shoot a fireball at their tethered players.
To further throw the players off, the boss will drop three AoE puddles on each players which needs to be baited, and each island will also have a portal that shoots a fireball down the column, limiting the space available for the players to do their mechanics.
First set of towers
The player positions for the first set of towers is fixed, so immediately go to your assigned tower and get ready for the knock up.
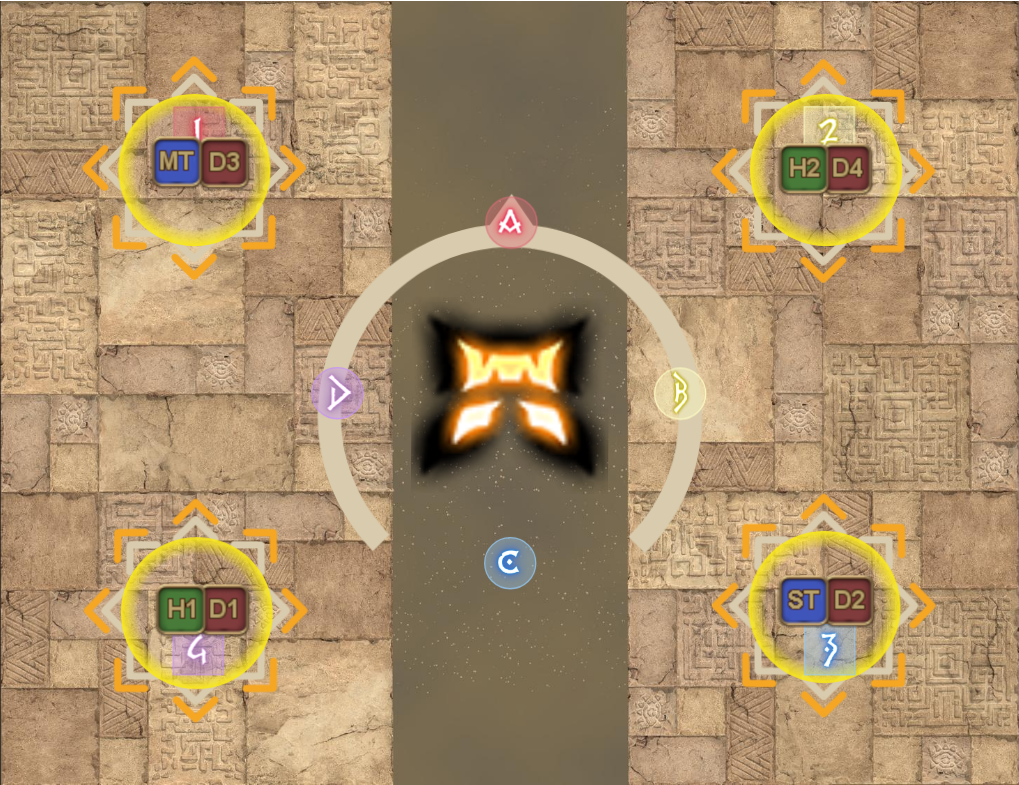
As the general rule, you only switch islands if you are tethered by a portal that is on the same island as you are, because you otherwise would not have enough space to stretch your tether. If the portal you're tethered to is at the opposite island, or if you have no tether, then you will stay on the same island.
| Going to the other island | Staying on the same island |
|---|---|
Firebreath
Once the towers are resolved, the players with no tether should immediately run inside the boss's hitbox to bait the prey marker. The player with tether should stay around the outer ring of the boss, so that they don't accidentally bait the prey marker while also being close enough that they can receive heals from everyone.
Once the prey markers has appeared on the untethered players, your light party must now split up left and right of the boss, with each pair containing one tethered player and one non-tethered player with a prey marker. The priority for the tethered players are self explanatory, because they have to stretch their tethers diagonally no matter what. The non-tethered players, however, must use body language instead to determine who goes left and who goes right.
Nukemaru has a priority system, which is MTSTD1D2D3D4H1H2, but you can disregard that as its usually not respected, even in JP. Go with the assumption that people are going to eyeball this mechanic instead.
Start as close to the center as of the boss as possible, and slowly make your way to your safespots. All your three AoE puddles must be dropped at the edges, so count to three if necessary and only move in to your safespot after the 3rd puddle has been dropped.
As a reminder, the waymark inner safe spots are for the non-tethers, while the edges of the arena are for the tethered players. In the diagrams below, the safespots are marked with red and green circles respectively.
| Pattern 1 | Pattern 2 |
|---|---|
 | 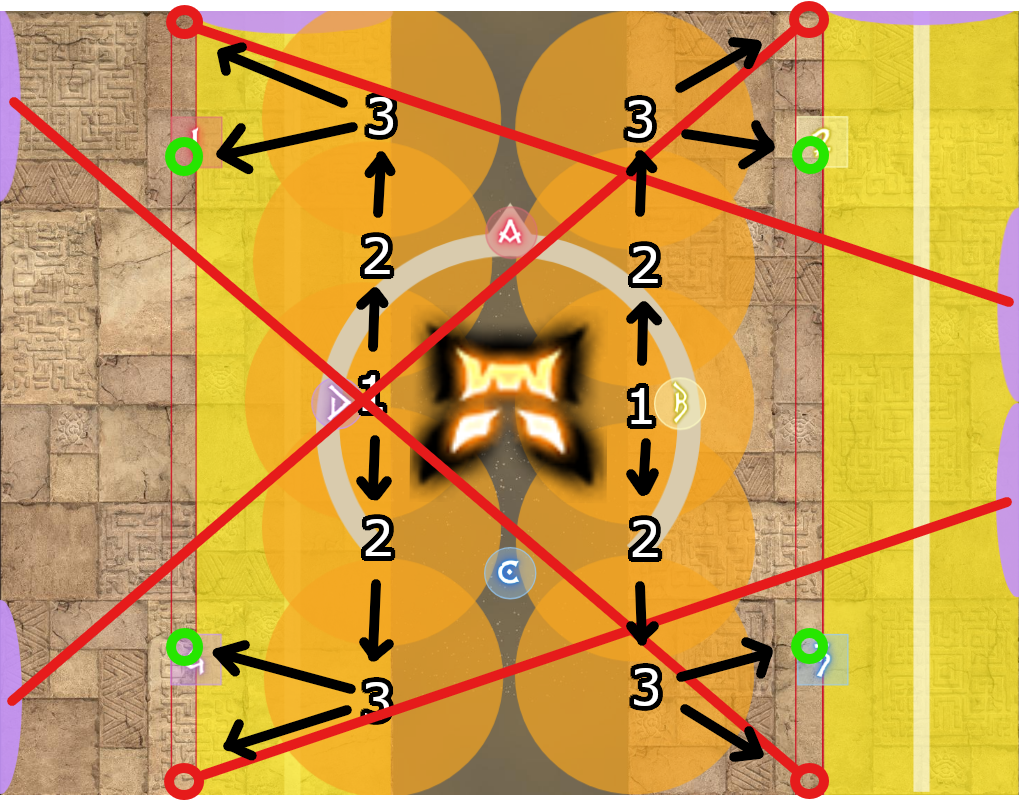 |
After resolving the first set of Fire Breath, the boss will repeat the whole mechanic again. Your party is already split up into pairs this time, however, so you can use the same pairs to resolve the towers. The Fire Breath that comes after can be resolved the same way as how you did it the first time.
To reiterate, this mechanic should not be hard by any means due to the existence of the braindead markers, which literally tells players where they should be standing to not murder their party or themselves. But if even one person makes a mistake here, then this mechanic will easily cause a wipe.
Massive Meteor and Arcadion Avalanche
After surviving the 2nd set of Fire Breath, the boss will use Massive Meteor to target one random player on each island with a multi-hit stack marker, which hits up to 5 times. If someone has died and the resurrection was late, then consider using your tank LB here, because the attack is that many times more lethal if you try to soak this with 3-man.
The knock up towers appear once again, so hopefully you still remember from which side you came from. Pay attention to which way the boss is looking, because just like normal mode, he will grab the island in front of him and throw it at the players. So if you see the boss looking at your island, then make sure to get to the other island.
After dealing with the stack and towers, the boss will lift up the island that hes facing, with the intention of throwing it at the players. Look immediately how the boss grips the island and which direction he is swinging the huge chunk of rocks at. That will tell you immediately whether to dodge left or dodge right. You can use sprint here if you're not confident in your speed.
| Left safe | Right safe |
|---|---|
Great Wall of Fire and Orbital Omen
After dodging his overly over the top attack of throwing an arena at your party, the Tyrant will finish this phase with Crown of Arcadia, repairing the arena back to how it was before in the process. This is then followed up by the Great Wall of Fire tankbuster and the Orbital Omen mechanic.
This Great Wall of Fire is always shared, so hopefully the tanks remembered whether they are rotating clockwise or counterclockwise together. As for Orbital Omen, it is a copy paste of the first one, so deal with it the same way. After having dealt with both mechanics, the Tyrant will wrap this up with another Crown of Arcadia.
| Great Wall of Fire | Orbital Omen |
|---|---|