M8S - Lone Wolf's Lament
Once the Twinbite are resolved, that is your cue to immediately get into position for the next mechanic. Soon, short tether and long tethers will appear, which either forces the two connected players to be far apart from each or to stick together. At the same time, a tower, each requiring a different amount of people, will spawn on each island which needs to be soaked by the party, without accidentally breaking the tethers.
Alice's Lone Wolf
This mechanic would be more difficult if it wasn't for the fact that everyone realized that three of the tower positions are completely static in how many people are required to soak them. The week 1 players quickly figured out the two possible patterns and developed a rather braindead strategy that allows you to breeze through this mechanic with ease. In the JP raiding scene, this is dubbed the Alice's Lone Wolf.
When Twinbite is resolved, you can preposition yourself as follows:
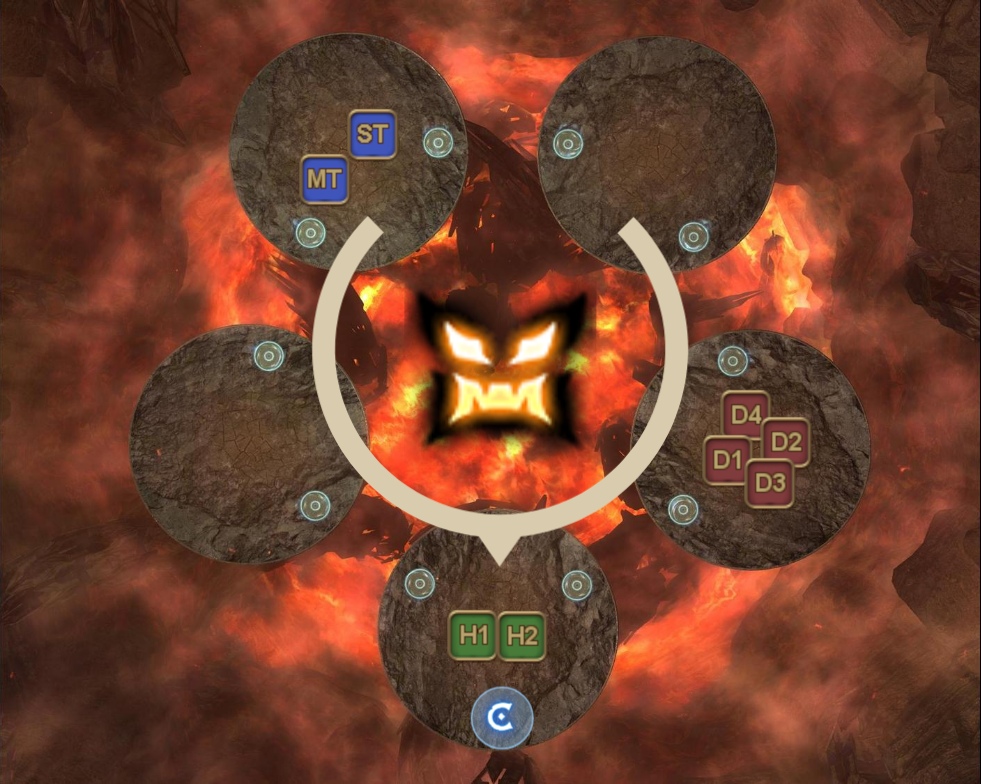
You have plenty of time to preposition, but don't loiter around too long. The boss will cast Rise of the Hunter's Blade soon, which will turn the teleporters red again, so that is your time limit. Once in position, you can simply wait until the boss casts Lone Wolf's Lament, which will make the tethers appear.
Now, each support will be tethered to a DPS player and the tether can either be close (green) or far (blue). Depending on your role and the tether you've received, you will either have to teleport to a different island or do nothing.
| Your role | Type | Tethered to | Action | Setup |
|---|---|---|---|---|
 |  |  | Go southwest |  |
|  | | Go northeast | |
 | | | Do nothing | |
| | | Do nothing | |
| | | Go northeast | |
| | | Go northeast | |
| | | Go south |
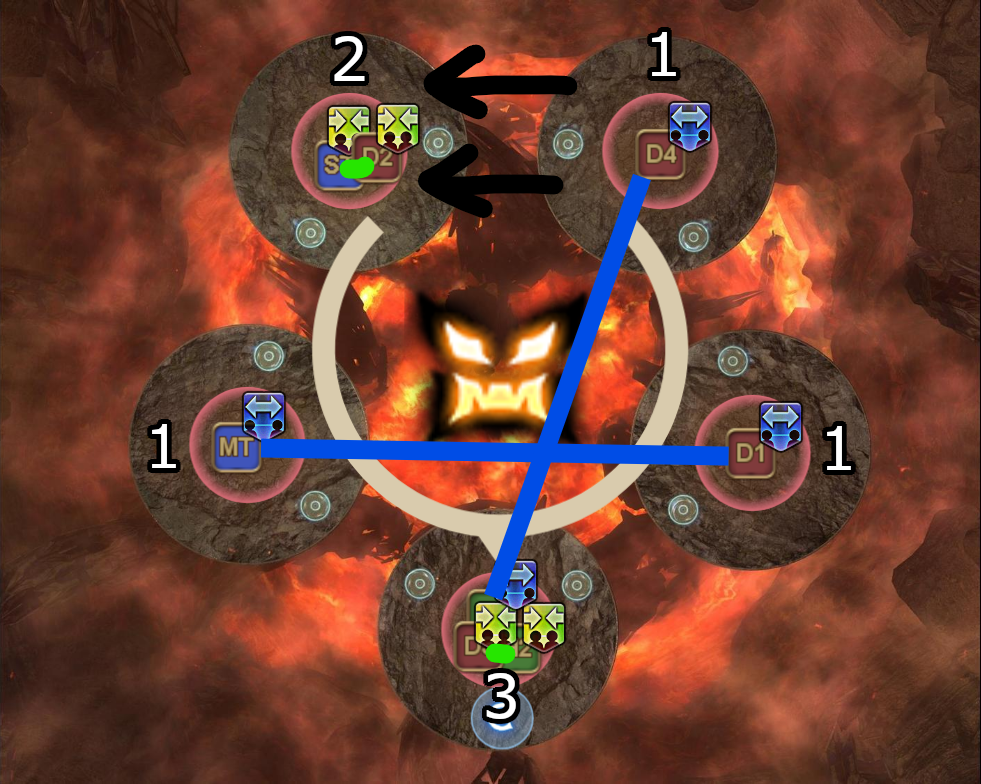
Identify your tether and head over to the correct platform. The towers will soon spawn, and as mentioned before, only the northwest and northeast islands are randomly 1 or 2 while all the other islands are completely static. If the northwest island is 1, then the DPS with blue tether should move over. If its two instead, then the tank/dps green tether pair should move over instead to soak the tower.
| Pattern 1 | Pattern 2 |
|---|---|
 |  |
Hero's Blow & Ultraviolent Ray
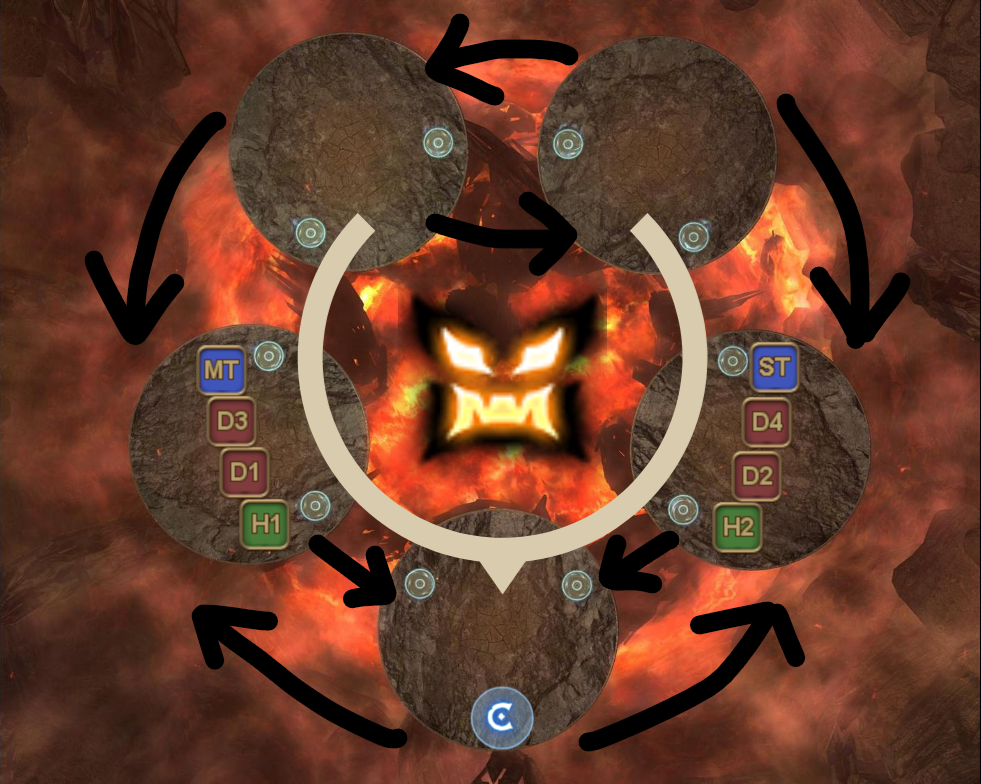
Now, the reason why your party might wipe will most likely not be because of Lone Wolf's Lament. The reason might actually be Hero's Blow and the Ultraviolent Ray that immediately comes after. In the first Hero's Blow, you could force the boss to look at south, but you cannot do that here, because everyone is spread out due to having to soak towers.
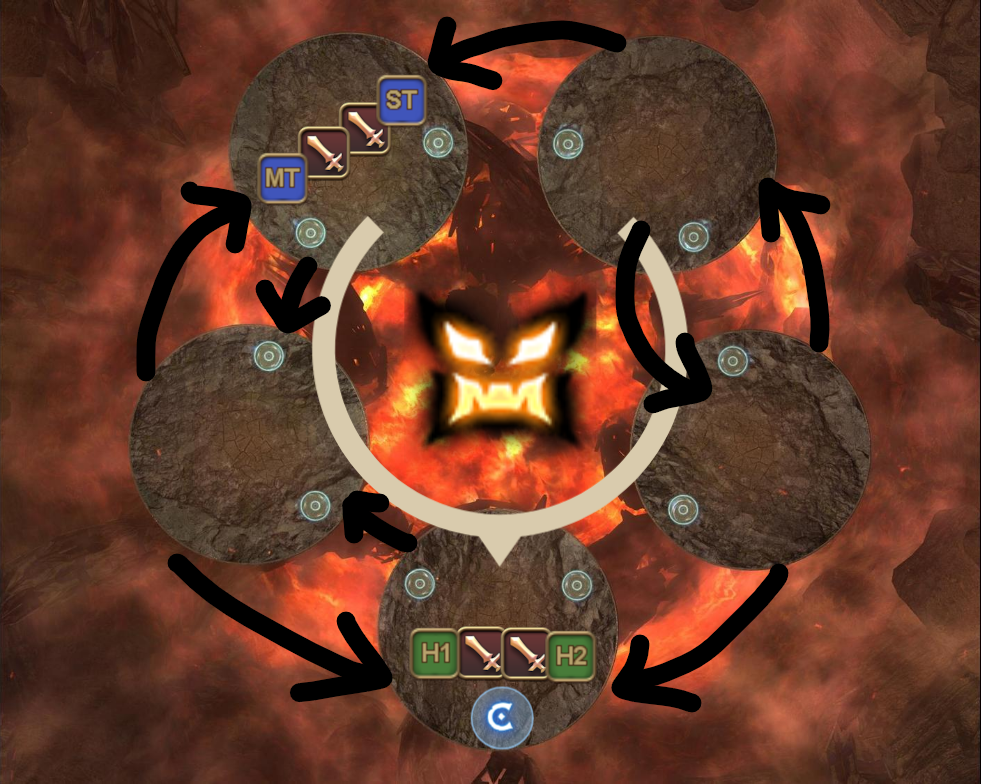
Your reflexes will be tested here. Pop sprint immediately as you soak your tower and immediately look at where the boss is facing. Once you've confirmed that, quickly identify whether he is cleaving left or right side. If he is not cleaving your side, simply dodge the chariot/donut while you remain on your island. However, if he is cleaving your island, then you have one chance to teleport to the correct island in order to dodge the cleave and the chariot/donut.
If you thought that was bad, then wait until the boss now follows this up with Ultraviolent Ray. Unlike all the other Ultraviolent Ray, you have no time to do your light party lineup here because of how disorganized your party is after the Hero's Blow dodge. Game8 will tell you to try and go back to your quake island, while Rinon UV4 recommends you treating southwest as the new south instead. Pick your poison.
| Game8 | Rinon |
|---|---|
 |  |
No matter which strategy your PF uses, go with the assumption that you will fail to reach your desired platform for the lineup. Ignore the suggested lineup provided by either game8 or Rinon, and use the lineup based on how the players are already positioned.
The important takeaway from either of the strategies, is that you do not want any platform to contain 3 or more of the same role, because you want to avoid a situation where one platform has to sort out four players that has a blue beacon. For that reason, its even better to go opposite direction or not move at all if you see that there are too many people on one island.
Use your eyes, and adjust on the fly if you have to. Combine that with common sense, so you dont actually go to a platform that is already occupied by another player. Or if you see three beacons on one island next to you, then teleport towards the opposite direction to free up space for others. The strategy doesn't matter as long as you do whatever it takes to not wipe your party.
| Example 1 | Example 2 | Example 3 |
|---|---|---|