M8S - Beckon Moonlight
We're at the final major mechanic of phase 1, which is Beckon Moonlight. Similarly to the normal mode, the boss will create a clone at each cardinal of the arena, which will do a halfroom cleave in the order that they appear. The mechanic by itself is already fast to begin with, but the problem in this version is that Howling Blade will also combine this attack with Terrestrial Rage, which is the stack/spread from the previous mechanic.
Although simple in design, this mechanic is genuinely hard and possibly even harder if you're doing the game8 strategy, so do not underestimate this mechanic. Whether you can prog P2 or even clear this fight is heavily dependent on how consistent you are in this mechanic as a whole.
This mechanic has two strategies: The EN PFs will prefer one quadrant, while game8 will use the full half room.
- One Quad
- Game8
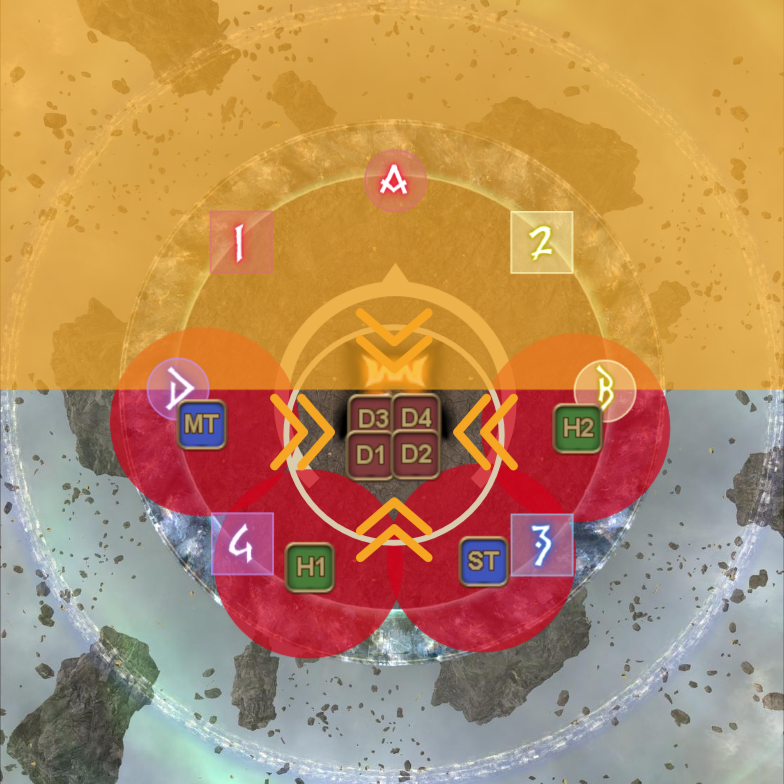
Beckon Moonlight - One Quad
As the name of the strategy suggests, this approach only uses one quadrant to resolve all the stacks and spreads. Pair the 1st and 2nd clone, and the 3rd and 4th clones together, and identify how they will cleave the rooms. Each of the pair cleaves will always leave behind one quadrant which your party can utilize for the stack/spread.
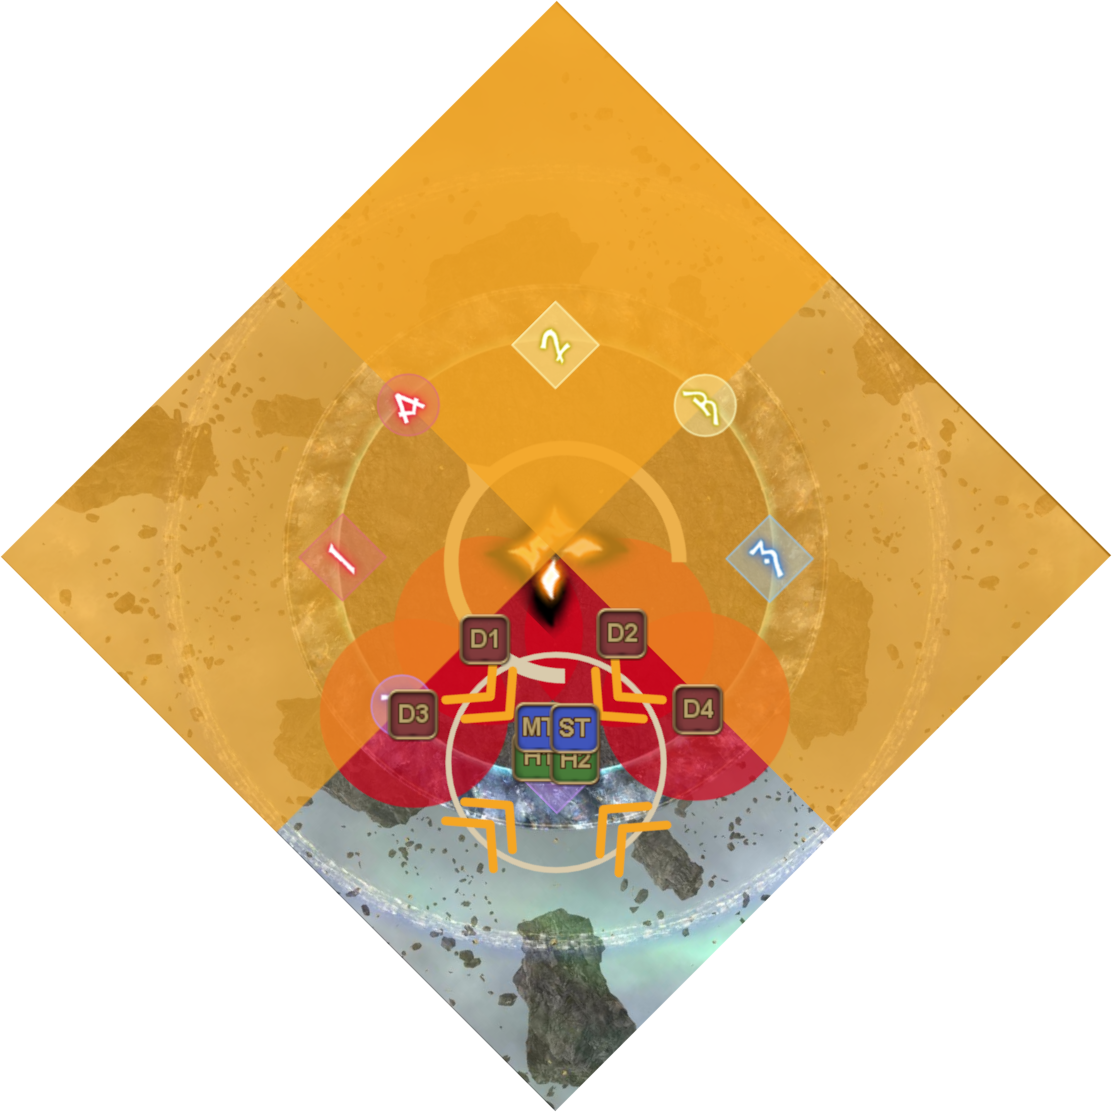 |  |
The available space is limited, but once you know what to look for as reference, then the fact that the party is so tightly squished together wouldn't even matter. The melee players can use the ring of the boss's hitbox as reference, while the ranged players can draw lines by using the cardinal waymarks as reference.
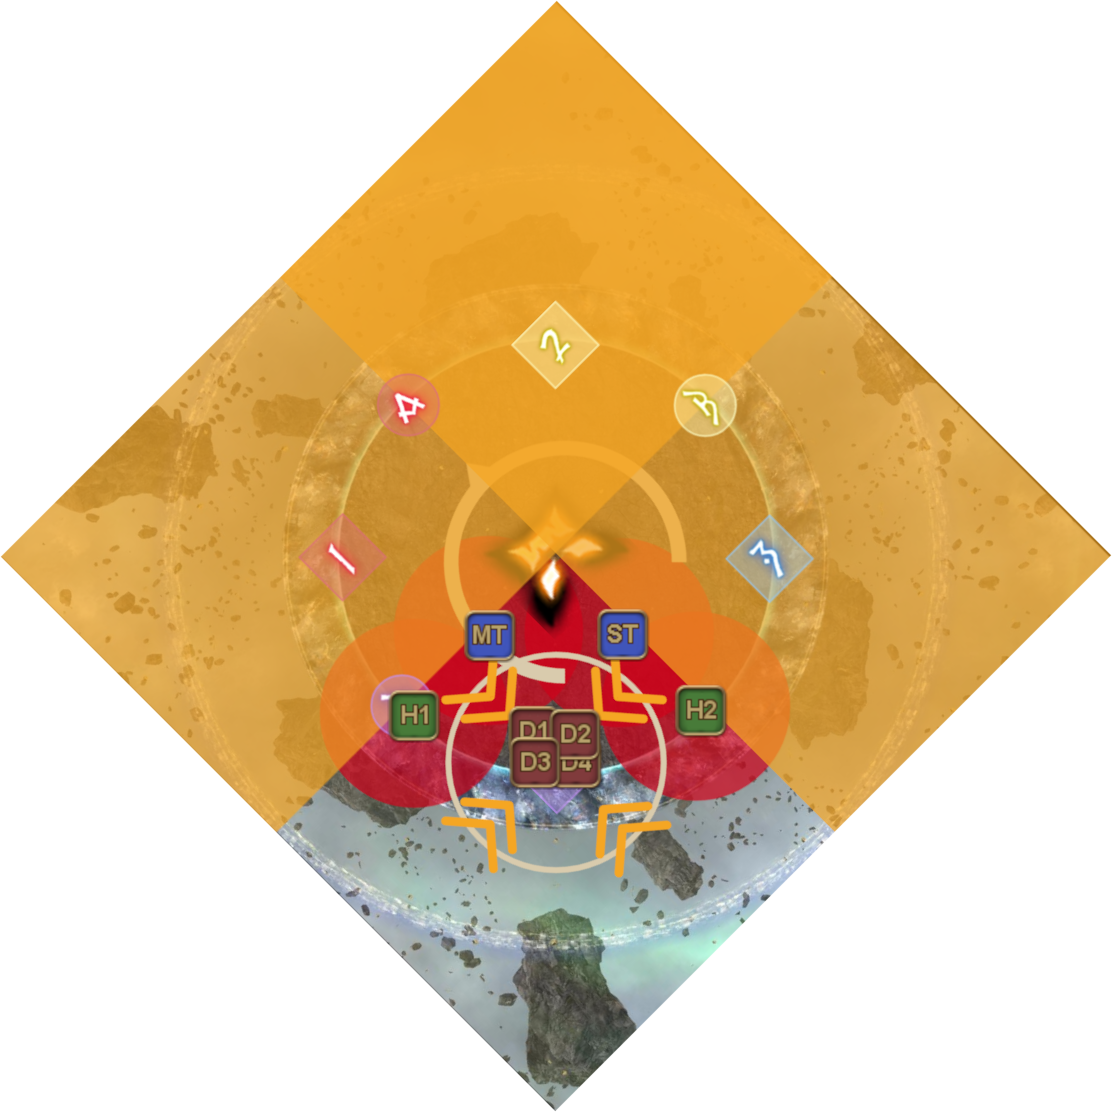
Once the first set of stack/spread is resolved, wait until the 2nd clone has dashed before you go to the 2nd quadrant. If you're lucky, then both safe quadrant might be one and the same, which means you can just stay where you are without having to move much at all.
| Example 1 Spread > Stack  | Example 2 Stack > Spread  |
|---|---|
Beckon Moonlight - game8
Game8 does not use one quadrant, but instead has the party utilize the whole half room instead. This is possible because the stack/spread are resolved at the same time as the 1st and 4th clone cleaves. This strategy can be tricky as you can get overloaded with too much information in a short time span, with information that might not even help you in solving this mechanic.
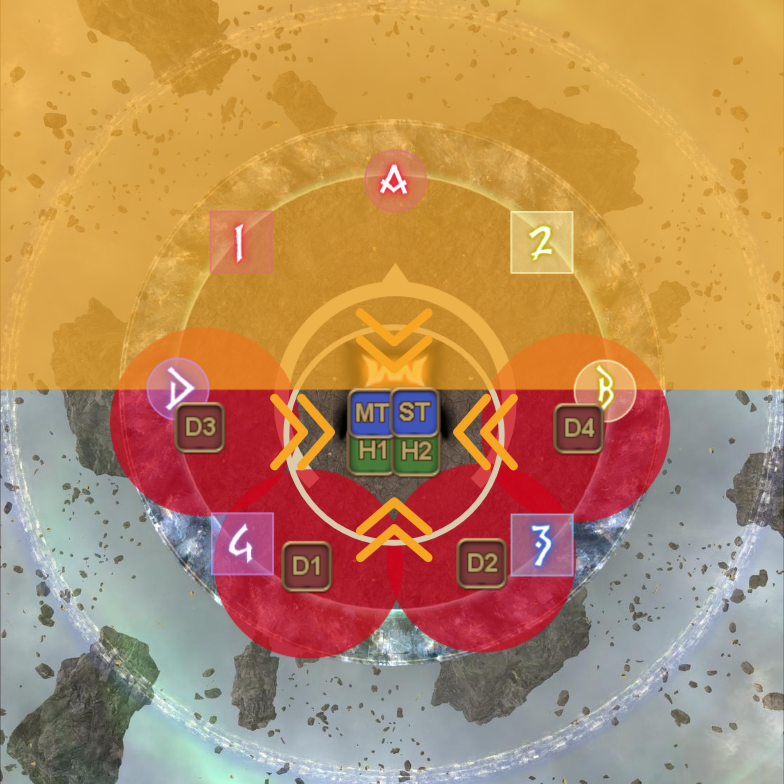 |  |
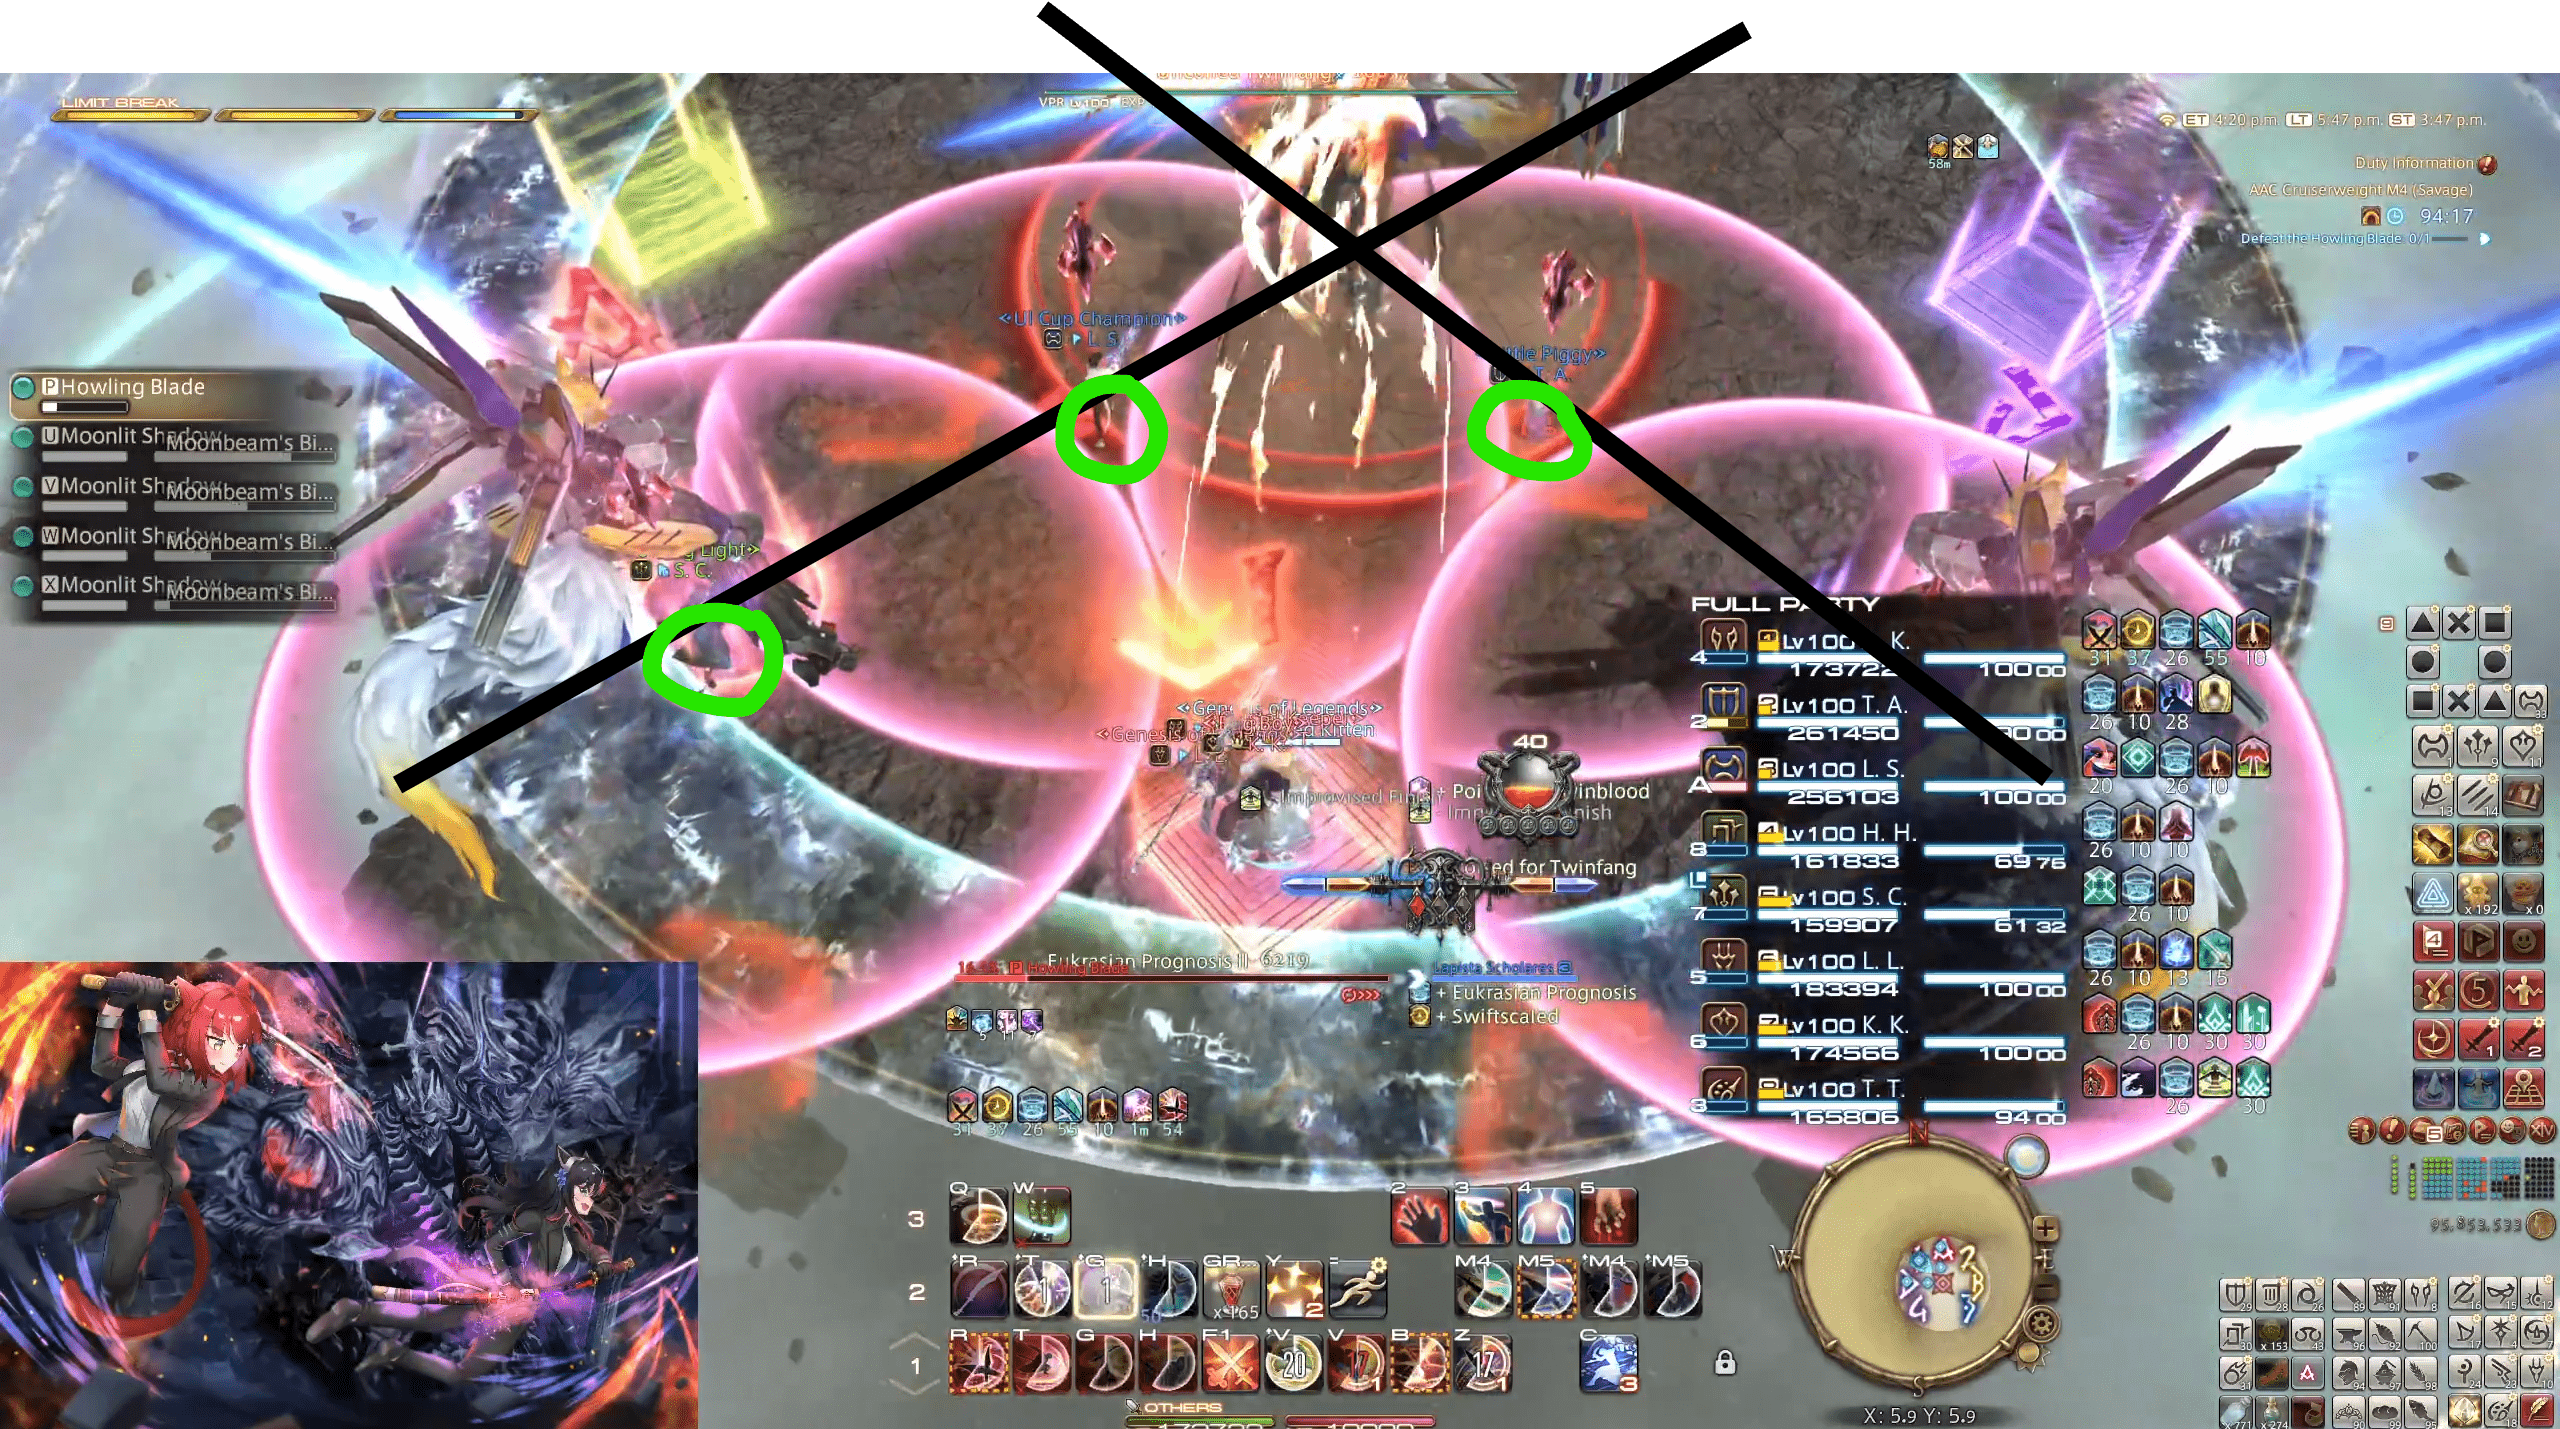
Below is a breakdown from the PoV of a D3 player, which should give you some insight as to how you can effectively approach this using game8 strat.
| Identify the first clone and immediately preposition yourself with the assumption that you're going to get spread. If you do end up getting spread, then you're already at the right place. If not, then its simply a matter of walking to the center so you can be together with the stack. The importance of this preposition is that you can now calmly analyze the other clones without having to worry whether you're at the wrong spot or not for the first cleave. | 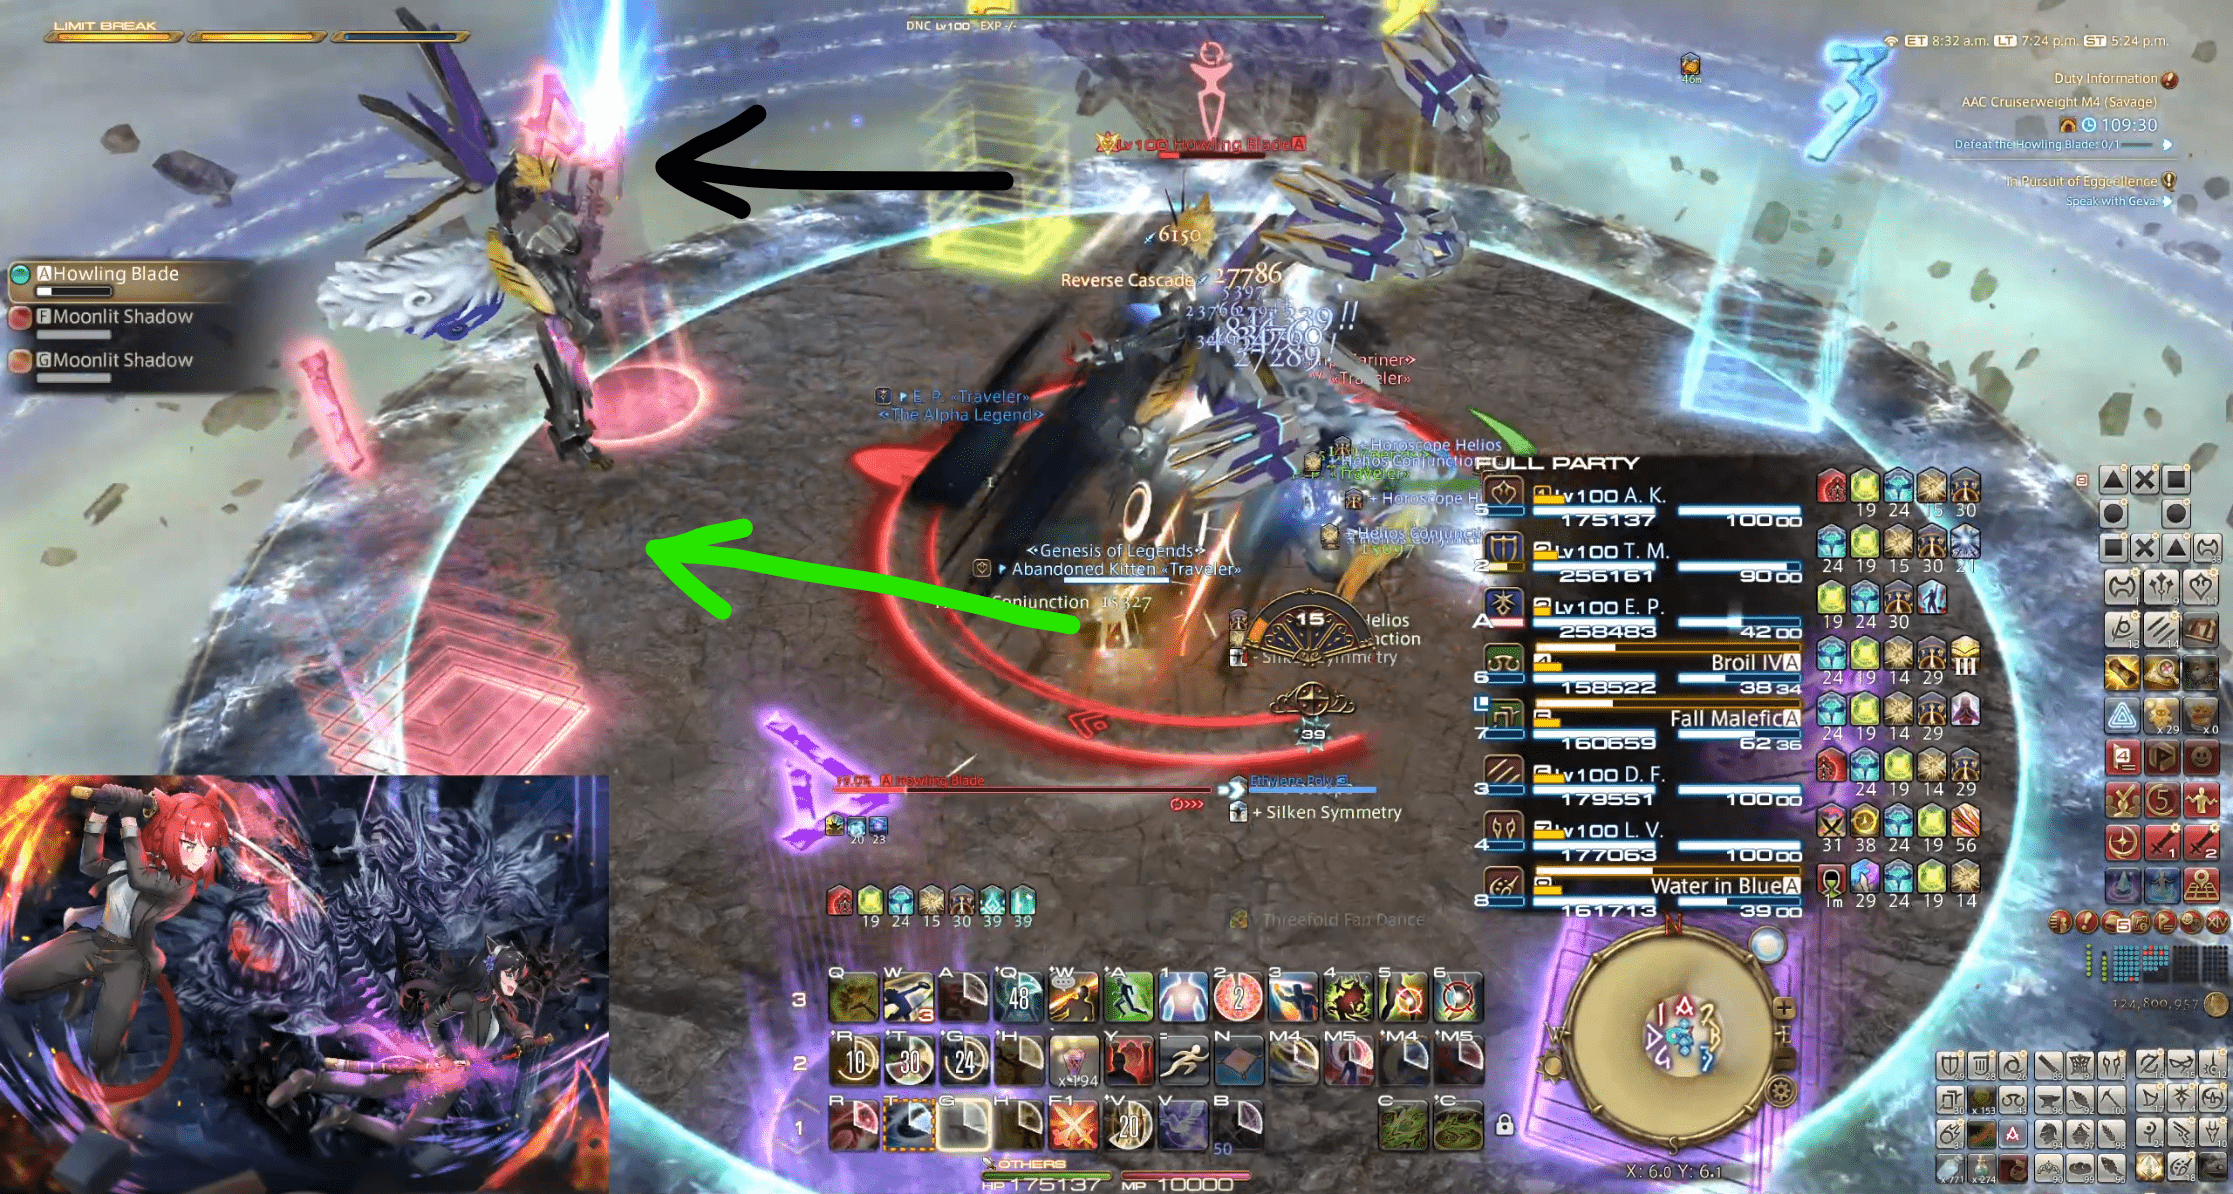 |
| Once you've prepositioned, you can now take the time to analyze the 2nd clone and identify whether the clones are going clockwise or counterclockwise. Your goal in this step is to identify whether you have to do an early dodge or not. In case of an early dodge, you will have to dodge to the other half as soon as possible once the spread resolves. In this example, the clone is cleaving the other side, so your quadrant is essentially safe. Regardless of whether your quadrant is safe or not though, using sprint here is recommended. | 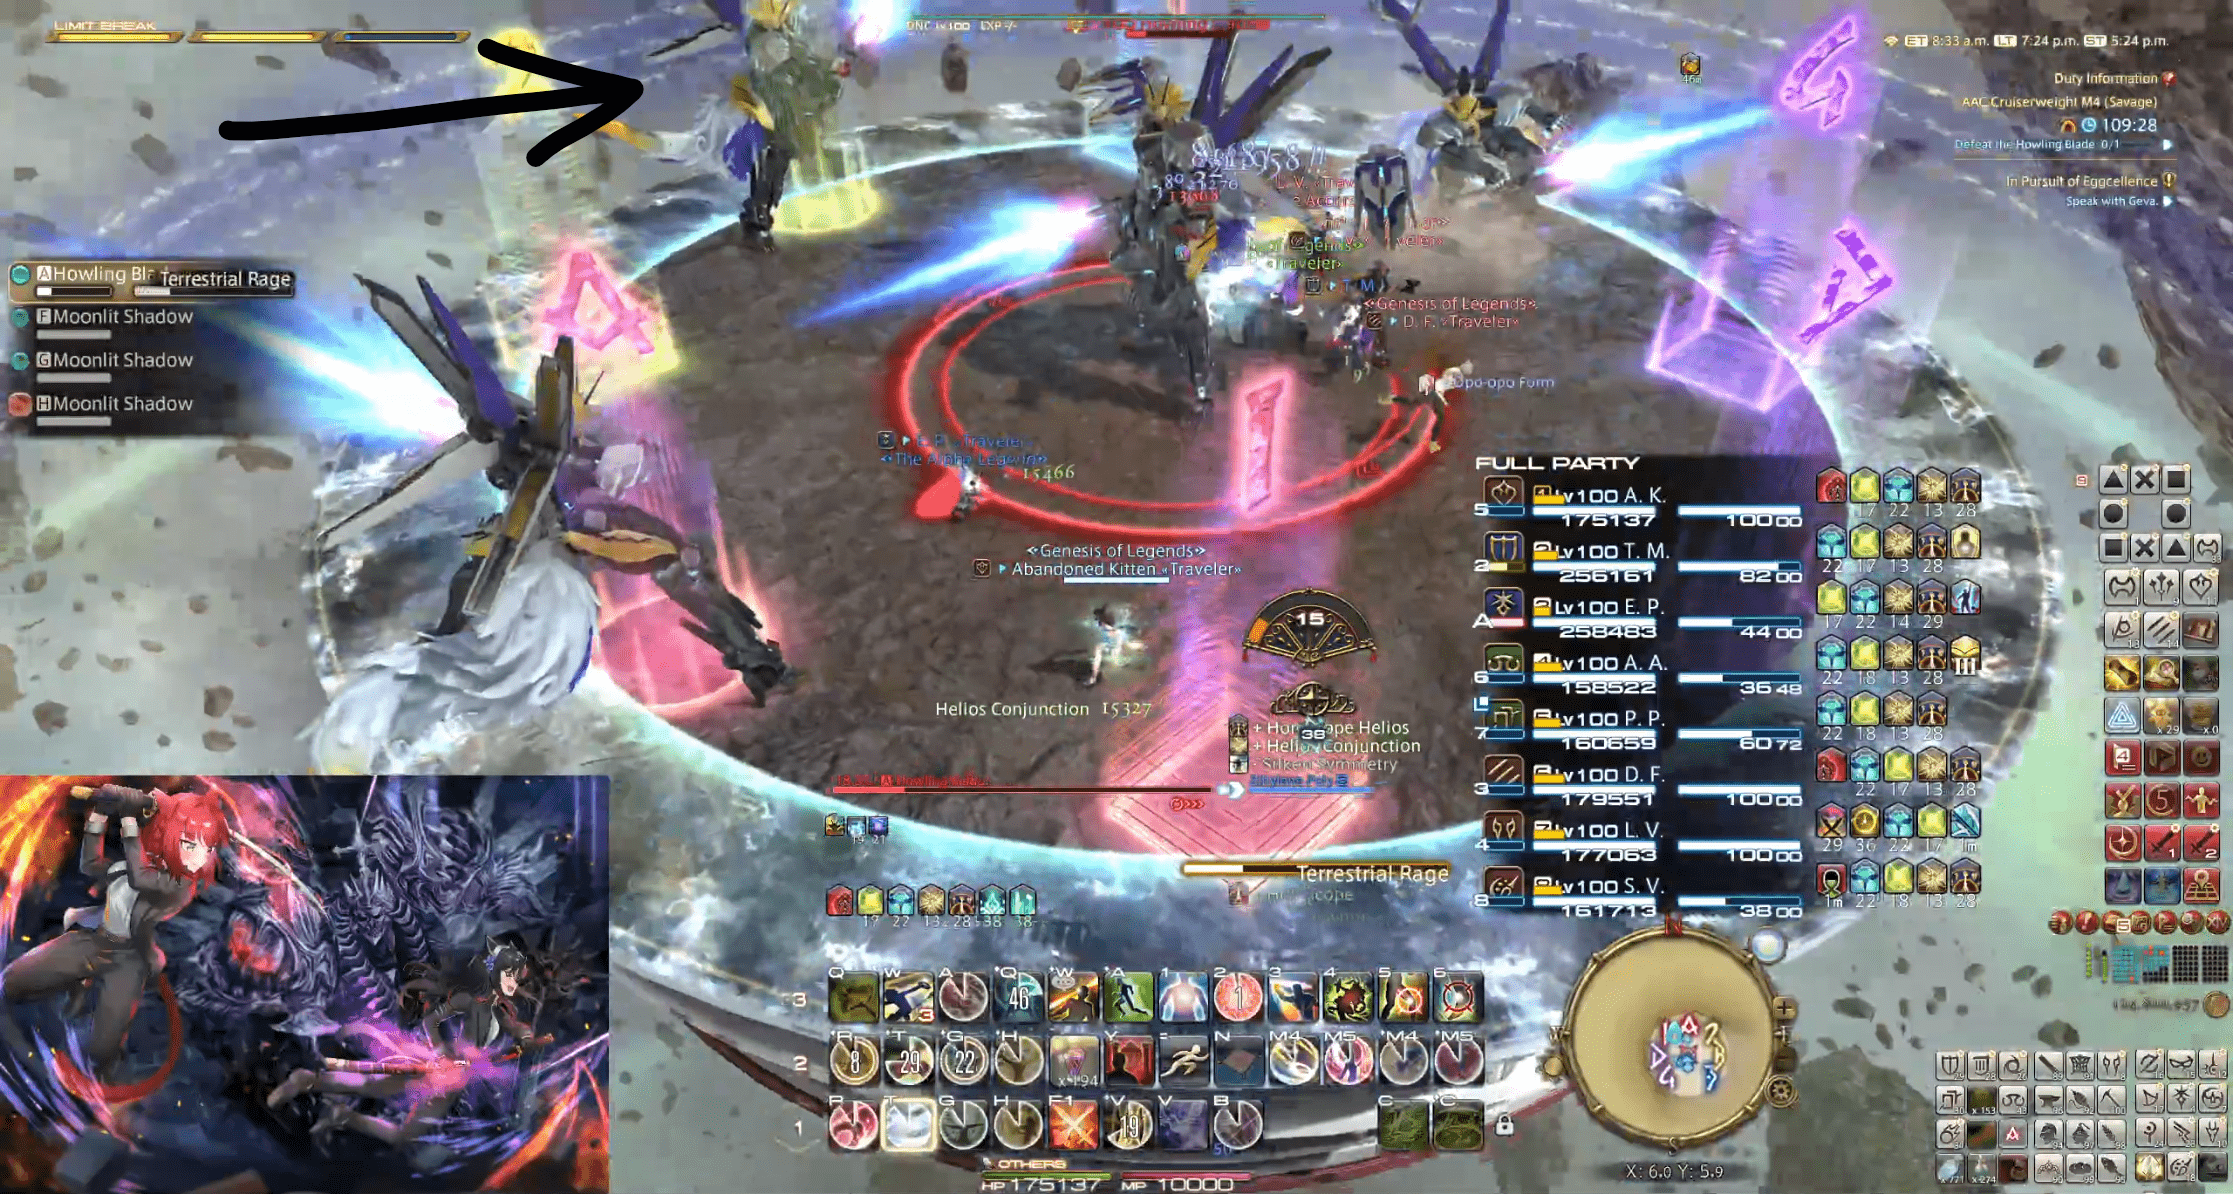 |
| The spread/stack markers should appear at this point, so stay at your spread position or to the middle if you have stack. While doing so, use this moment to identify the 3rd clone, which is either in front or behind you from a D3 PoV. Your goal in this step is to identify whether you have to switch to the other side of the arena or not, after the 2nd clone has dashed. In this example, the third clone is not cleaving your side, which means you can stay where you are. | 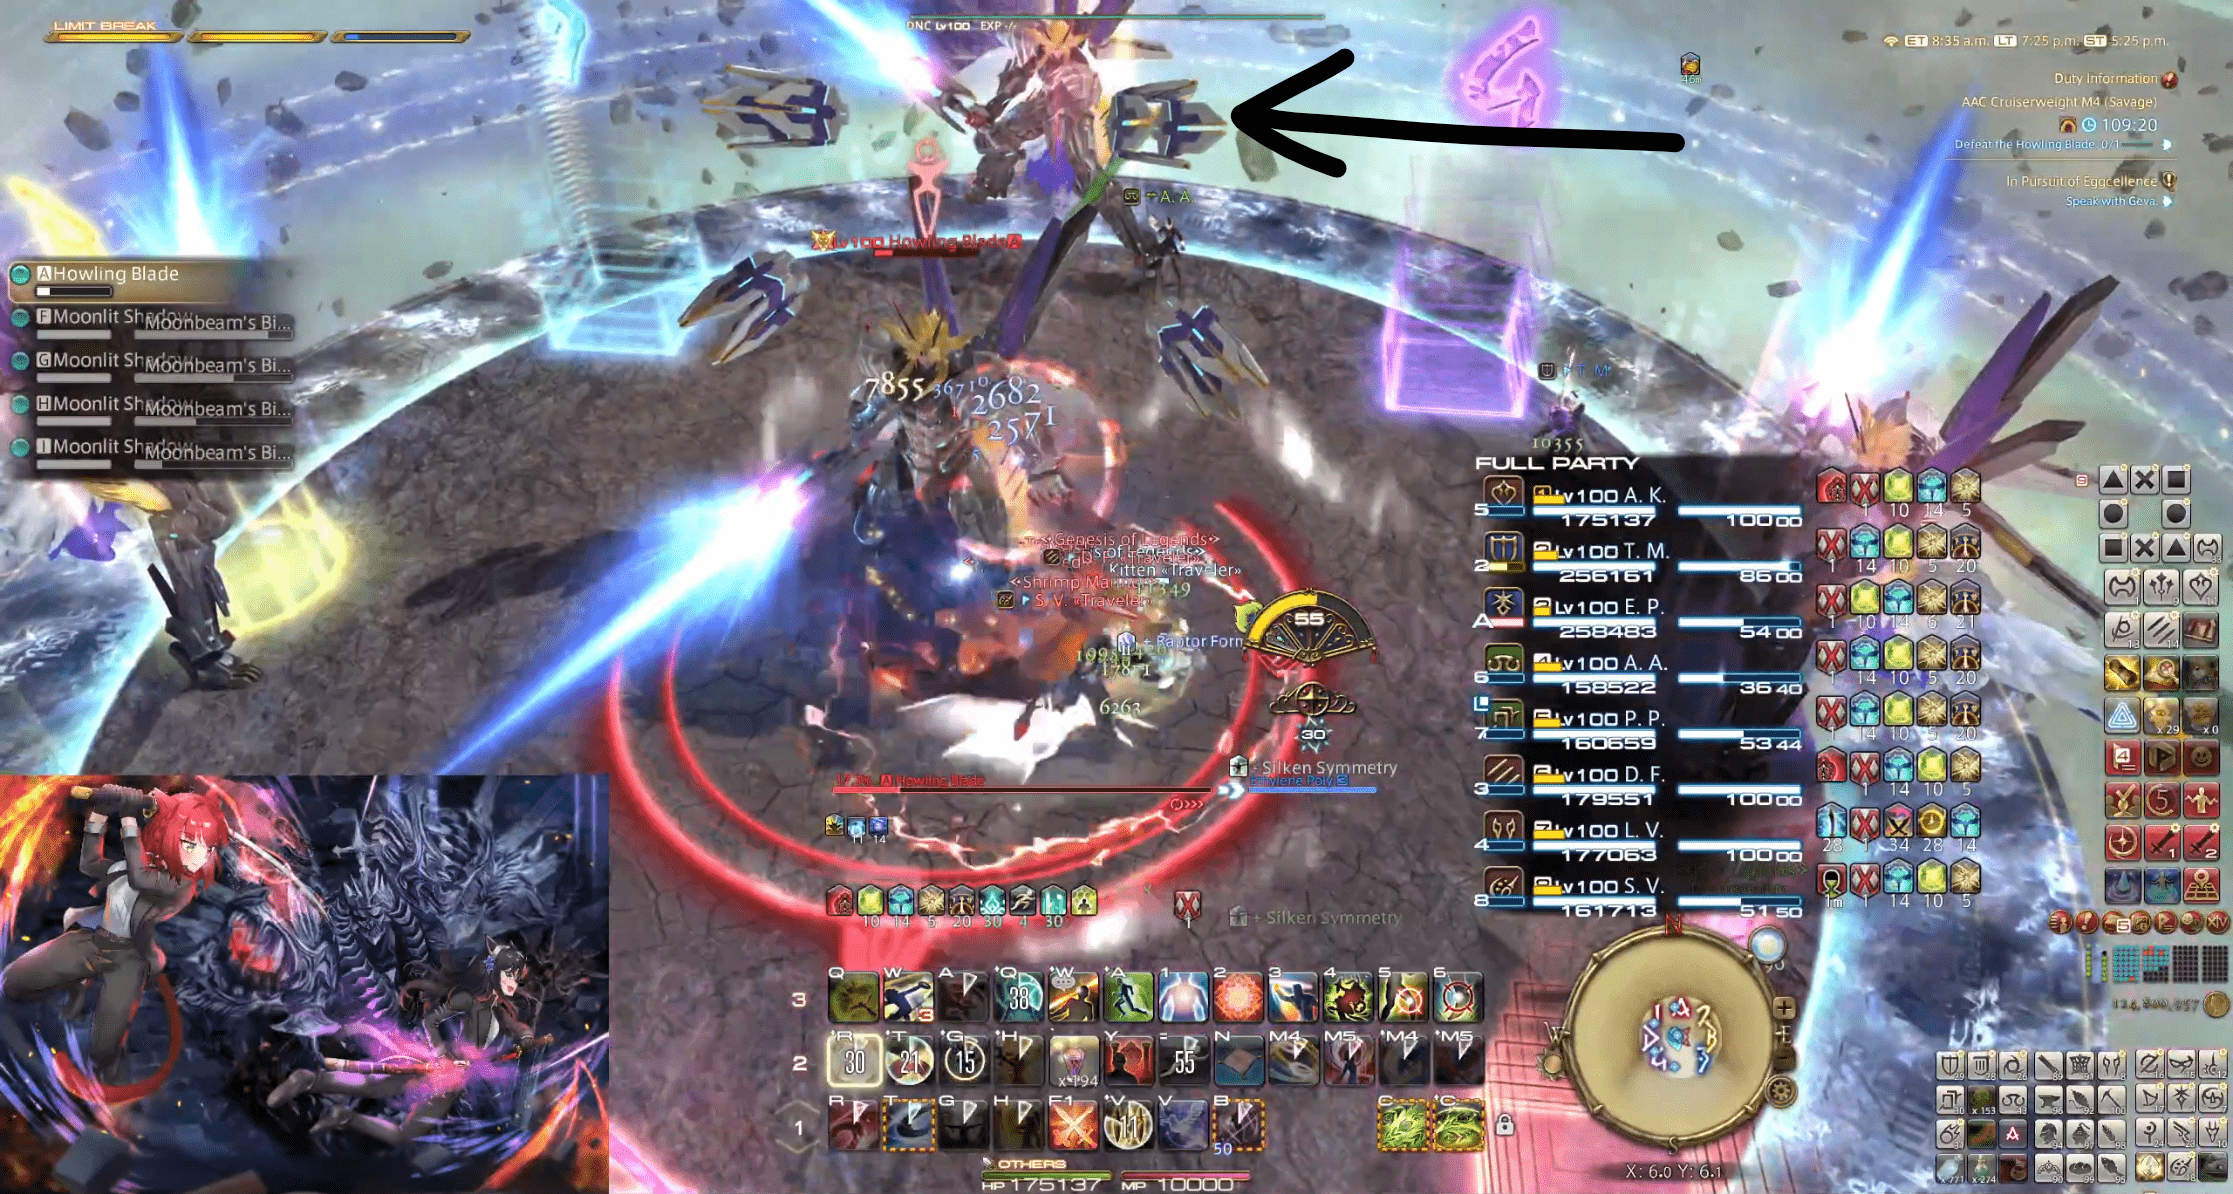 |
| For the final step, you have the time until the 3rd clone dashes to identify which side the last clone is cleaving. This last halfroom cleave will determine how the 2nd set of stack/spread is resolved. As luck would have it, the last clone is not cleaving your side, but this means you have to do a late dodge because the 3rd clone is cleaving your D3 spread position. |  |
The game8 strategy for this mechanic is arguably harder than one quad due to the required situational awareness as well as being able to analyze information quickly in a short amount of time. Even if you understand the thought process, the pace of this mechanic is so fast that you will likely still have to practice around a lockout or maybe two before the consistency kicks in.
| Example 1 Spread > Stack  | Example 2 Spread > Stack  |
|---|---|
Post-Beckon Moonlight
Regardless of which strategy you used for Beckon Moonlight, the mechanic is not over yet! After the last clone has dashed, immediately make a dash to the closest cardinal spot that you can find, because a wave of stone wolf heads will fire their line AoEs soon, making everywhere except the cardinals unsafe. This is followed up by either Windfang or Stonefang, but with the speed cranked up to eleven.
You were warned at the start of this fight that this will make a return, so hopefully, your pattern recognition is good enough that you are capable of solving this mechanic without much trouble.
| Windfang | Stonefang |
|---|---|
You're almost done if you've survived Windfang/Stonefang. The boss will use Tracking Tremors, which is the multi-hit stack marker you've seen before in Millennial Decay. Once again, try to time your 15s mitigations to the last second, because this stack marker is followed up by two Extraplanar Pursuit.
You must kill the boss before he uses the 2nd Extraplanar Pursuit, or he will become untargetable and use a third Extraplanar Pursuit after declaring that he has won the fight, wiping your party on the spot. Generally, you want to save your potion and/or LB3 for phase 2, but if push comes to shove, use them so that you don't fail the DPS check here.