M7S - Thorny Deathmatch
Welcome in phase 2, in which the Brute Abombinator is now a wall boss. As a wall boss, the Abombinator's attack pattern changes and you will not see most of the attacks you've experienced in phase 1. This phase is also a lot more slow paced than the previous phase, so you can use this moment to catch your breath.
Be very careful with your use of gap closers! The center of the boss is outside the arena due to it being a wall boss, so you will dash off the arena and fall to your death instead if your angle is wrong.
Brutish Swing
Similar to the first phase, the boss will use Stoneringer to create either a sword or a club on his right hand. However, there's no tankbusters involved in this one. Instead, the Abombinator will latch onto a random building and throw a Brutish Swing, which is either a donut or a chariot depending on which weapon he has created. After a Brutish Swing, the immediate followup attacks are always Glower Power and Revenge of the Vines.
The Glower Power is a spread AoE in which the boss will also fire a line AoE beam in front of him. Revenge of the Vines on the other hand is the generic raidwide of this phase. Both of these attacks are magical attacks, so this is the moment for your party's Addle and DRK/GNB 90s to shine. There's around 12 seconds inbetween those two attacks, so your mitigations can cover both attacks if you time them properly.
| Sword | Club |
|---|---|
Notice how all the buildings are covered in vines now after Revenge of the Vines? This will become relevant later, but for now, heal up and get ready for the next mechanic.
Thorny Deathmatch
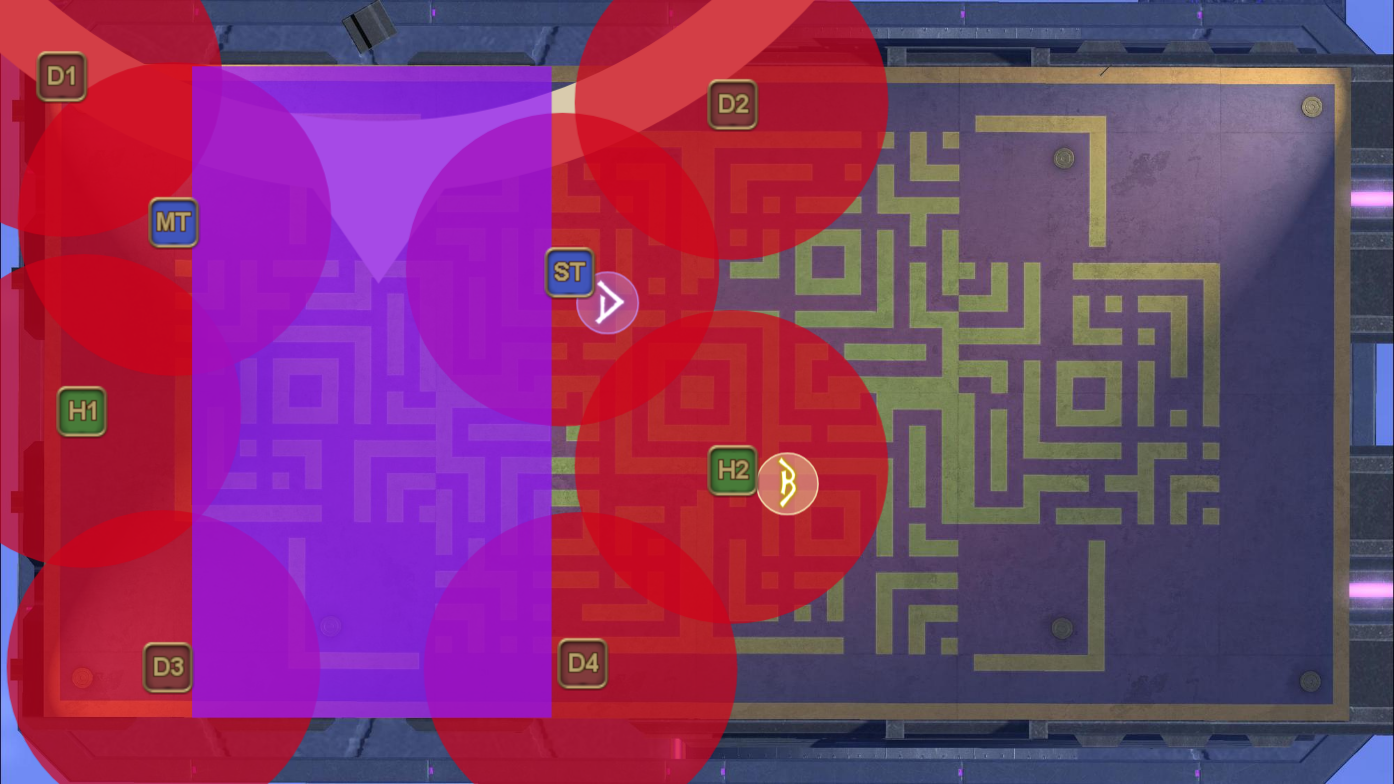
After surviving your first set of attacks, the boss will take this moment to cast Thorny Deathmatch. This mechanic introduces the Thorns of Death debuffs, which is applied to the player with the highest aggro in this mechanic.
| Debuff | Description |
|---|---|
    | The player tethered to a vine, whether it is from the boss himself or a building covered in vines, will receive a DoT. The strength of this DoT will become stronger as you stretch the tether, which you can see from the debuff level changing between 1 to 4. The strength of the DoT is roughly 80k damage at level 3, so avoid stretching the tether too much and stay inside level 1 or 2. |
This mechanic is simple: the Abombinator will tether towards the player with the highest aggro, which is hopefully one of the two tanks. Once the boss draws another weapon with Stonebringer, the boss will now use Abominable Blink on one of the two tanks, which is a strong flare with a tankbuster property.
| Safety gaming | Survivable, but party mits required!! Use your tank 90s and max melee! |
|---|---|
 |  |
The tank with the flare must run away from the party, but they obviously cannot do that if they happen to be also tethered to the boss. So to resolve this, the tank without flare must establish the highest aggro, which allows the player with flare to run away safely without dying from the Thorns of Death. Abominable Blink is considered a tankbuster, so don't forget to mitigate this attack. The vine will disappear once the flare is successfully resolved.
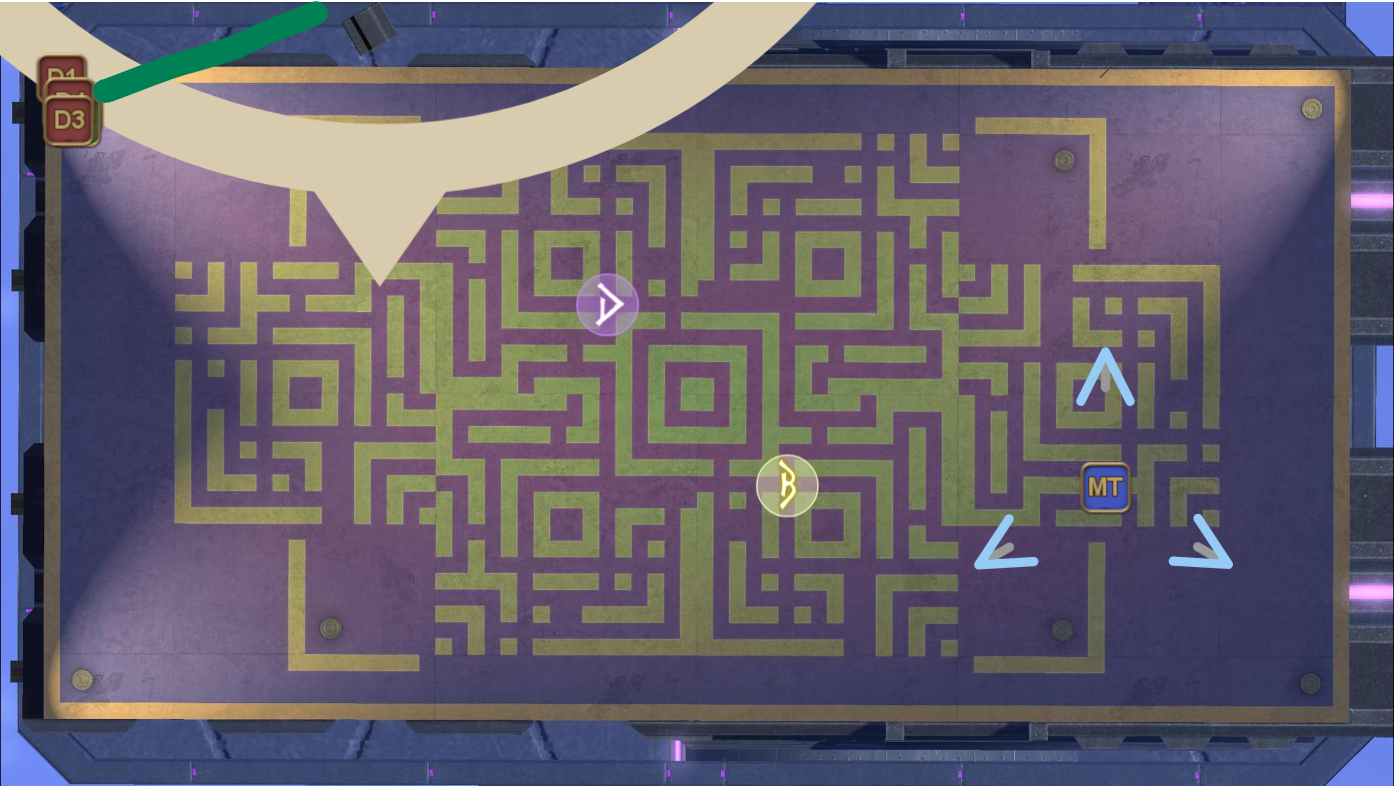
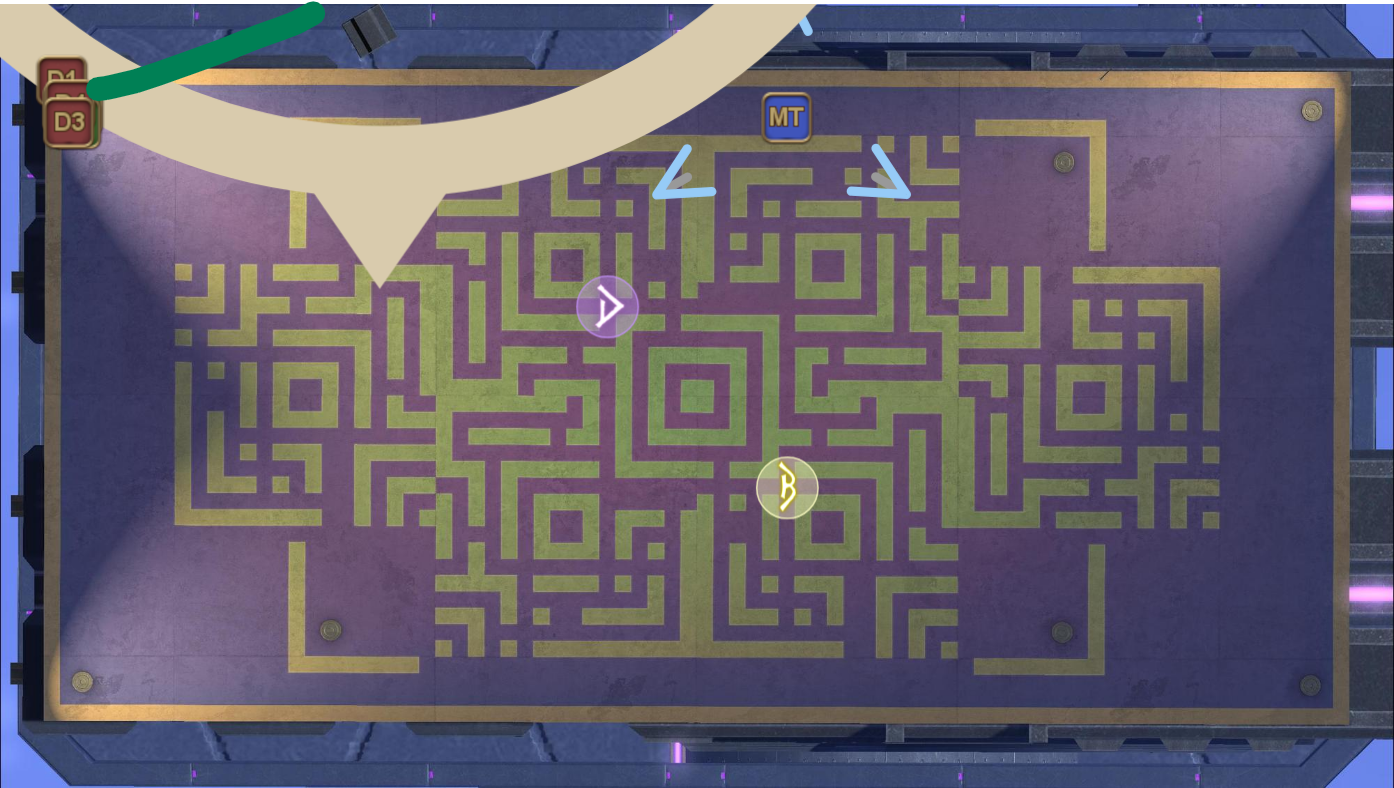
Sporesplosion
After dealing with the flare, the Abombinator will now cast Sporesplosion, which will create exatrine patterns that explode in the order they appear. This mechanic is nothing special by itself, as you can opt for a 3-to-1 or even a 2-to-1 dodge with sprint, but what this mechanic does is distract you from the next attack, which is another Brutish Swing that is followed by Glower Power and Revenge of the Vines.
The boss will always jump to the building that is diagonally opposite of where he is, so once you've identified whether he has a club or sword, you can slowly make your way to the opposite side and dodge accordingly once you've dodged the exatrines.