M7S - Debris Deathmatch
After the Abombinator jumps back to the middle with Slaminator, you want to heal up as there's a Brutal Impact incoming. This is then followed by Stoneringer, which marks the return of Smash Here or Smash There from phase 1. Remember that this needs to be soaked by two tanks, but otherwise, it shouldn't be anything new for your party.
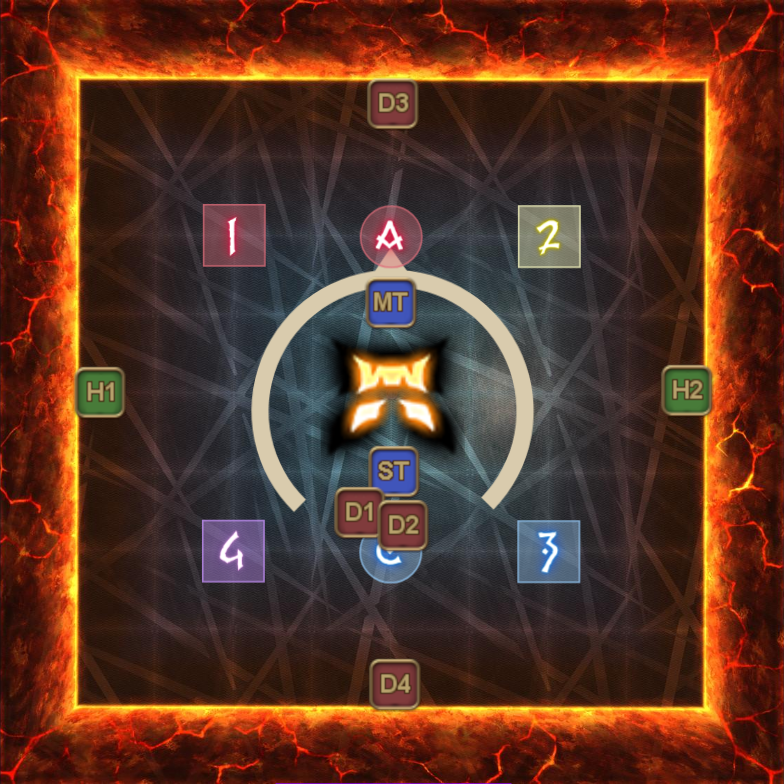
Immediately after the tankbuster, have all ranged players spread to their cardinal walls while the melees hang around in the middle. The Abombinator will cast Debris Deathmatch soon, which will spawn four tethers on each wall that the ranged players need to intercept. If you're a D4 RDM, then now is the time to use Manafication to burst early or whatever weird rotation is popular right now, because you will not get an opportunity to burst once the tether has solidified on you.
Debris Deathmatch
As soon as the boss finishes casting Debris Deathmatch, have each of the ranged players intercept the tethers of their respective walls they're assigned to. The Thorns of Death debuffs are back! And the Abombinator will now launch a barrage of mechanics at you. Be careful as the mechanics happen at a very fast pace.
| 1. | Once the tethers are intercepted, the boss will start off with Spore Sacs. You have seen this mechanic before at the start in phase 1, so pop sprint once you see the seeds drop down and dodge accordingly. As ranged, avoid dodging to the middle because that will stretch your tether to Thorns of Death III. To remind you how bad it is, getting a Thorns of Death III nets you a nasty 80k DoT. That would easily make your healers want to kill you, if the DoT isn't already doing that. | 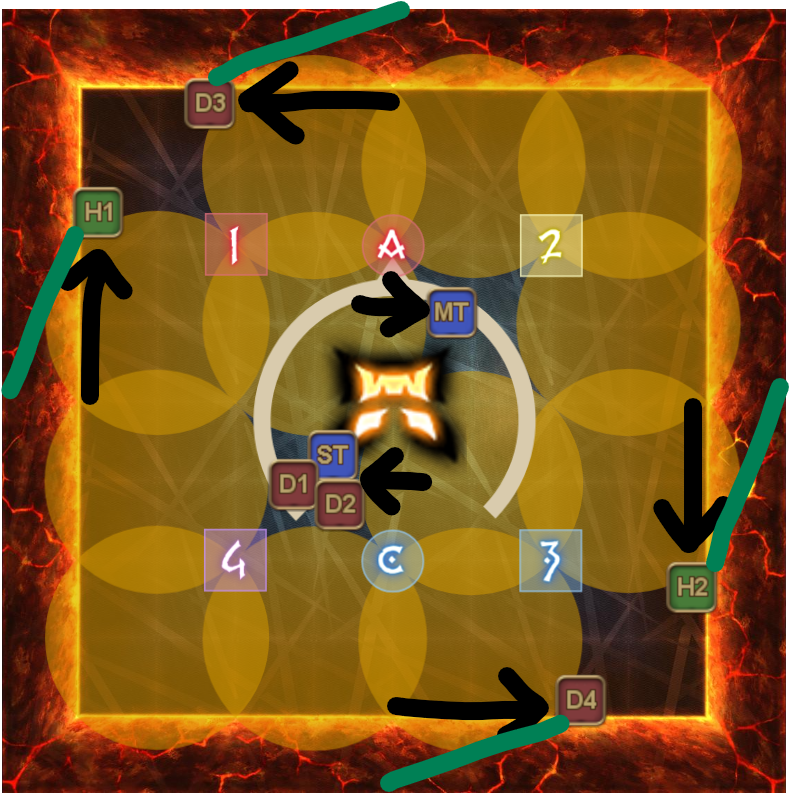 | 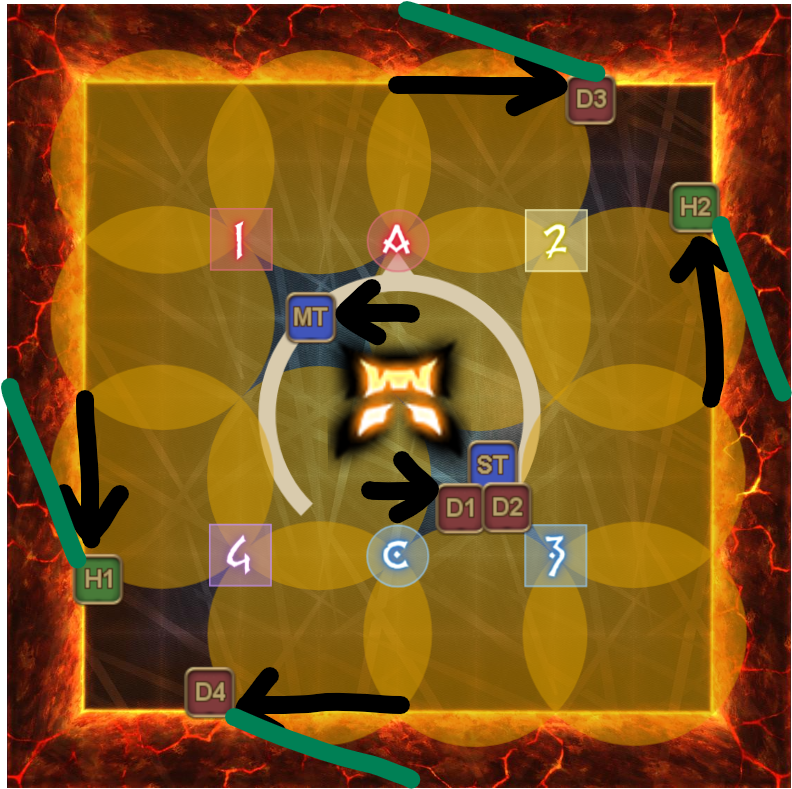 | |||||||||
| 2. | Now, either all support or all DPS will be targeted by a stack. This stack is meant to be soaked by two players, so immediately head to the cardinal edge of each wall to soak the stack with your partner. Drop your uptime if you must, because if any of the tethered player dies here, it will likely cascade into a wipe. You might notice that some Abomination adds have spawned from the Spore Sacs. The MT should establish aggro on the northern and western add, while the ST should provoke the southern and the eastern adds. Anyone else, do not attack the adds. Do not use your 2 minute burst here, unless your party agreed to burst on cooldown. | 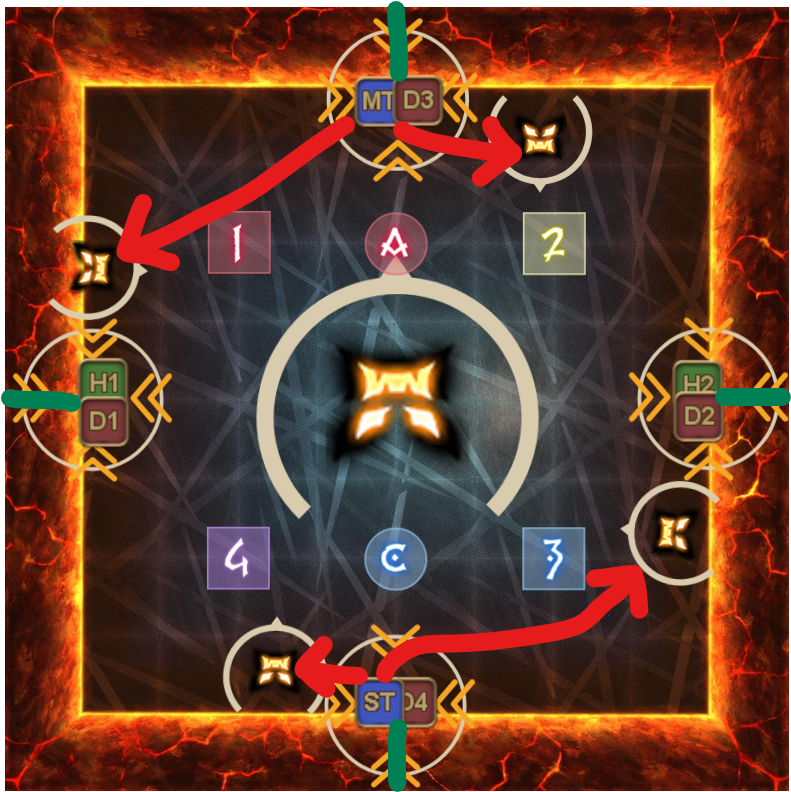 | ||||||||||
| 3. | A star will now detonate on the spot where the partners has stacked. Identify how the stars are and dodge however you want, as long as you don't get hit. Take into account of possible human error(s) as the stars can be misplaced. | 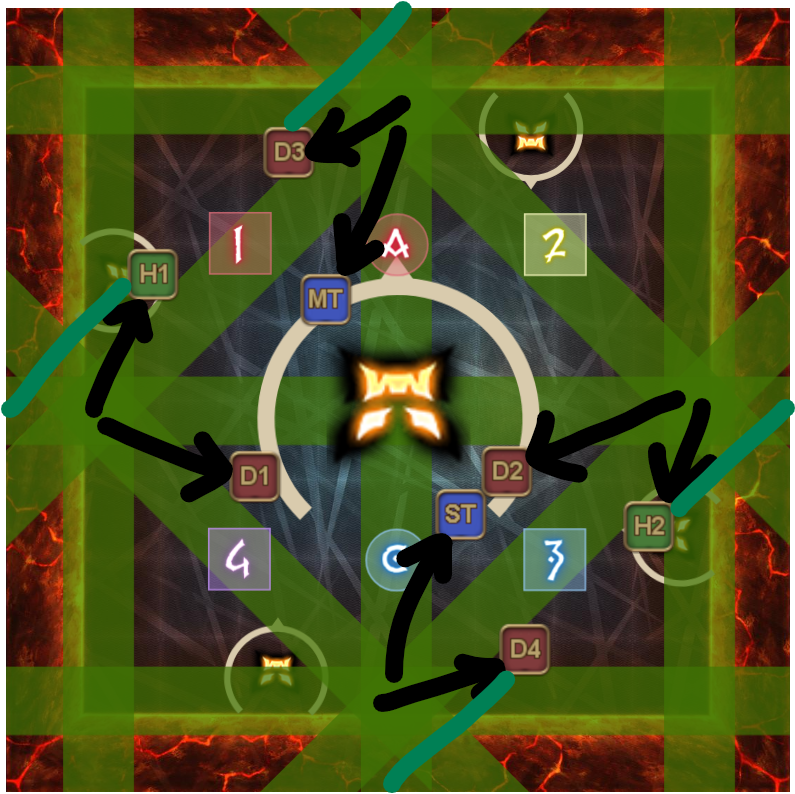 | ||||||||||
| 4. | After dodging the stars, the Abomination adds will now start moving, hopefully on the tanks if they did their job properly. Now, the boss will soon attempt for another cheap shot by casting Quarry Swamp, which is the line of sight petrify that you've seen before in phase 1. You do not need to kill the adds, because unlike phase 1, they're not going to selfdestruct on a short notice. Instead, you will use those adds to block the line of sight of the boss while they are still alive. Doing so will cause the adds to be petrified instead, which allows your party to effectively oneshot them with any attack! In a PF setting, your cue to burst is when the boss has finished casting Quarry Swamp. Make sure to take a few steps in, around where the waymarks are, because your buffs will otherwise be out of range for the other players! | 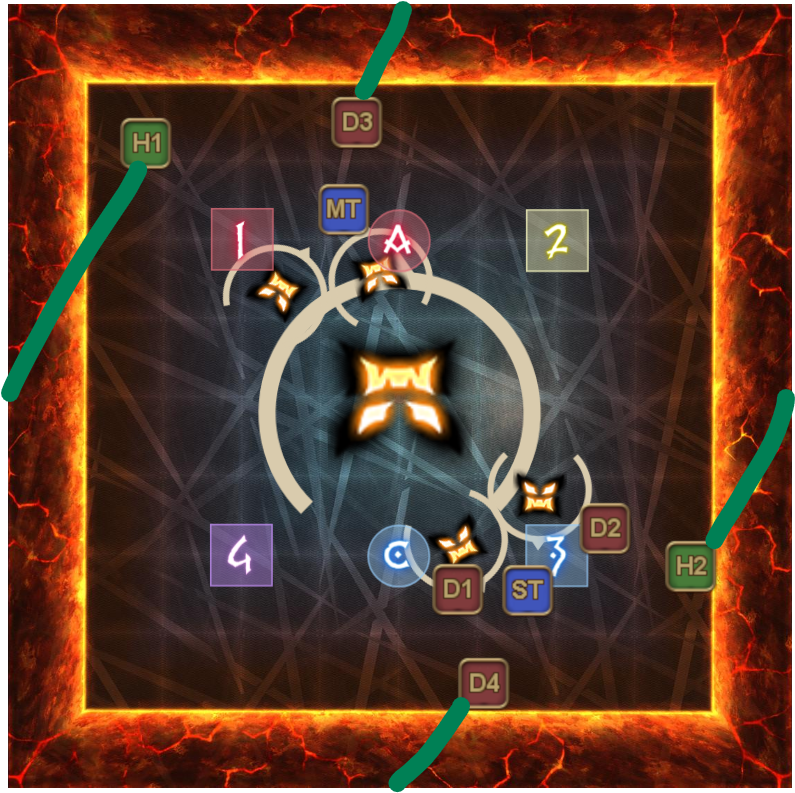 | ||||||||||
| 5. | The Sinister Seeds from phase 1 makes a return, so preposition yourself accordingly as the ranged players will once again be randomly targeted by either a purple AoE or baited AoEs, while the melees players will get the opposite of whatever the ranged players got. The ranged player should pick their favorite corner to preposition, while the melees are to start at northwest of the boss. It does not matter which corner the ranged players start at, as long as they don't start in the middle. | 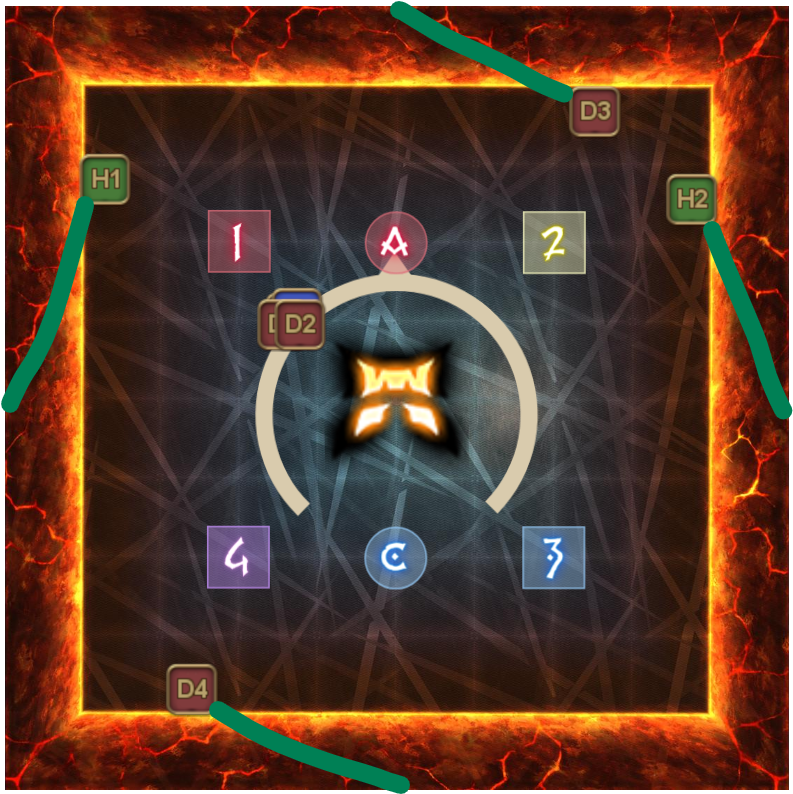 | ||||||||||
| 6. | If the melee get the purple AoE, then they should split up and place the seeds in a 十 shape, using the waymarks as reference. Bear in mind that the waymarks are missing for D1 and D2, so use the lines on the floor instead as reference. The ranged should trace along their walls in order to bait their AoEs. If the ranged get the purple AoE instead, then they get to place their seeds in a 十 shape but at the walls instead. The melees can mariokart around the boss instead by going east > east > south, in that order. | 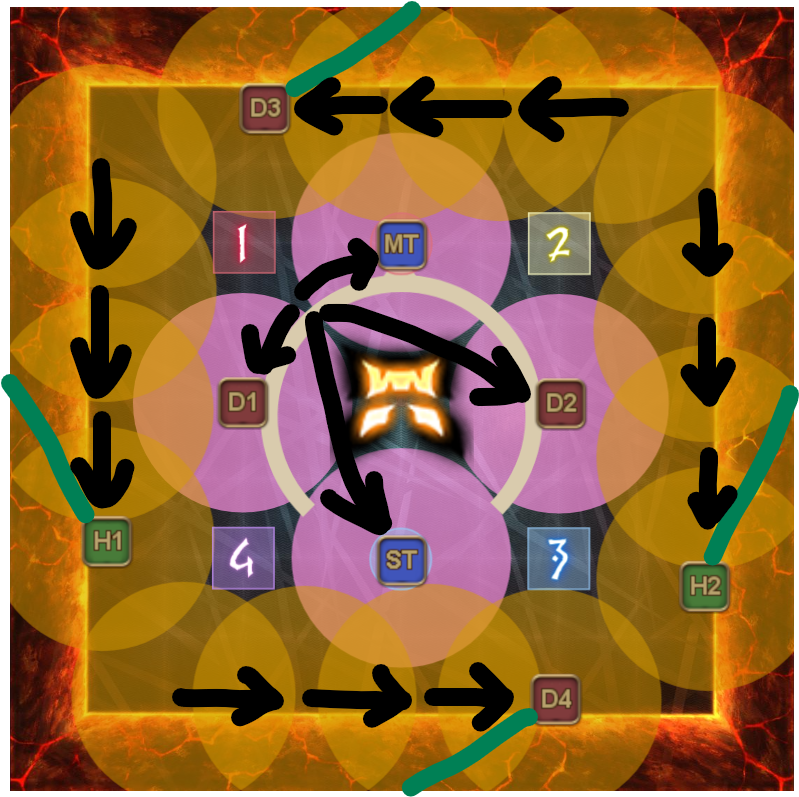 | 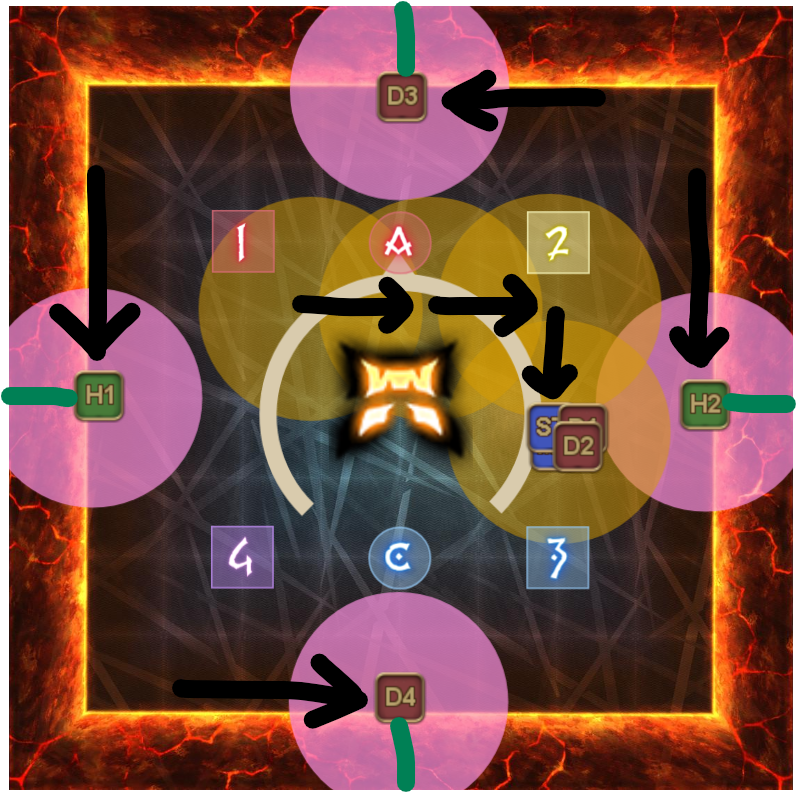 | |||||||||
| 7. | Now your next task it dodge both the stars and the secondary explosions from the seeds. This can either be right in the middle or all the way southwest of the arena. All the vines will have dissipated at this point, so ranged players, make a run for it once you've dropped your purple AoE or your last baited AoE. | 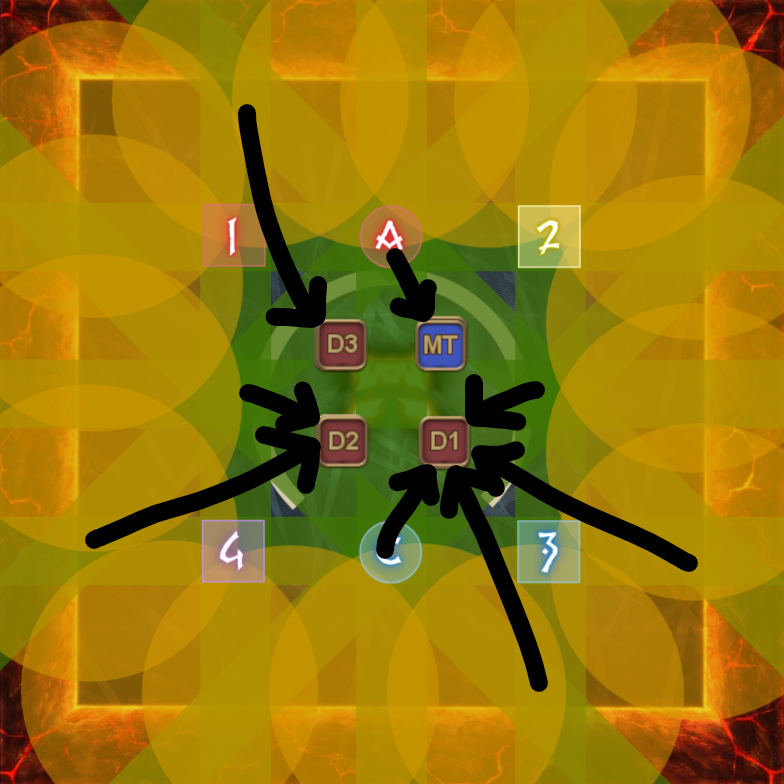 | 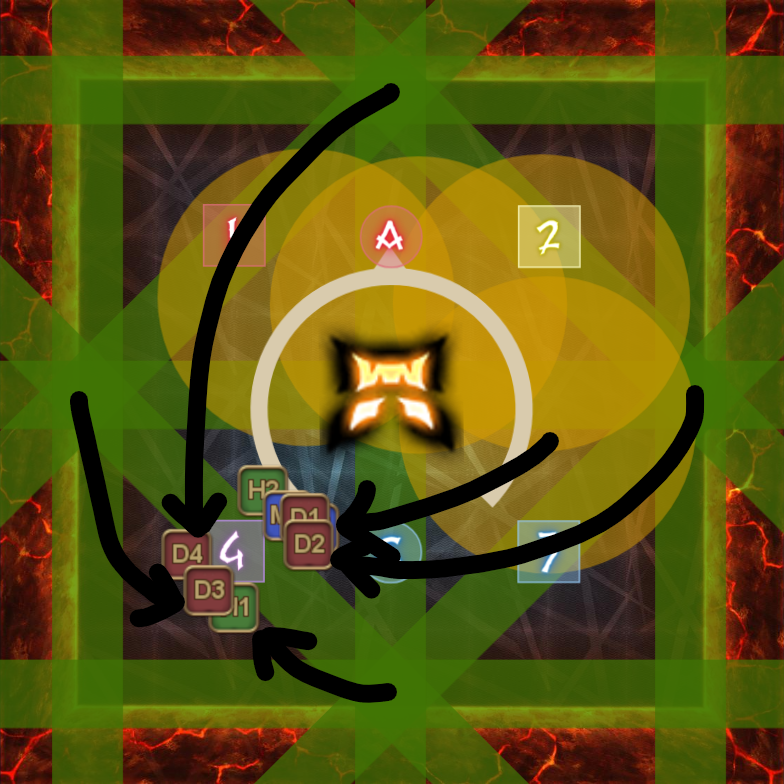 | |||||||||
| 8. | After the vines have cleared up, the Abombinator has one last trick up his sleeve, which is a Pulp Smash. Similarly to phase 1, do not make weird sudden movements that changes the direction of the boss or do anything that makes it harder for people to determine the direction, like hiding under the boss. As an extra rule in case you're dealing with a southwest pattern here, try to stack as close to the the waymark as possible. This gives everyone the right amount of space to dodge out of the boss while spreading. Remember that you cannot stay inside the hitbox of the boss! Heal up and mitigiate as soon as you can after resolving the Pulp Smash! The Abombinator wont let you catch any breaks, as he proceeds with Brutal Impact as a last ditch effort to pick off some of your more squishy party members. | |||||||||||