M4S - Sunrise Sabbath
If your party is well geared, knows their rotation well and have made minimal mistakes so far, then the chance exists that you might skip this mechanic entirely! Don't bank on this though, as this requires your whole party to be optimal if you want to defeat the boss before this mechanic is cast.
Wicked Thunder will cast Aetherial Conversion to store her attack again, which she will once again unleash after the next major mechanic. This is followed up by Azure Thunder, which is a raidwide that will shrink the arena back to a circle again. Be prepared for the most notorious mechanic of this fight, simply because whether you clear or not depends on whether you survive this mechanic.
Sunrise Sabbath
The boss will first cast Ion Cluster to inflict all players with one stack of Positron and Negatron, with the first group starting at a 38s timer and the second group starting at a 23s timer. Each group always consists of 2 supports and 2 DPS.
 |
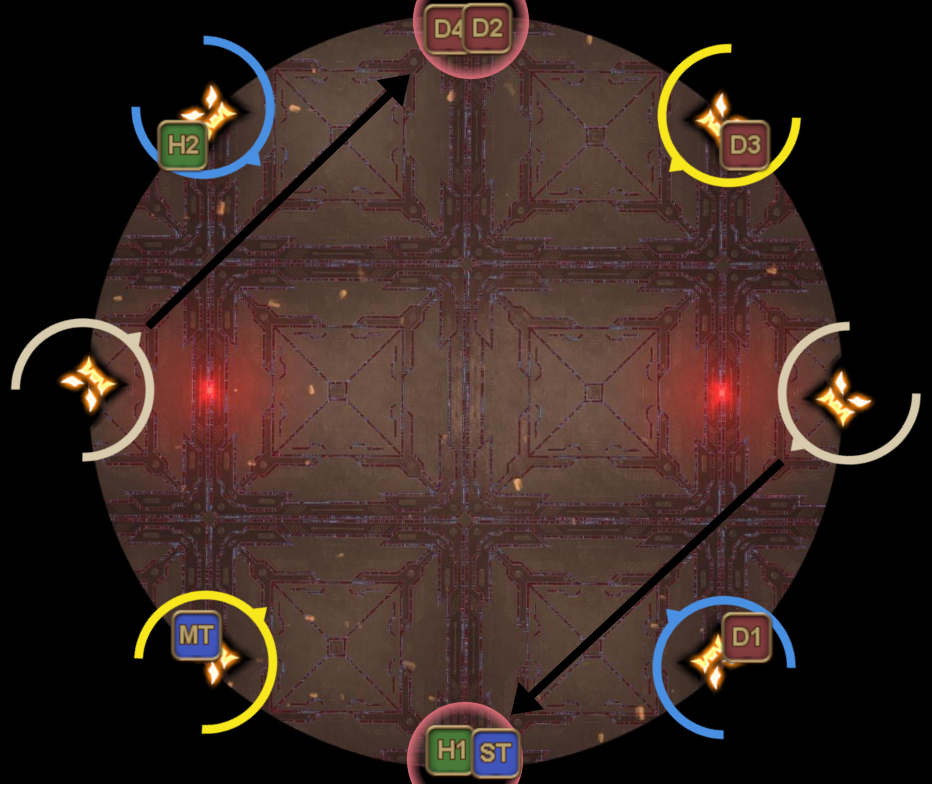
After inflicting the debuffs, the boss will now cast Sunrise Sabbath, which summons four clones with a cannon on each intercardinal spot, and two clones with wings that are positioned west and east. The cannon clones are turrets which targets the player that is closest to it, while the wing clones will create a two-man tower at the direction they're looking at.
Your goal as a party is as follows: Four players with the short timer must bait each cannon with the goal of cleansing their debuff. This must be done without the laser accidentally hitting anyone else, especially the people at the tower. The group that is not baiting the cannons must split off in pairs to soak the towers. Once the first set is resolved, the groups swap roles. The long timer are now the ones baiting the cannons, while the group that no longer has any debuffs will now be soaking the towers. Be careful as the boss will throw in a Wicked Special in between after you've resolved the first set.
Towers
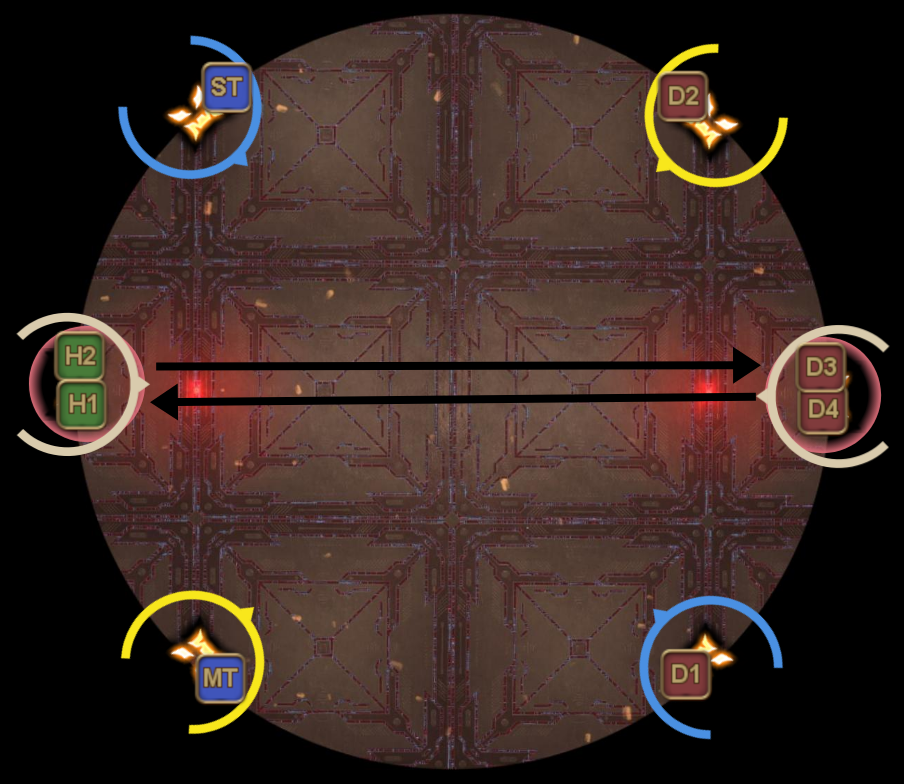
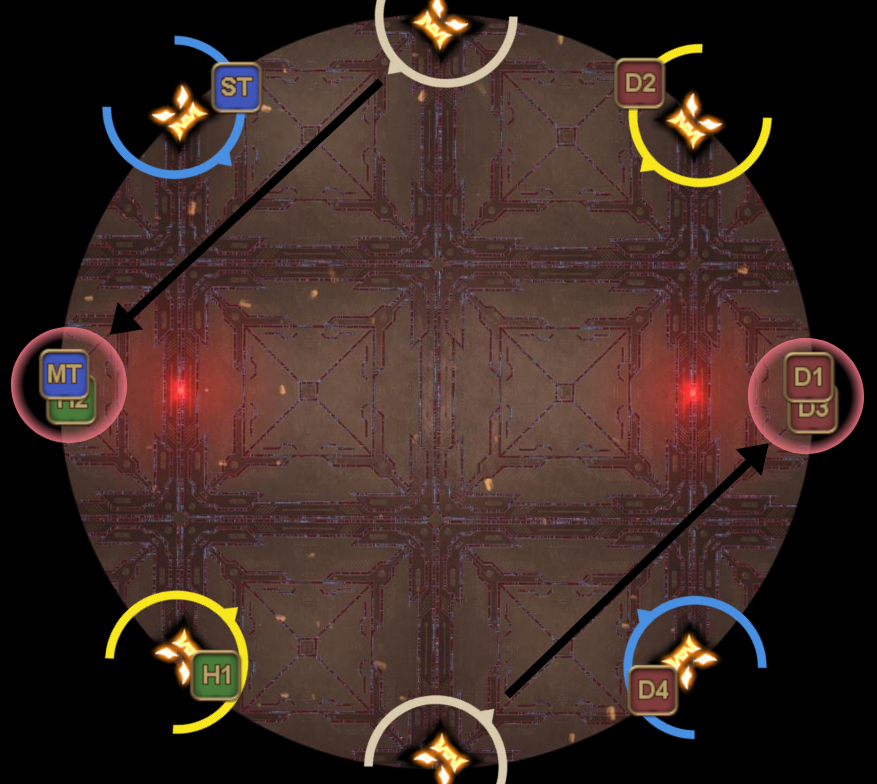
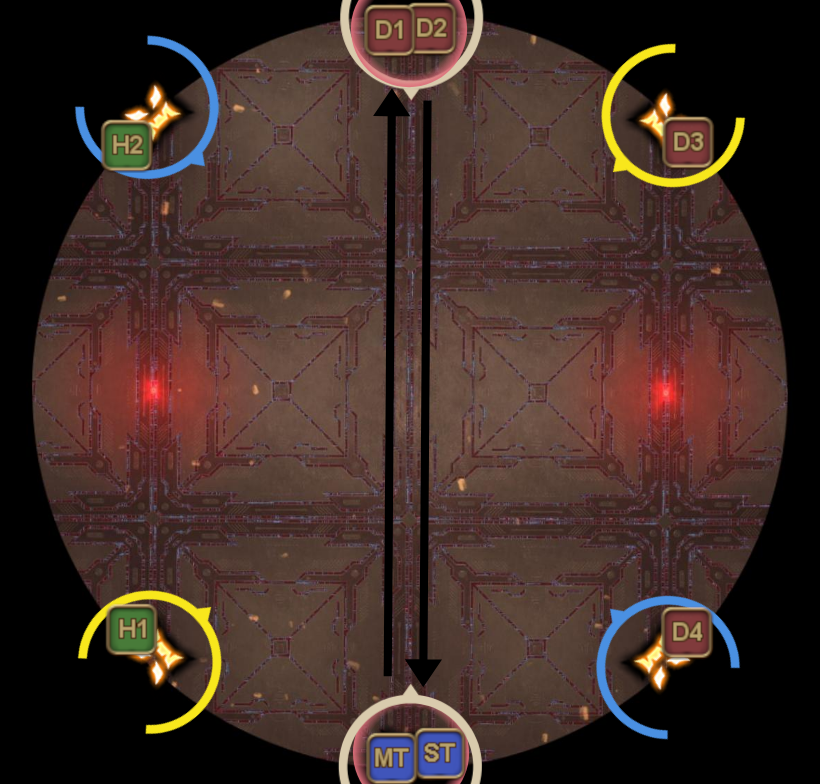
First, the tower spawn locations. The tower spawn locations are dependent on where the wing clones are looking at. If they're looking straight at each other, then it means a tower will spawn under the clone. If however, the clones are looking diagonally, then it means the towers will spawn at a different cardinal direction. Both sets of towers can spawn on the same location (e.g. north/south and north/south again), so always identify at the start which way the winged clones are facing. A set of towers will always spawn opposite of each other, so its not possible for one clone to jump west, while the other jumps north/south.
Everyone must identify these towers, including the ones baiting the cannons, because their job is to not aim the cannon into the towers. To identify quickly whether the clones are looking ahead or diagonally, you can use their wings as reference instead. The priority system for towers is supports West and South, while DPS takes North and East.
| West/East clones Diagonal | West/East clones Middle |
|---|---|
 |  |
| North/South clones Diagonal | North/South clones Middle |
 |  |
Cannons
While the other group is resolving the towers, the group responsible for the cannons now must aim the cannon away and prevent the laser from hitting anyone else. The priority for the cannons is supports CCW from north, while DPS goes CW from north. If done correctly, the supports can never be at northeast while at the same time, the DPS can never be at northwest. You might recognize this as the Paradeigma 2 laser priority system if you happen to have done P12S before.
| Cannons different on one side Tower west/east, aim cannon to north/south | Identical cannons on one side Tower north/south, aim cannon to west/east |
|---|---|
 |  |
The cannon turrets are really sensitive to movement and being slightly off can mean the difference between killing your party members and a clear. If you are having trouble finding your proper spot when it comes to aiming the cannons, then using the markings on the floor might help with building your consistency.
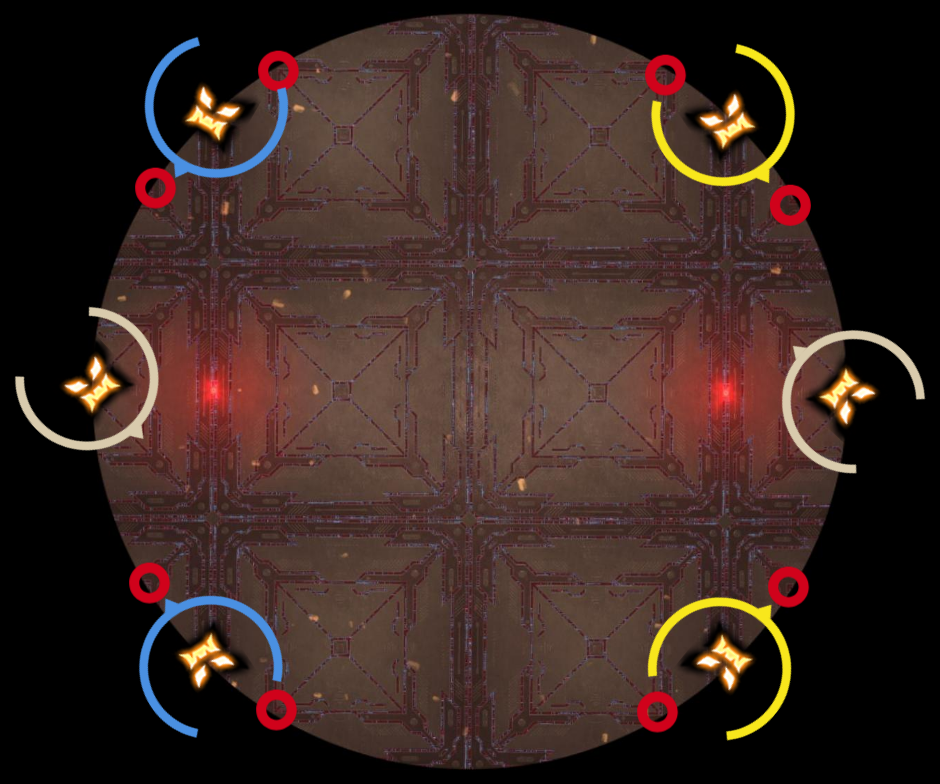 |
Identify and go to your marking depending on which way you have to shoot your cannon towards to. If you want to be extra cautious, you can take one or two steps towards the cannon, but no more as you will risk the cannon swerving around.
There exists a simulator which you can use to verify whether you understand all the steps taken in the mechanic to resolve Sunrise Sabbath. You can access this simulator through the following link: http://cupnoodle.moe/sunrise.htm
| Example 1 | Example 2 |
|---|---|
After resolving the towers and cannons, the boss will cast Tail Thrust, which you should be familiar with at this point. In case accidents did happen during Sunrise Sabbath, then hopefully, at least one of your healers survived the onslaught. Your healer can LB3 after you're done dealing with Tail Thrust.