M10S - Snaking
After getting through the Insane Air, the two bosses will return to the middle and prepare Firesnaking/Watersnaking.
Immediately put the MT group under Deep Blue and the ST group under Red Hot, because the bosses are about to apply debuffs based on proximity.
| Debuff | Description | Additional note |
|---|---|---|
  | The snaking debuffs will determine whether you will be attacked by the Deep Blue or Red Hot for the upcoming mechanics. The bosses will apply this debuff on either the four closest players or the four furthest players away from them, which means that all members of a light party will always get the same debuffs as long as they are prepositioned correctly. If you get the opposite debuff, e.g. getting fire debuff as MT, then the tanks need to swap bosses by provoking the boss that aligns with their debuff. |  |
You want all four of same debuffs to be applied on all the members of a light party each. Failure to do so will very likely cause a wipe, so make sure to preposition properly before the cast finishes!
Snaking
Your role in this mechanic is dependent on which debuff you have, which will be further elaborated here below. As mentioned before, if the debuff does not match your current boss, then you need to tank swap the bosses and adjust accordingly.
| 1. | With the debuffs applied and the battle lines drawn, the light parties should go to their respective bosses and stay on that side of the map. For reference, Deep Blue will be fought at the western half, while Red Hot is dealt with on the eastern half. Throughout this mechanic, both bosses will barrage the parties with a bunch of attacks. It will look chaotic at first, but most of the attacks should be simple attacks that you've seen before. | 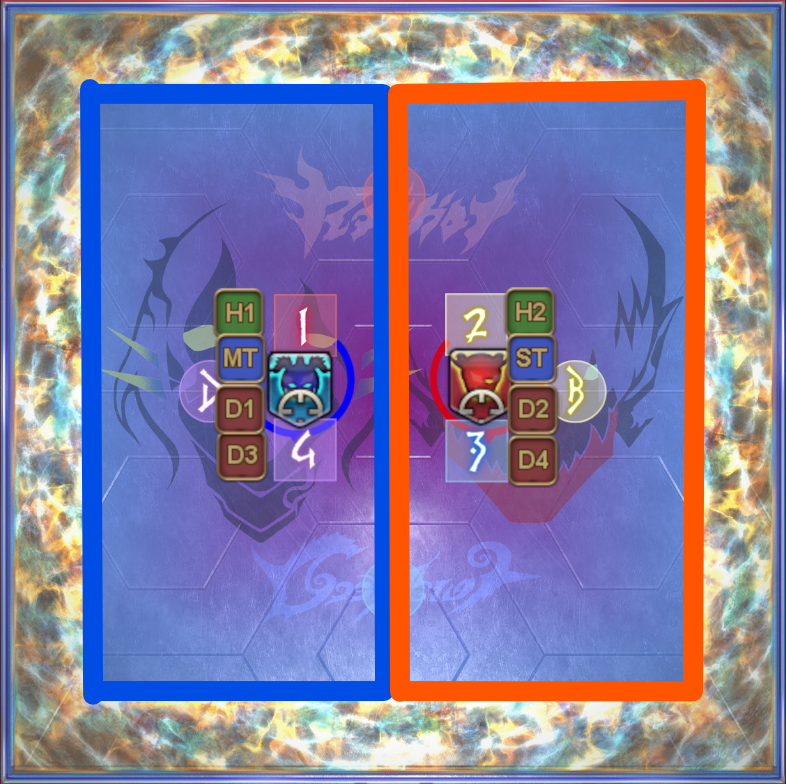 | ||
|---|---|---|---|---|
| 2. | Deep Blue will dash to the western wall and use either Alley-oop Double-dip or Reverse Alley-oop. He can either dash northwest or southwest, which will determine your spread positions when you're baiting the proteans. Whether the boss uses double or reverse, the way you do the dodge after baiting the proteans is the same no matter what. Red Hot on the other hand, will use Alley-Oop Inferno to drop a fire AoE puddles on his targets. Have the light party spread across the wall on the east side. Once dropped, immediately run towards Red Hot in the center in order to dodge any stray protean fires that comes from Deep Blue if he happens to use a reverse. Refer to the images on the right for the priority used for the spreads. | 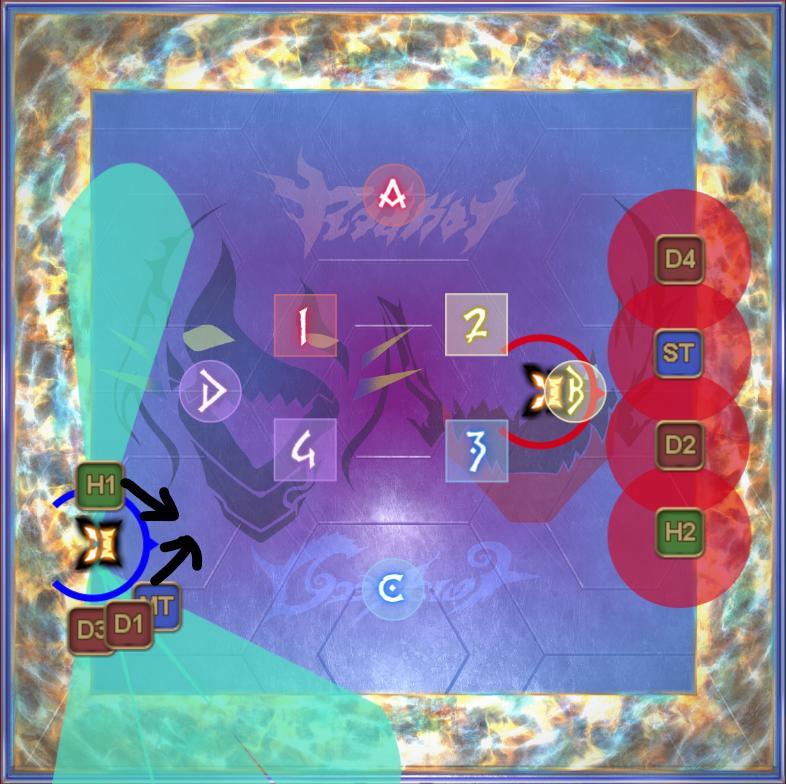 | 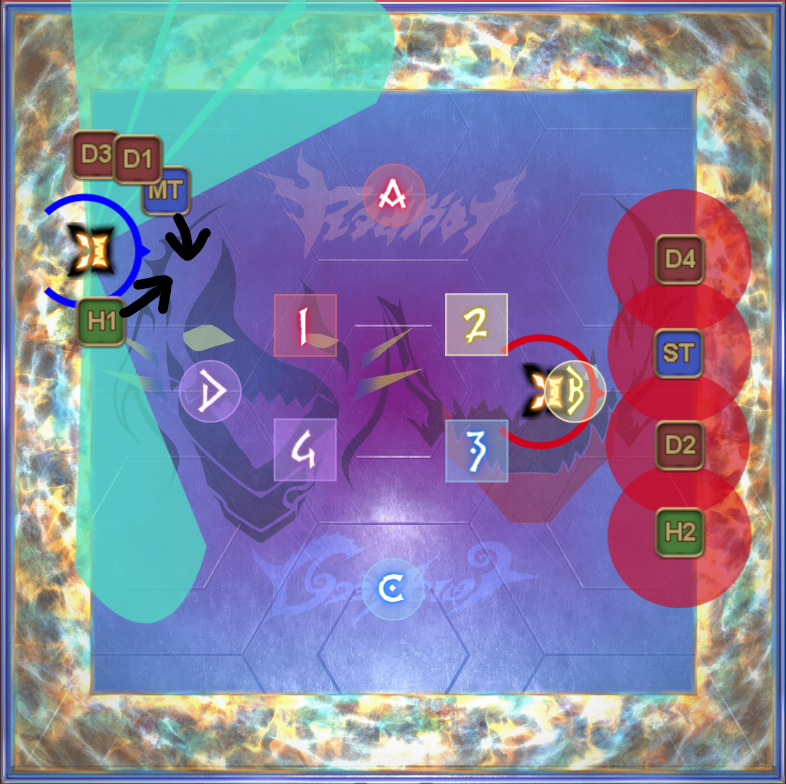 | |
| 3. | Deep Blue will use Sick Swell to create a tsunami on either the north or south of the arena. Taking note of this can help you with planning in the upcoming mechanics, but its also fine if you just ignore him. Red Hot, on the other hand, will do a Hot Impact on a red player with the highest aggro. This is the 2-man tankbuster which you've seen at the start of the fight, so the blue tank should hurry and dash towards Red Hot in the middle in order to take this tankbuster together. | |||
| 4. | Now its Deep Blue's turn to make a move. Deep Blue will use Deep Varial to dash towards the opposite direction of where the tsunami is, in order to do a giant cone cleave that will hit the majority of the arena. This is combined with either a spread or a light party stack, which can be identified by the amount of balls that appear at the wall where Deep Blue is going to dash towards. Meanwhile, Red Hot will do another Alley-Oop Inferno, chucking more fireballs towards the red party. The party has to spread out yet again in order to resolve the spreads without clipping each other. Refer to the images on the right for the spread positions. The AoE will resolve after the giant cone from Deep Blue has passed, so you have time to adjust if needed. If you are the ranged players, then don't be afraid of being tucked into the corner, because as mentioned before, the fire takes 3-4 seconds to solidify which allows you to simply walk out of the fire. Just be careful of the exploding AoEs from the fire puddles and you should be fine. | 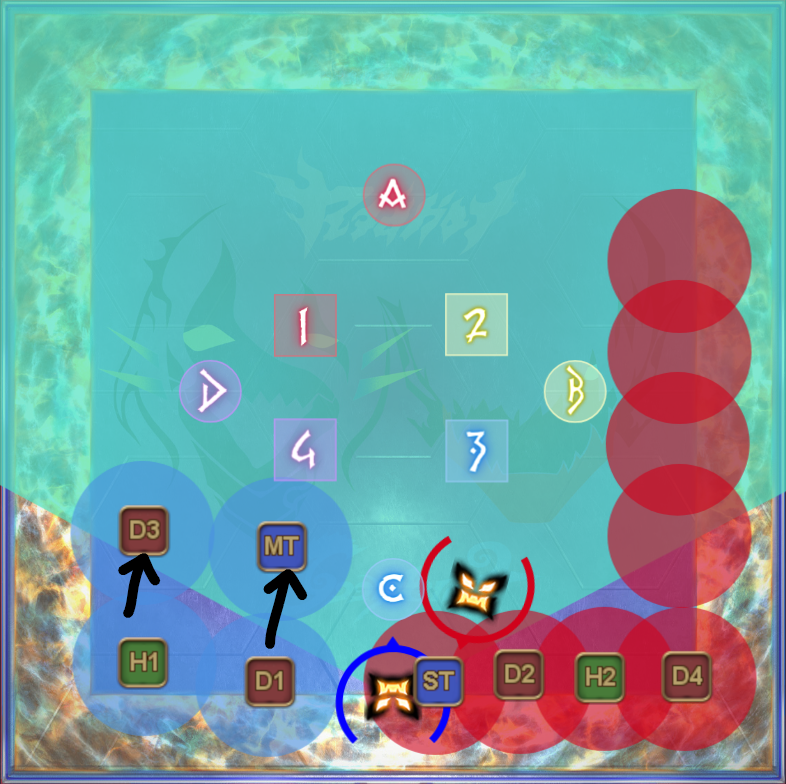 |  | |
| 5. | After resolving the AoEs, Red Hot will now teleport to the middle and begin casting Hot Aerial. What this attack does is that it will jump onto the furthest red players, up to four times. This attack leaves a fire vulnerability, meaning that the same player cannot take the fire attack twice in a row, which means that each player must take turns by running out and then running back to the center in order to bait the attack. Make absolutely sure to run back to middle after taking an attack, because you will otherwise risk baiting another attack from Red Hot and die as a result! For reference, this mechanic is done true north in the following order starting from northeast: THRM At the same time, Deep Blue will finally resolve his tsunami wave by casting Sickest Take-off. This attack is identical to what you experienced at the start of the fight: Avoid being in the same lane as Deep Blue, be careful not to get knocked into the fire puddles and have the group stack/spread as necessary, depending on how many balls the boss is holding. | 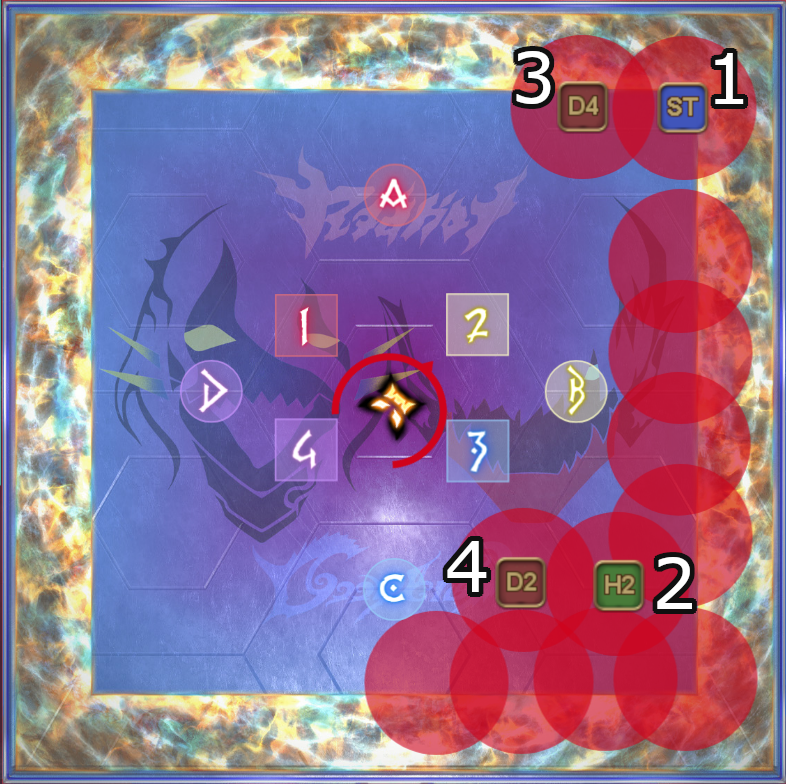 | 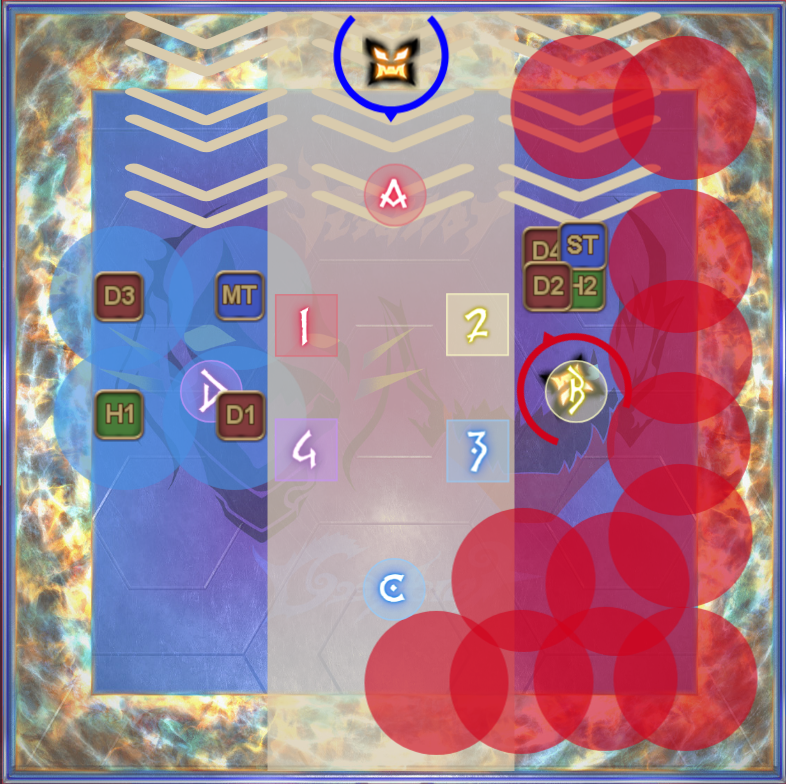 | |
| 6. | Once Red Hot is done with his Hot Aerial, the tank should immediately pull him out of any fire puddle that he is currently standing on. This is because he will soon cast Cutback Blaze to cover the arena in fire. You have seen this mechanic before, so dodge the exploding AoE bubbles and preposition yourself to the east of the boss so that the safe zone is created towards the west. The blue tank should immediately pull Deep Blue towards Red Hot, because once Red Hot finishes casting Cutback Blaze, Deep Blue will follow this up with Deep Impact. Pop your Arm's Length and your invuln, and run off to the edge to prevent him from striking the party instead. The rest of the party, on the other hand, should continue attacking Red Hot while staying as close to Deep Blue as possible. If your party managed to survive to this point, then both bosses will cast Divers' Dare, ending this phase. | 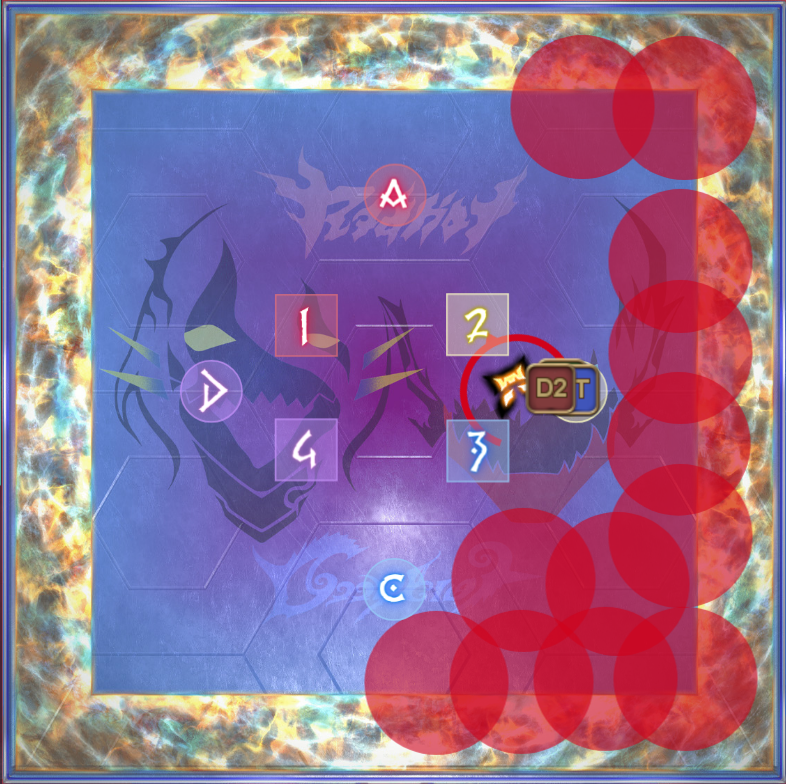 | ||
A lot of things are happening throughout this mechanic, but once again, they are mostly mechanics you've seen before. Once broken down, the sequence is fairly streamlined and easy to follow, with the rest being a matter of how well your execution is.
| Watersnaking Tank PoV | Firesnaking Tank PoV |
|---|---|