Graven Image 3
"What!? There's no way that didn't work!"
After surviving the raidwide and the tankbuster that comes after, Kefka will be surprised as to how nothing he throws at you seems to be working. Regardless as to whether you think Kefka is being serious or sarcastic, he will cast Tele-trouncing here to inflict arrow debuffs on all players.
| Debuff | Description | Additional Notes |
|---|---|---|
    | Once the timer runs out, a small teleporter will be dropped on where the player is standing. Upon stepping on this teleporter, the player will be teleported a short distance in the direction the arrow is pointing at. In order to see P3, the party must resolve all tele-portents on the floor by having a player step on them. Placing two tele-portents too close together will despawn them both, which counts as a failure. | 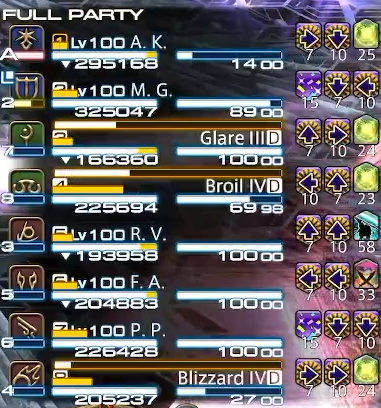 |
Just like the last mechanic, you cannot just simply place them on the floor and walk over them to resolve them. This is because Kefka will use Graven Image to tether each role group to a statue again. One role group will be put to sleep, while the other role group will be confused.
The confused players will automatically seek out the closest player near them in order to slaughter them, so your objective in this mechanic is as follows: You will have to trick the confused player to step on all tele-portent, which will delay them long enough for the confusion debuff to expire. There are 16 tele-portents, which means each player is responsible for four tele-portents.
Unlike the last mechanic, you can safely ignore the tethers because knowing which statue you're tethered to is irrelevant when it comes to solving the mechanic.
Pinoy Box strategy
Nicknamed the Pinoy Box, because the one who came up with the idea is Filipino, the strategy involves placing four teleporters in a box formation on each quadrant. The teleporters are placed in a way that once the confused player steps on it, they will be sent from teleporter to teleporter until they resolved all of them.
| Mana waymarks | Elemental waymarks |
|---|---|
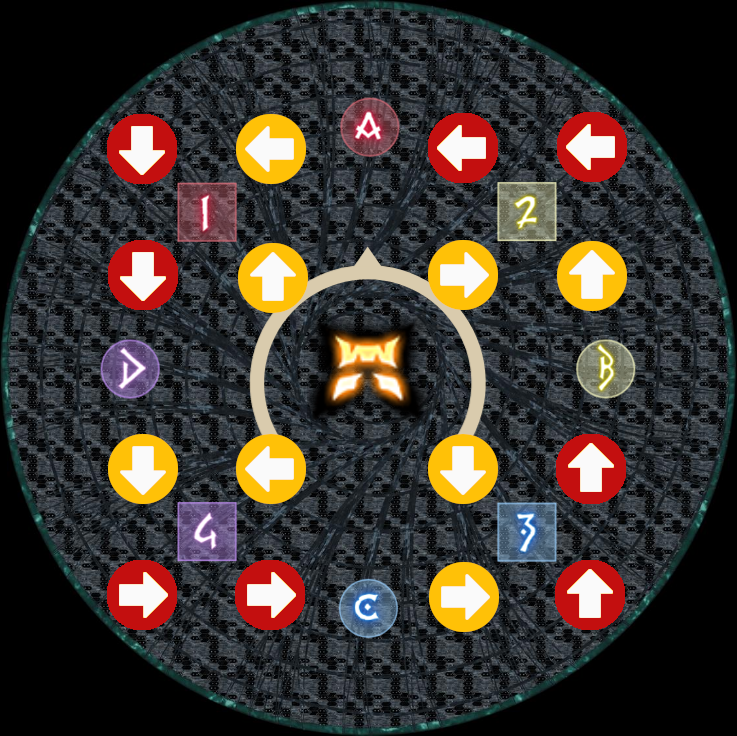 | 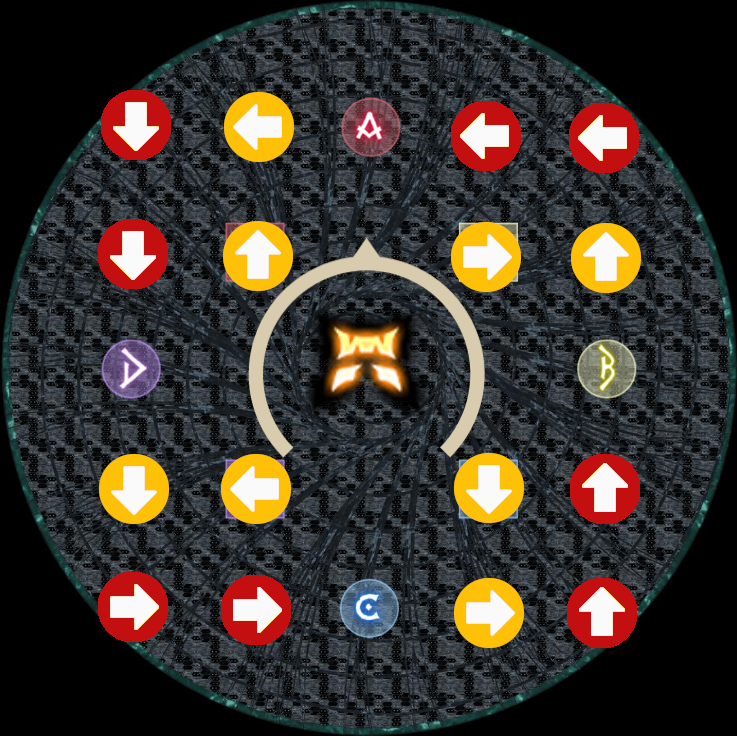 |
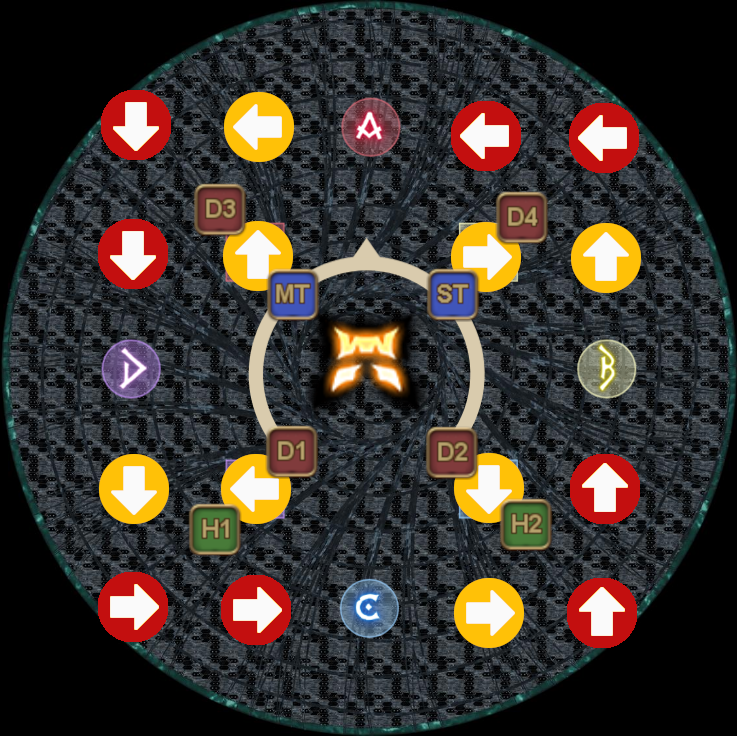
As each player will always get two arrow teleporters, you can see in the diagram above as to where you have to go for this mechanic. To make it easier, the teleporters are colored so that it is easier to identify which pairs of teleporters belong to the same player.
How do I know which quadrant I have to go to?
There's the hard way, which involves understanding that the arrow teleporters pattern is placed in a counterclockwise motion. And, there's the easier way, which involves putting the diagram somewhere as a cheat sheet, whether it be an ingame strategy board, on your 2nd monitor or printed on your table.
Having the cheatsheet is recommended, because it allows you to get past this mechanic and prog further, after which you can slowly try to learn to do the mechanic without the cheatsheet. Mileage may vary, but expect to wipe quite a lot if you want to try to do the mechanic without the cheatsheet.
I am using the cheat sheet, but that doesn't answer my question...
There are two possible patterns a player can get when it comes to the arrow debuffs:
- Two of the same arrows
- Two different arrows that are never the opposites of each other
| Partylist | Diagram | |
|---|---|---|
| | |
| Northwest | Northeast | |
| | |
| Southwest | Southeast | |
| | |
Assuming you're using the cheat sheet, then you should not have any issues finding your quadrant if you get the pattern in which both arrows are the same. However, if you get two different arrows instead, then the trick to finding your quadrant is to look which way the arrow debuffs you have is pointing towards.
Once you've identified your quadrant, your next task is to identify which debuff timer is lower, because the timers are completely random as to which one is 7s or 10s. This step is irrelevant if your two arrows are the same, but important if not, because you must place the arrow teleporters exactly like how it is in the diagram in the correct order. Placing any of the teleports wrongly will immediately fail the mechanic, so make sure this mechanic is done correctly.
"Still alive? Unbelieeevable! I really must insist you die!"
I've succesfully placed my teleporter!
The confetti will resolve the 3rd and the final time shortly after you have finished placing your teleporter. To resolve the confetti, have all supports head to west, while all DPS are to go east. Aim carefully so that you do not end up getting knocked back into a teleporter. As for the confetti players, avoid making any last second movements as that can throw people off.
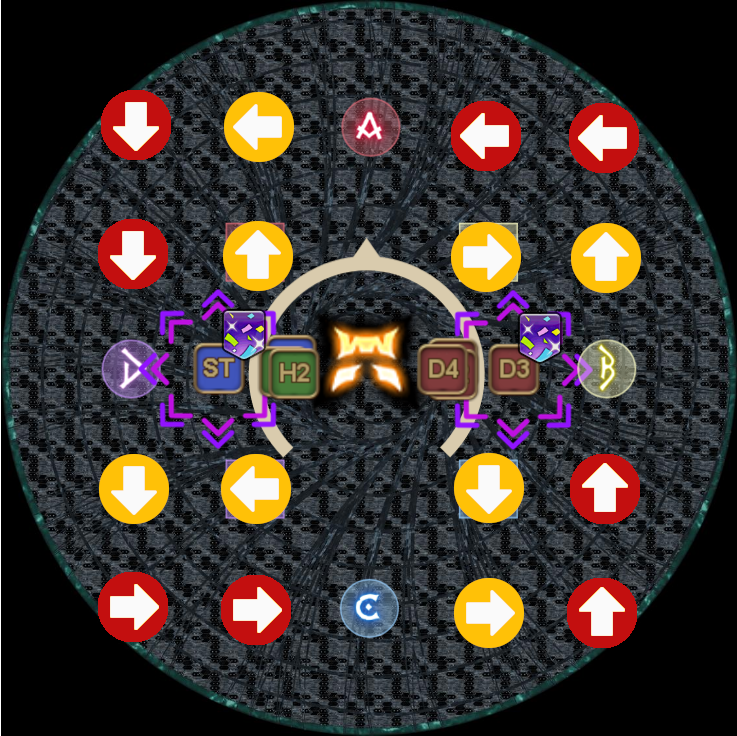 | > |  |
Once the knockback is resolved, immediately head to your spread position. Upon arriving on your spread position, try to edge close to the teleporter circle without touching it in order to avoid any accidents where players will try to auto attack the wrong player while confused. Assuming that both players in the quadrant are directly across each other of the teleporter, your next attack will never clip each other.
Final Mystery Magic
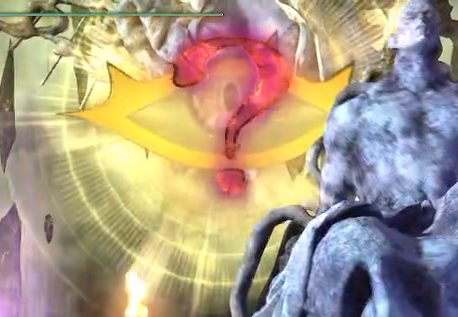
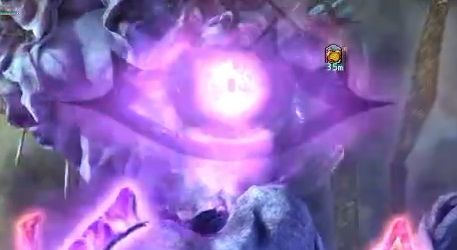
You are not done yet with this mechanic. While teleporting around, you might have noticed that the statues in the background is preparing a gaze attack. The gaze attack comes in two possible flavors: look or don't look.
| Ave Maria Look at it! | Indolent Will Don't look! |
|---|---|
 |  |
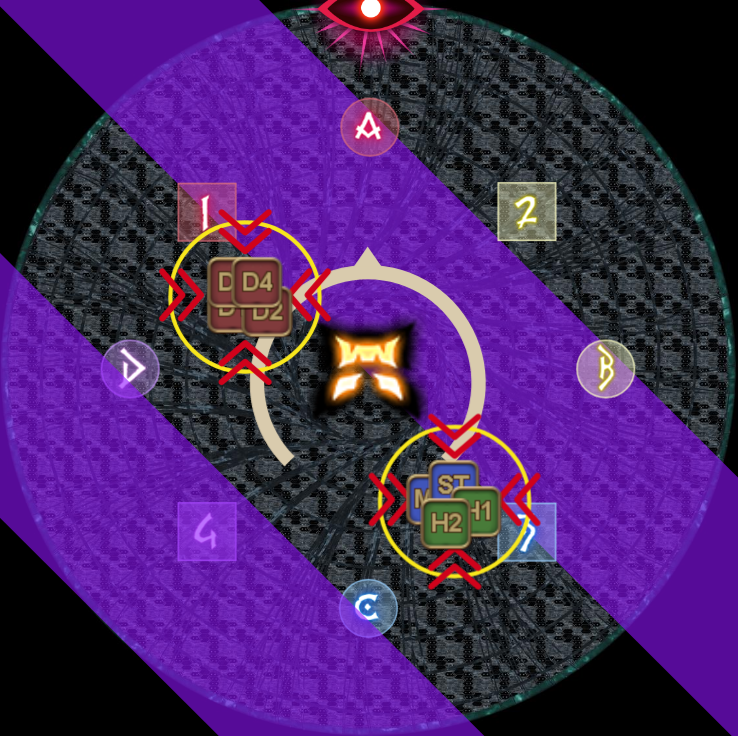
As soon as the confusion and sleep debuffs have worn off, Kefka will cast his final Mystery Magic of this phase. This version of Mystery Magic combines lightning with fire, so identify first whether its stack or spread, and identify which one of the attacks are real or fake.
Now, both Elemental and Mana follows Yan for the stack andspread positions in this mechanic. However in practice, people will soon find out that Elemental have their own idea of how the mechanic should be resolved due to prioritizing uptime, whereas Mana will obey the strategy to the letter. Be careful about this small detail so you don't end up being surprised later when you're doing this ultimate in Elemental.
| The Yan spread/stack positions that Mana has agreed on | |||
|---|---|---|---|
 | 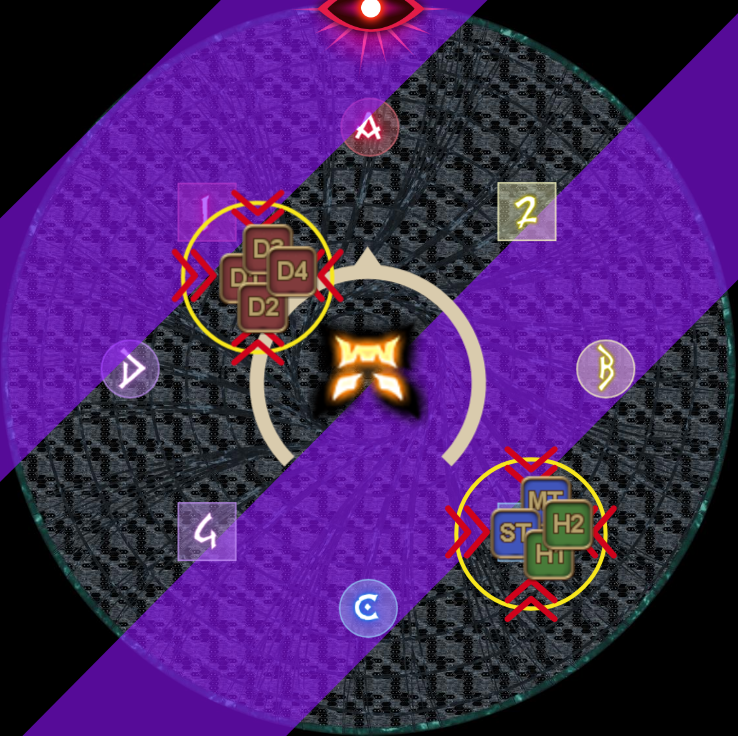 | 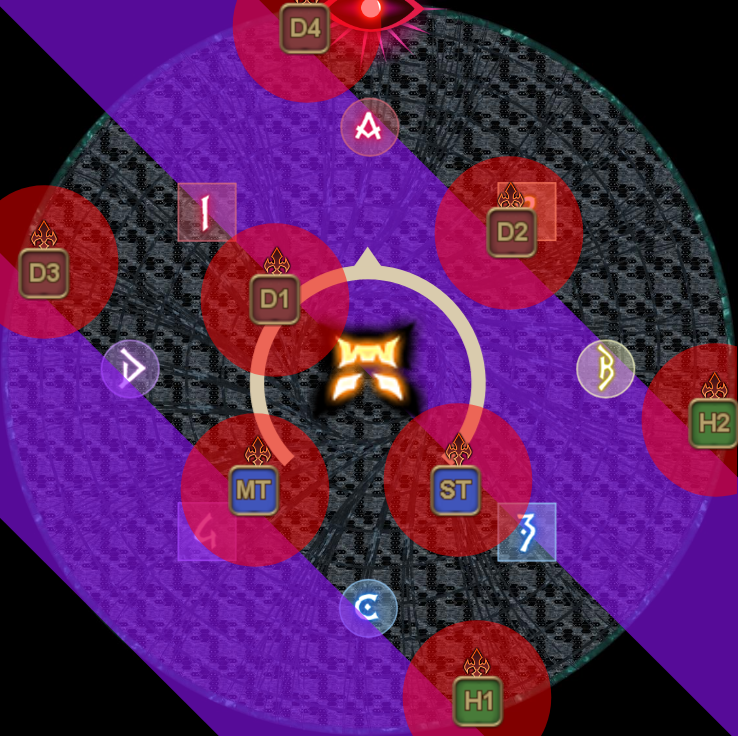 | 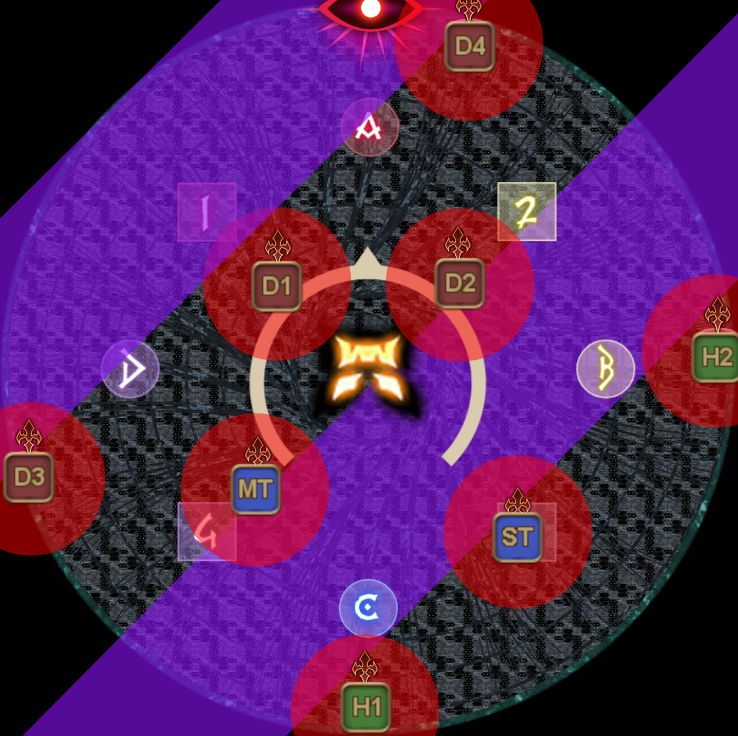 |
| The Yan spread/stack positions in Elemental, but with uptime flavor added to it | |||
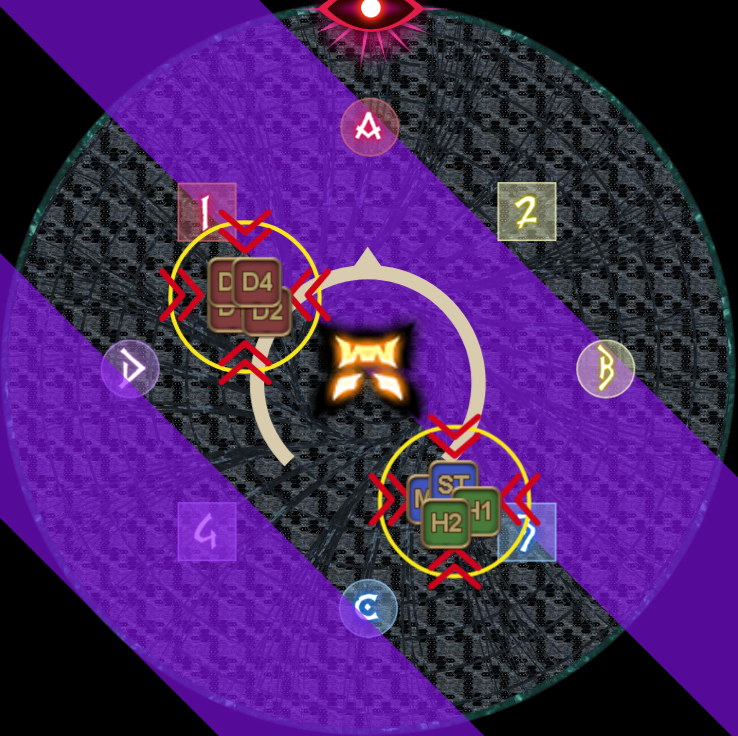 | 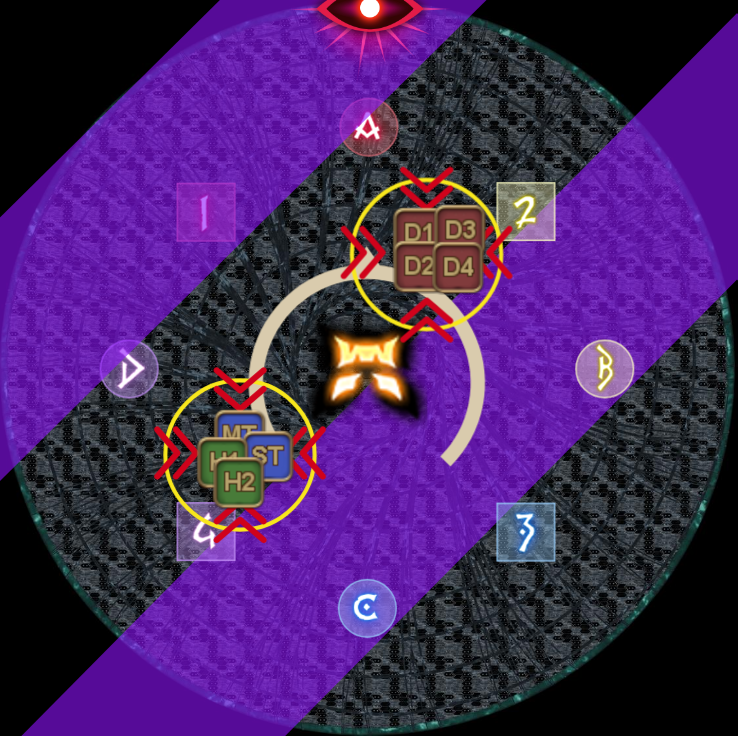 | 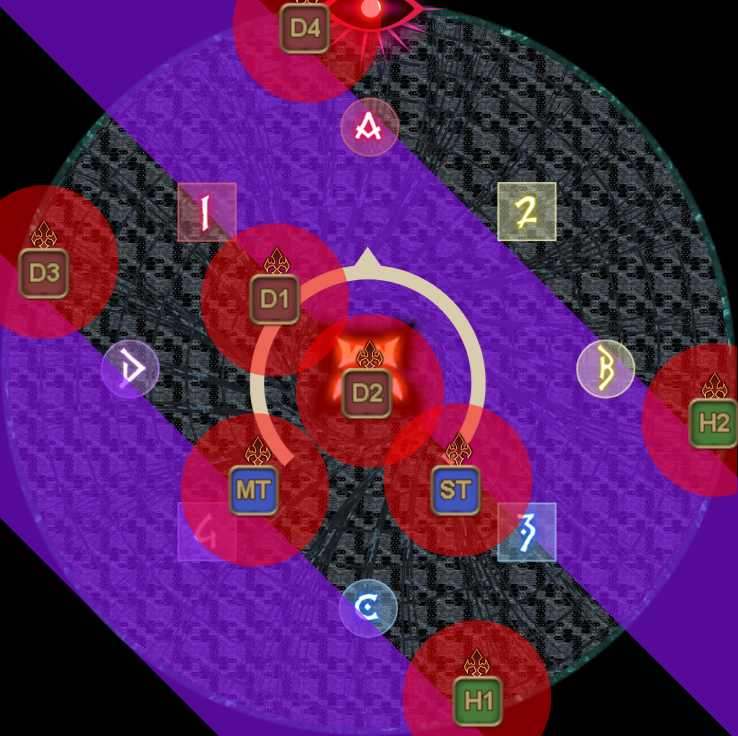 | 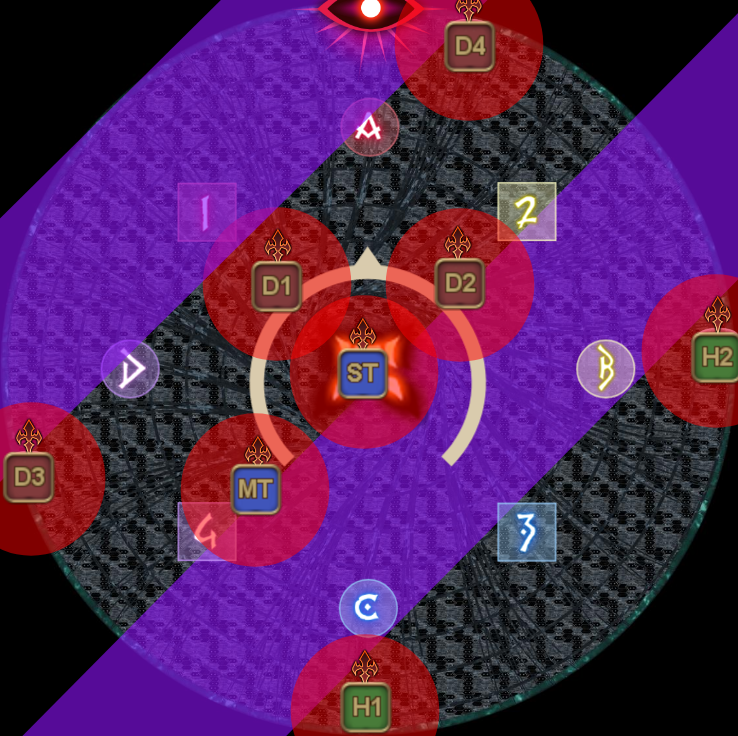 |
Identify what the statue is doing while you are teleporting around. By the time you stopped teleporting and have regained control of your character, you should already know whether you have to look at the statue or avoid its gaze. After that, its a matter of identifying which attacks are real and fake, and acting accordingly. Here are some references you can use to gain some insight.
Example 1 | Example 2 | Example 3 |
|---|---|---|
For the newer players who are unfamiliar with gaze mechanics, the gaze mechanic will check the view of your character, not your camera. Attacking the boss, auto attacks included, will make you face the boss, so drop your uptime if you don't know how to uptime it and wiggle in the direction you want to look to solve this mechanic.
"How boring. Guess I'll have to spice things up!"
If you see this above quote, then you've done all mechanics correctly in phase 1 and are on track to reach phase 3. Otherwise, as mentioned at the start of this guide, your run will end prematurely in phase 2. Doing the mechanics wrong in phase 1 will not stop you from progressing phase 2 though, but keep that in mind if you wish to reach phase 3 or further.
If your party did not manage to reduce Kefka's HP to 14.9% or lower, then he will become untargetable shortly after and wipe the party with Light of Judgement.