Flood
Important note: Kefka will not re-center himself throughout this whole fight, so under no circumstances should the tank ever pull Kefka away from the middle, accidental or not. Pulling Kefka away from the center will make certain mechanics harder or even flatout impossible to solve. Tanks, you have been warned!
"Destruction is the fate of all things."
Kefka jumps down into a hole, only to reappear shortly while brandishing a very cute staff that does not fit his appearance.
There will be two tank swap mechanics in this fight, called Maddening Orchestra. One of the tanks will always invuln in Maddening Orchestra, so hopefully, your party has communicated beforehand as to who is going to invuln first. If your party cant decide on the priority, then as a reminder, whoever invulned Exdeath first in phase 3 should also be the one invulning first in this phase.
Once you've settled as to who is going to invuln, have the tank who is not going to invuln first establish the main aggro by provoking the boss immediately once he's targetable. The tank who is going to invuln first will establish the 2nd highest aggro by enabling their stance once they've finished using all of their strongest attacks.
Ultimate Repeater
Kefka will start off by casting Ultimate Repeater, which is the raidwide attack of this phase. This attack is powerful and hits up to four times, so on top of requiring mitigations, the healer also has to apply a heal in between any of the four hits. Keep in mind that if you let your party take all four hits without any heals in between, there will likely be deaths regardless of how many mitigations you've stacked onto your party, so be careful about that.
Right at the start, before Kefka is even targetable, your party can optimize their mitigations by pressing their 90s mitigations right as Kefka says "I'll raze to the ground with a smile" or when you see him materialize his staff. In case of PLD and WAR, they can press it even earlier as their mitigation lasts for 30s. Pressing your mitigation early here is crucial for the final mechanic in this fight, so knowing this optimization tech is practically mandatory.
Fell Forces
Right after the raidwide comes Fell Forces, which is Kefka's auto attack that comes with a gimmick of its own. Fell Forces will target one random healer, one random DPS and the main aggro player with a stack attack that must each be soaked by their respective role groups.
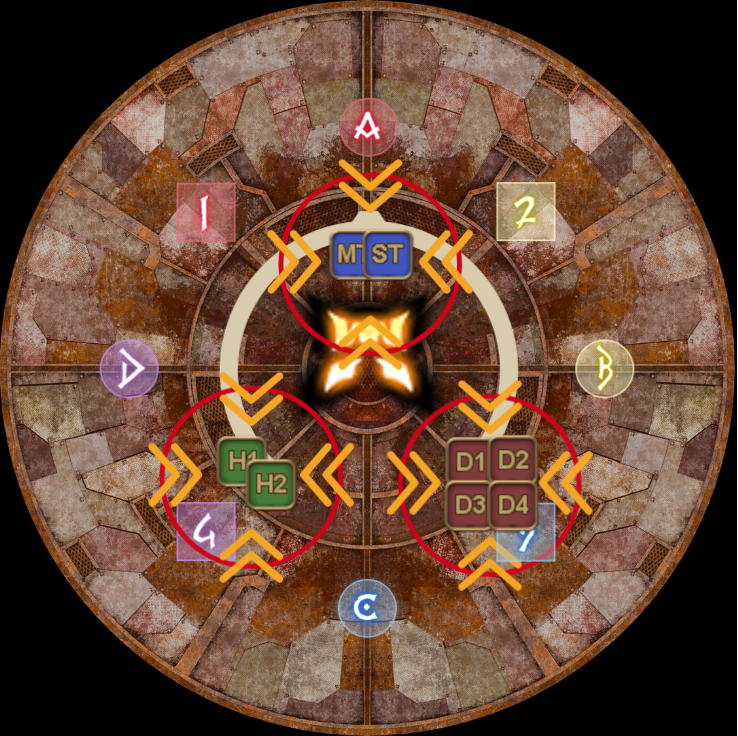
The Fell Forces on the healer and DPS can be covered with minimal mitigation and healing, but the Fell Forces on the tank hits 435k damage even if both tanks soak it together. This auto attack on the tank is actually the most powerful attack, raw damage wise, from Kefka in this phase, so mitigate this properly and treat this attack as a proper tankbuster! Using your 40% and short mitigation should be sufficient.
Kefka will use Fell Forces constantly throughout this whole fight if hes not busy casting another mechanic, so make it a habit to default to your role stack position whenever you resolve any major mechanic!
Flood
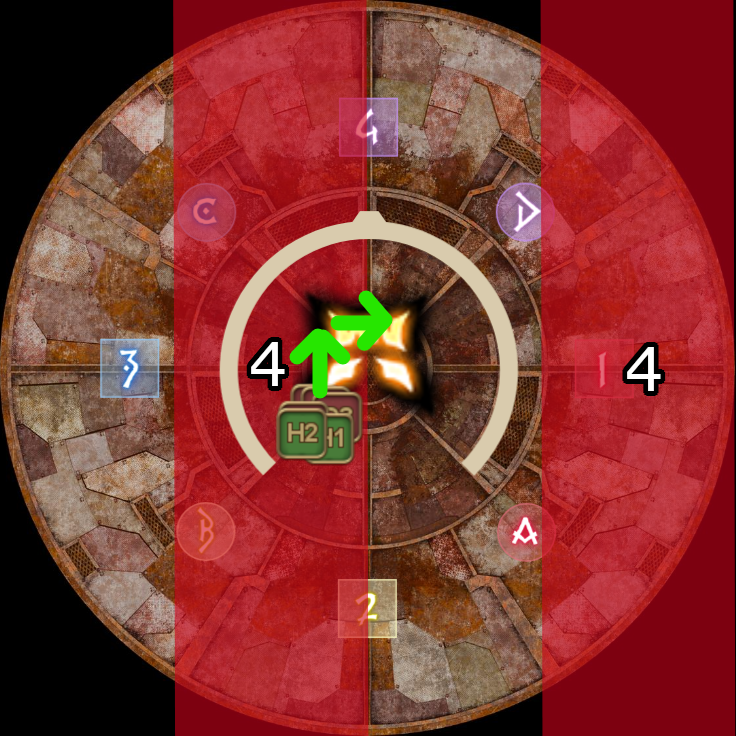
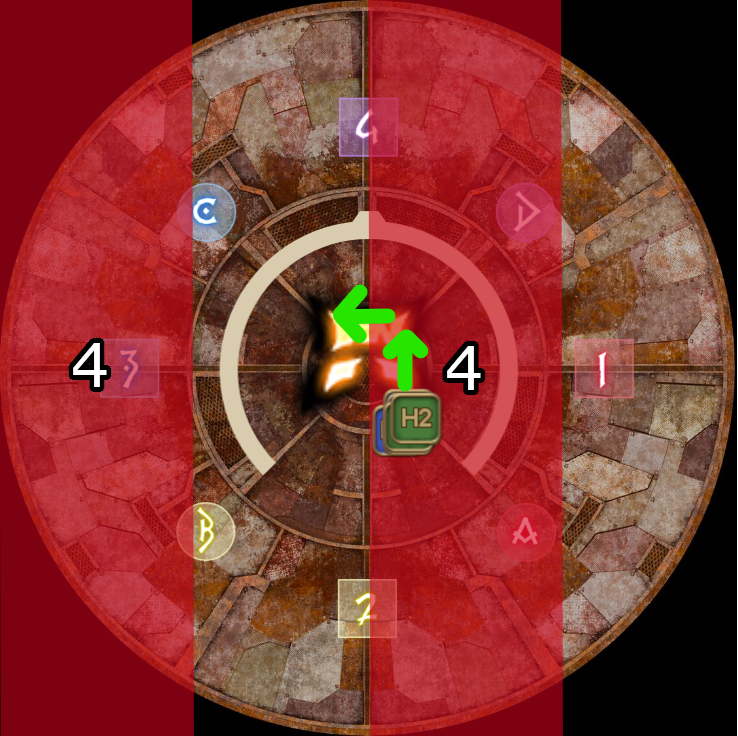
After three auto attacks of Fell Forces, Kefka will now cast the first major mechanic, which is Flood. In this mechanic, Kefka will telegraph two line AoEs that will go off four times. The pattern is similar to the lightning magic you've seen before, but for the sequence of the patterns will all be either rotated 90 degrees clockwise or counterclockwise. While the line AoEs go off, your party will be attacked by three Chaotic Flood attacks which needs to be soaked by the entire party.
This attack is nothing special, but the telegraphs are very fast and thus easy to miss, so here is some breakdown on how this mechanic works. First, the entirety of this mechanic is done around the center of the arena, because that allows your party to resolve the mechanic with minimal movement while retaining uptime. Second, your starting position is always in one of the cardinal directions.
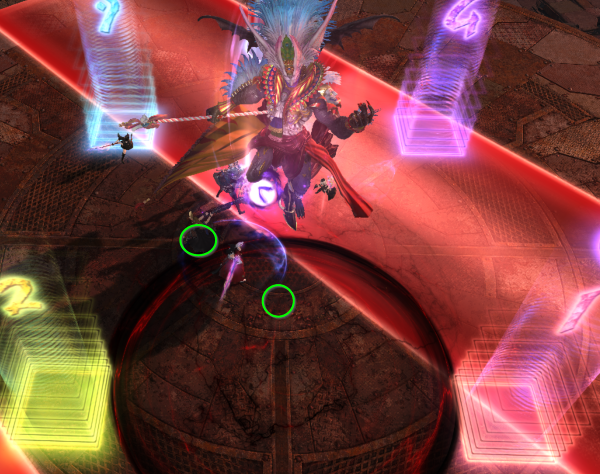
Upon identifying the first telegraph, your party should immediately move to the safe side. In the image, you can see two green circles, which marks the two potential starting locations for your party to resolve this mechanic.
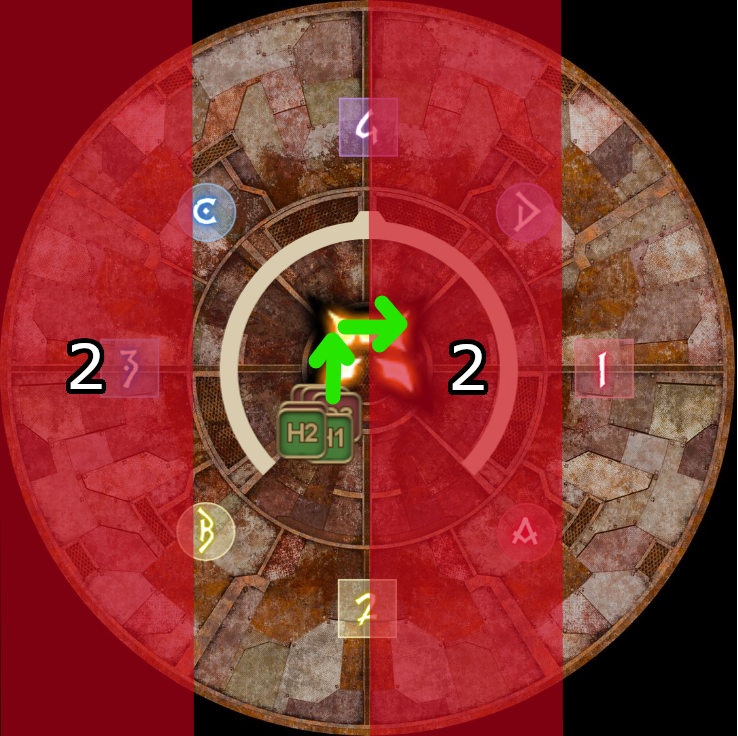
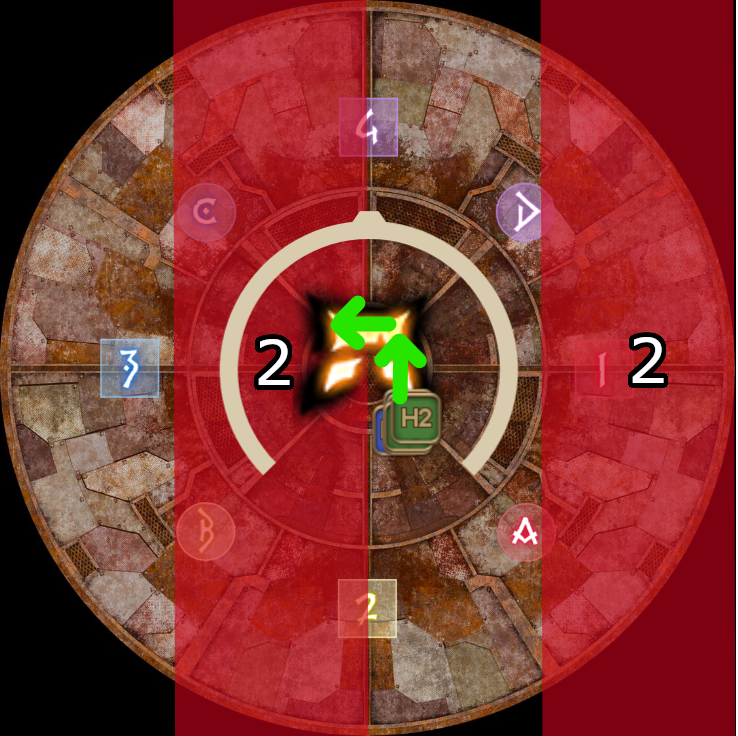
Now, identify the 2nd telegraph, which should shift you to one of the quadrants that remains safe on the 2nd attack. From hereon, you will also have all the information needed to complete this mechanic. You will always rotate 180 degrees around the center to dodge all the line AoEs, and whether you rotate clockwise or counterclockwise is determined by the 2nd line AoE placement.
 |  |
Now, if for whatever reason you missed the 2nd line AoE, no worries! You still have a fallback plan, which is by looking at the 4th and final line AoE placement. By looking at the final line AoE placement, you can still determine your safe starting spot and whether you have to rotate clockwise or counterclockwise. This still requires you to spot the first line AoE, so do pay attention when Kefka telegraphs his attack.
 |  |
Here are some more examples as reference you can use to gain a better understanding of this mechanic.
| Example 1 A counterclockwise | Example 2 A clockwise | Example 3 D clockwise |
|---|---|---|