Graven Image 2
"Did you think you'd won? Oh no no no, we've only just begun!"
Kefka will cast Graven Image again, making the statue in the background attack you again. In this mechanic, one role group will be tethered by the middle statue while the other role group will be tethered by the eastern statue.
Gravitas and Vitophyre
The role group that is tethered by the middle statue will be attacked by Gravitas, which by itself is a 2-man stack attack that drops a gravity circle on the floor. This attack does not inflict any vulnerabilities, so what PF will do is just stack the whole party together so that they can resolve every Gravitas at once. The gravity circle itself needs to be soaked by at least 2-man as well, more to that later.
Meanwhile, the east statue will attack the players with Vitophyre, which is the statue launching a giant piece of rock at each tethered player. If this rock clips any other players than the intended target, then the resulting impact will throw the innocent bystanders off the arena, instantly killing them. And if the rock somehow hits the gravity circle, then it will explode, wiping the whole party instantly.
This attack comes in two sets, with PF resolving the first set south and the second set north.
First set
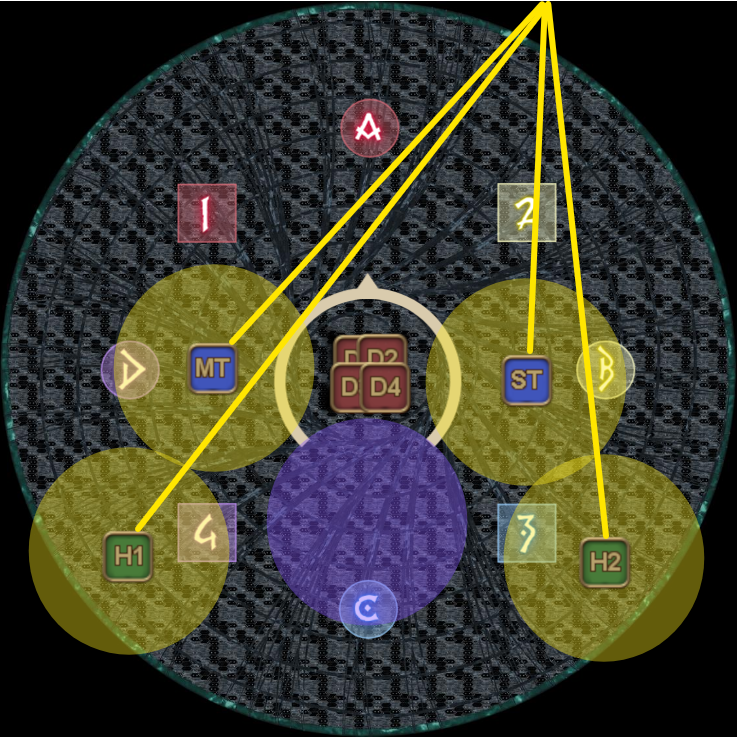
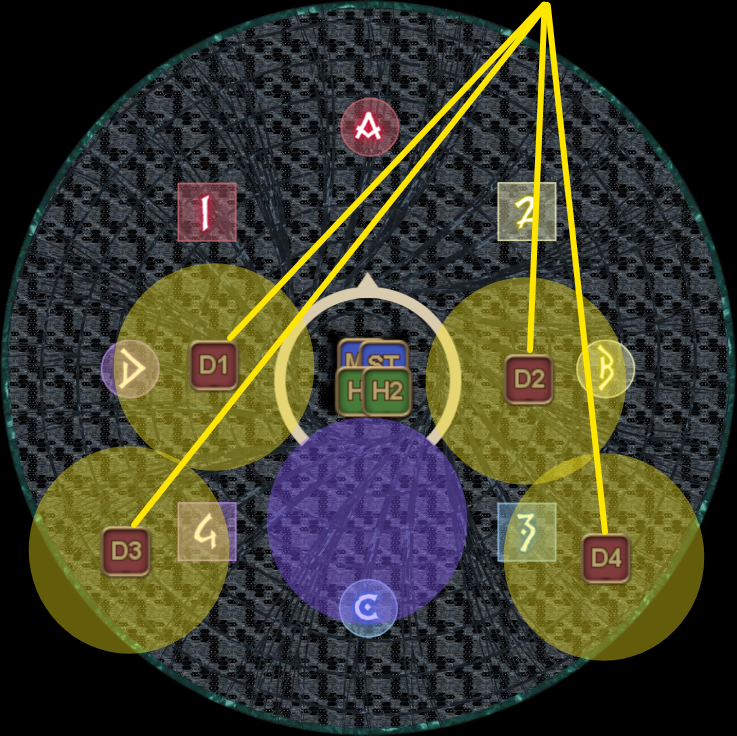
After Kefka finishes his Graven Image cast, identify immediately to which statue you're tethered to. After that, head south and stack up as a party at max melee range of the boss. Kefka will use Blizzard III Blowout here to cleave two quadrants, which can be real or fake, so identify the safe spot and shimmy left or right if necessary.
Remember which statue you're tethered to! Once the Gravitas lands on the floor, the party must immediately get out of the circle as it will explode and wipe the party otherwise. The players tethered to the middle statue must run to the center of the arena, while the players tethered to the east statue must spread out.
| Support spread | Example | DPS spread |
|---|---|---|
 |  |
After resolving the attacks from the statue, two things will happen. First, Kefka will use Revolting Ruin III on the player with the highest aggro. This is the same tankbuster you saw at the very start of this phase, so resolve it the same way by having a tank take both hits, preferably with an invuln.
Second, the statue in the background will randomly cleave either the west half or the east half of the arena. You can identify which half the statue is cleaving by looking at which side the giant orb spawns. There are alternative ways to identify it, like looking at its color (purple is west, yellow is east), or using the distinct sound cues from the moment the orb is materialized.
Pick your favorite method, identify which half is getting cleaved and dodge the attack. While dodging the attack, try to walk behind Kefka as you don't want to be caught in the tankbuster crossfire. As for the tank who is not taking the tankbuster, don't forget to provoke once you see the tankbuster marker on your co-tank!
| West cleave | Tankbuster | East cleave |
|---|---|---|
As the mechanics are resolving, the statues will once again tether a role group to either the middle statue or the east statue. The tethering is completely random, so expect the possibility that your role group will be tethered to the same statue twice in a row.
Second set
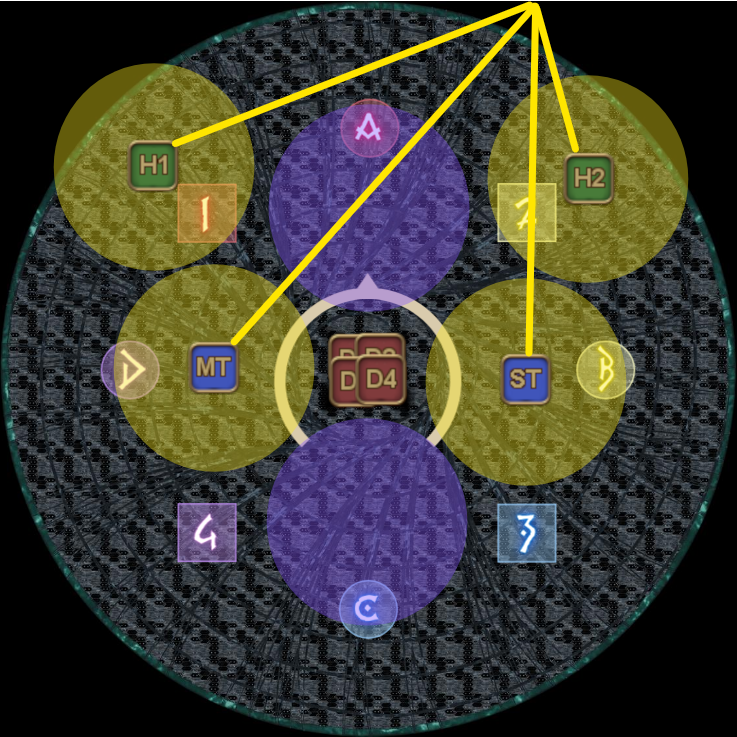
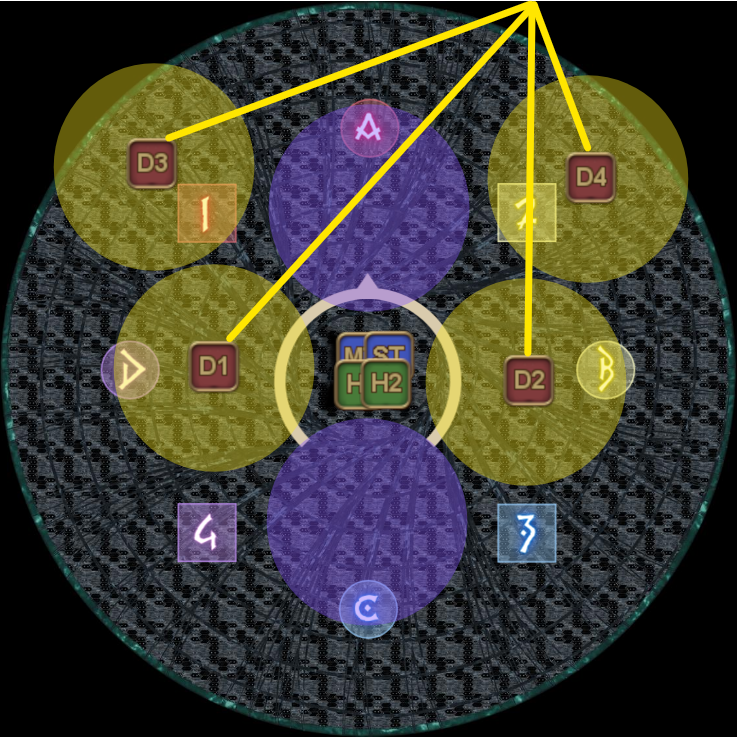
Once the cleave has passed, have your party immediately preposition at the north of the arena at max melee range of the boss. Similarly to the first set, you will now be doing the exact same thing you did before but now at north instead. As a reminder, the spread is true north, as you can see in the diagrams below.
| Support spread | Example | DPS spread |
|---|---|---|
 |  |
After resolving the 2nd set of tethers, the statue will once again do a half arena cleave, which can be randomly west or east. Identify the safe side and go to that side once its safe to do so.
Resolving the Gravitas
There will be no more tethers for now, so your party is now given the opportunity to cleanse the Gravitas circles that are lingering at the north and south of the arena. These circles are functionally stack markers, so your goal is to soak each cluster with four players each.
It sounds simple on paper, but the reality is a bit harder because you cannot just walk in these Gravitas puddles and be done with it. The Confetti, which hopefully you haven't forgotten about its existence, will expire after the half room cleave. This forces your party to resolve the Confetti knockback and the Gravitas puddles at the same time.
There are two strategies circulating in Elemental PF, so make sure to double check which strategy your PF is using.
| West/East (Yan & Megabin) | North/South (Lisbin) | |
|---|---|---|
| West safe | East safe | |
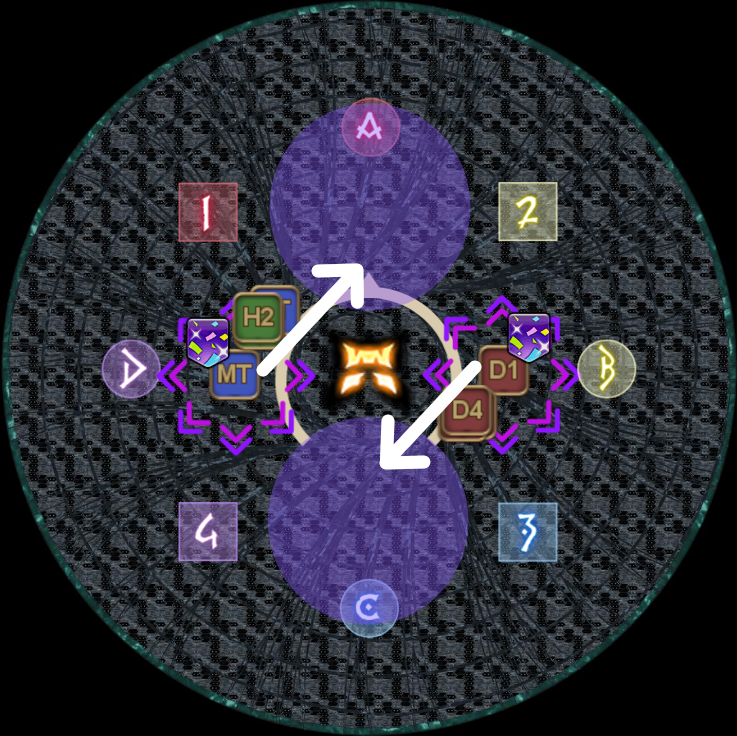 | 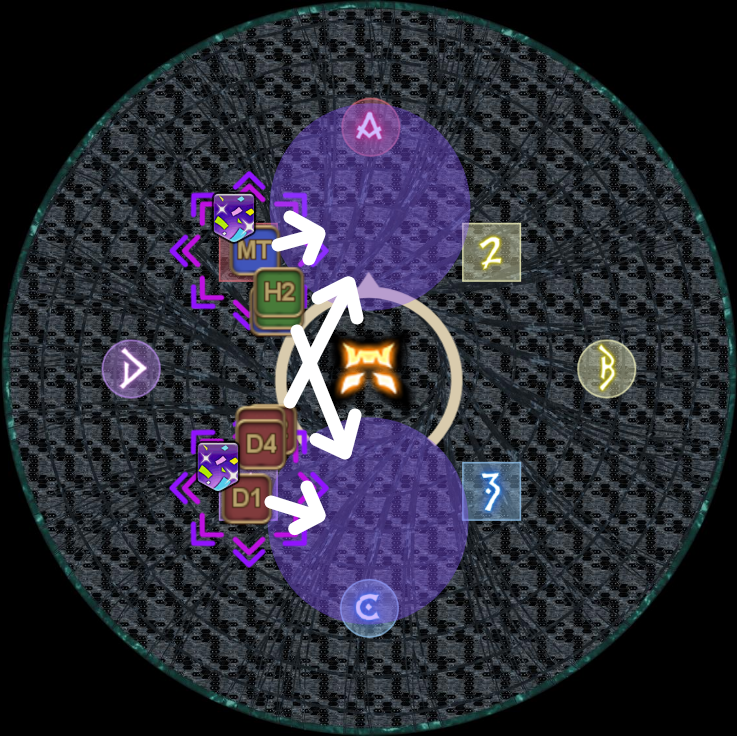 | 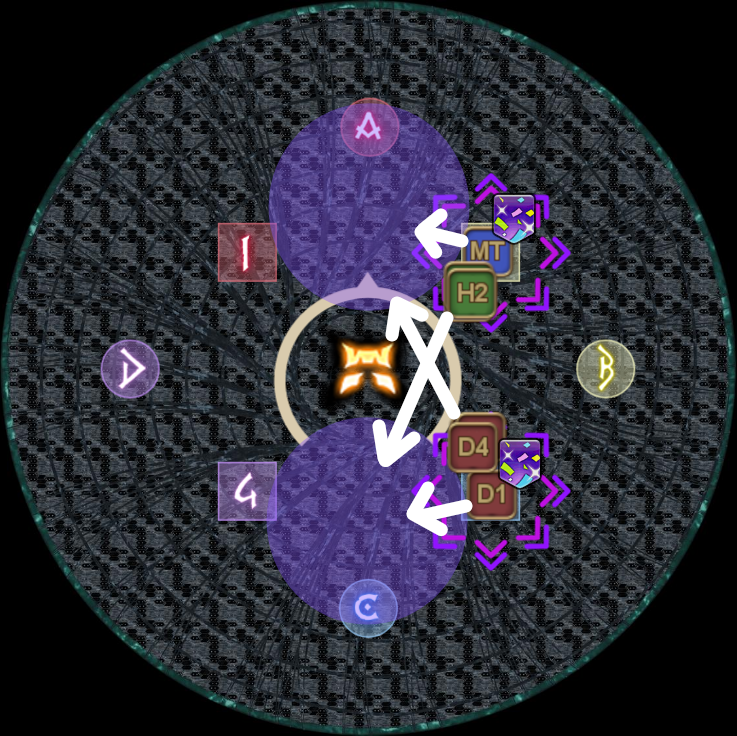 |
The difficulty in this mechanic lies in how much damage you will be taking from both the confetti and the Gravitas. Even accounting that there are mitigations, the players may die if they do not receive any healing between the confetti knockback and the Gravitas puddle soaking. The timing is tight, so Liturgy of the Bell (WHM) and any instant activation spells are recommended. Otherwise, use the confetti debuff timer to time your spell casts if necessary.
Once both Gravitas puddles have been successfully soaked, Kefka will signal the end of this mechanic by using Light of Judgement. Just like before, this raidwide is immediately followed up by three untelegraphed Hyperdrives, so whoever has the aggro should move up north and get ready to take the tankbusters.
As an extra note, any mitigations lasting 15s or longer can cover the confetti knockback, the gravity soak and the Light of Judgement if you time it well. This will help immensely for the healers, so try to aim for this optimization if possible.