P12S - Caloric Theory 2
Athena will start casting Caloric Theory again to signal the start of Caloric Theory 2. One random player will get a red marker, while the rest get a green marker. Once Athena is done casting, an aero circle will go off on all players with a green marker. Just like Caloric 1, hitting someone else with this attack is fatal because of Close Caloric, so make sure that everyone spreads out in a formation to avoid clipping each other.
Once Athena finishes casting Caloric Theory, Athena will inflict the following debuffs on all players:
- All players will start with two stacks of Close Caloric.
- The player with a red marker will start with three instead, due to taking a fire attack at the start.
- All players will get Atmosfaction.
- One random player with a green marker will get 8 stacks of Entropifaction.
- The player with a red marker will never start with the Entropifaction.
| Debuff | Description | Additional notes |
|---|---|---|
 | For reference as to how much 9 yalms is, check the image to the right. | 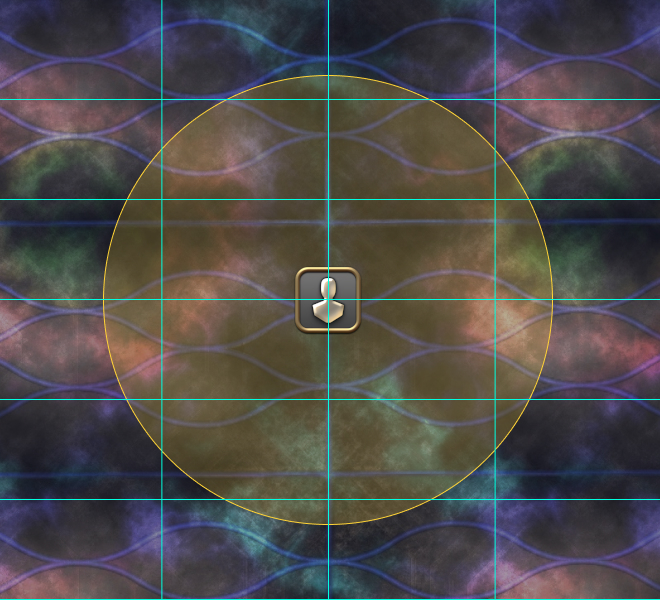 |
 | The image on the right shows you roughly how big the aero AoE is. |  |
 | The player with Entropifaction is easily identified by the giant flame above their head. |   |
 |
To resolve this mechanic correctly, the party must let all the Entropifaction stacks run out without it hitting anyone. This would be trivial if everyone had infinite movements, but due to Close Caloric, a single player cannot resolve all the Entropifaction stacks alone. All players with green markers starts with two stacks of Close Caloric, which allows exactly two AoE dodges. The first dodge should always be to pass the debuff to another player while simultaneously dodging the AoE. The second dodge is to get away from the AoE again once the debuff has been passed to another player. The second dodge should always be away from the center, because at the very end of this mechanic, the Atmosfaction will go off and you do not want that to hit anyone by accident. Keep in mind that the player with the red marker starts with three stacks instead, so the Entropifaction should never be passed to this player.
All the general rules of Caloric 1 apply here as well! Avoid unnecessary movements and walk in a straight line without doing any weird movements. If you mess up by moving wrongly, then there's no turning back!
Just like Caloric 1, the prepositioning in Caloric 2 is the most important part of this mechanic. The party needs to preposition themselves in a way that allows them to resolve this mechanic as smoothly as possible.
- Nukemaru (JP)
- Pastebin (Aether)
Elemental and Mana follows the Nukemaru video guide for Caloric 2. Nukemaru's approach is to have the MT take the middle spot for flexing and have the party pass the Entropifaction counterclockwise.
| Once Crush Helm is resolved, everyone should loosely preposition themselves like this. Once Athena starts casting Caloric Theory, the MT should immediately locate who the player is with a red marker. The MT should swap places with that player, because the red marker should be in the middle. | 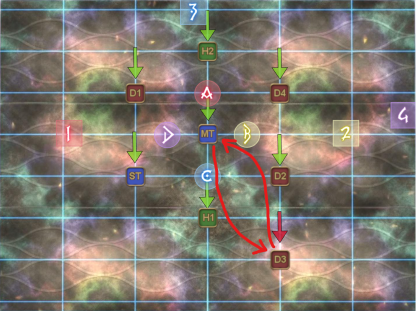 |
| After the MT switches place with the red marker, wait until Athena finishes casting Caloric Theory. Remember to mitigate and heal this, because this raidwide hits quite hard! | |
| One random player who had a green marker will be inflicted with Entropifaction. Once you see the AoE on the floor, move out and pass the debuff counterclockwise. In this example, the Entropifaction started at H2, so this player should pass it to D1 next. The player with the red marker in the middle should not move for the remainder of this mechanic, he/she only needs to stay still in the center and wait until the mechanic is over. |  |
| Once the debuff is passed, wait until the AoE appears on the floor. H2 should now dodge away from the center, while D1 should now pass the debuff to the next person, which is the ST. Each player basically does this, until there are no more players left to pass the debuff to. The preferred dodge is diagonal, but you can opt for a horizontal dodge instead. Just make absolutely sure that the way you're dodging will not cause any problems down the line for the other players. | 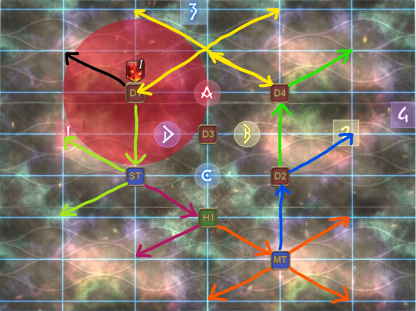 |
| The last person, in this case the D4, should run towards the position of where the Entropifaction started in order to drop the last stack. After the AoE puddle appears, you can dodge in any safe direction, even back to where you came from, because there are no more fire puddles after this. |  |
| Once the last person has dodged the last fire puddle, all the Atmosfactions will now resolve. If all players are properly spread out, then the Atmosfaction should not hit anyone. | 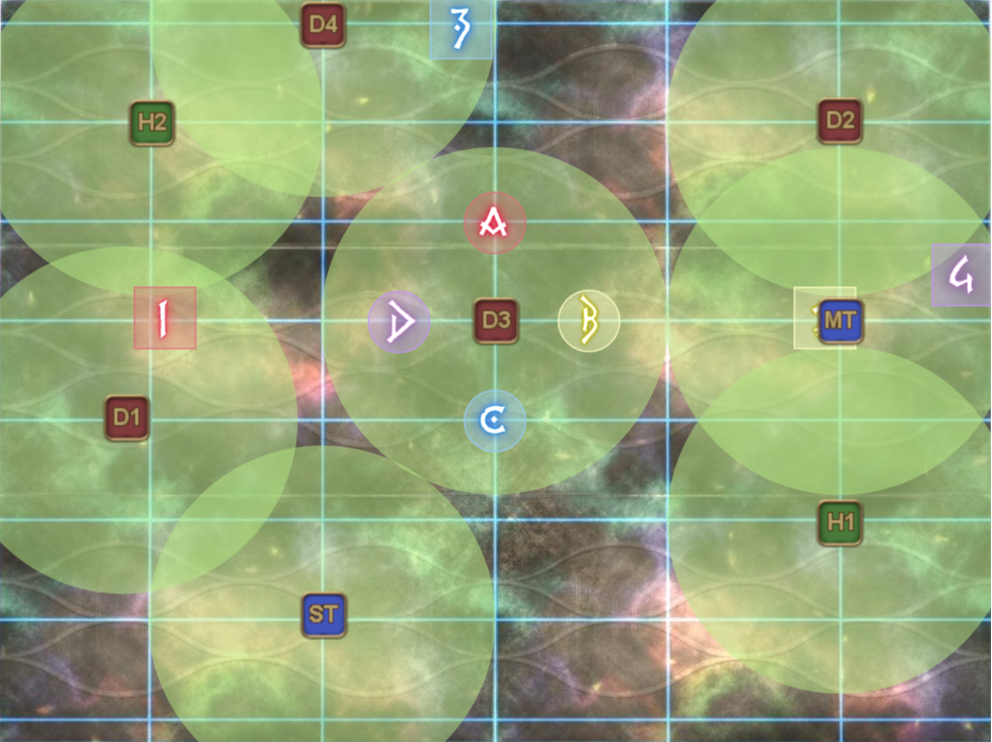 |
| Here is the MT point of view from the beginning until the Atmosfaction resolving. |
Aether follows the pastebin strategy instead. The pastebin strategy puts a ranged in the middle for flexing and have the party pass the Entropifaction clockwise.
| Once Crush Helm is resolved, everyone should loosely preposition themselves like this. Once Athena starts casting Caloric Theory, the D3 should immediately locate who the player is with a red marker. The D3 should swap places with that player, because the red marker should be in the middle. |  |
| After the D3 switches place with the red marker, wait until Athena finishes casting Caloric Theory. Remember to mitigate and heal this, because this raidwide hits quite hard! | |
| One random player who had a green marker will be inflicted with Entropifaction. Once you see the AoE on the floor, move out and pass the debuff clockwise. In this example, the Entropifaction started at OT, so this player should pass it to D2 next. The player with the red marker in the middle should not move for the remainder of this mechanic, he/she only needs to stay still in the center and wait until the mechanic is over. | 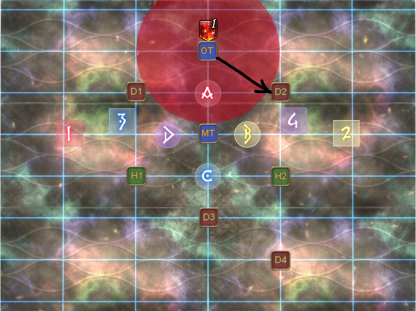 |
| Once the debuff is passed, wait until the AoE appears on the floor. OT should now dodge away from the center, while D2 should now pass the debuff to the next person, which is the H2. Each player basically does this, until there are no more players left to pass the debuff to. The preferred dodge is away from the center, whether it horizontal, vertical or diagonal. Just make absolutely sure that the way you're dodging will not cause any problems down the line for the other players. |  |
| The last person, in this case the D1, should run towards the position of where the Entropifaction started in order to drop the last stack. After the AoE puddle appears, you can dodge in any safe direction, even back to where you came from, because there are no more fire puddles after this. |  |
| Once the last person has dodged the last fire puddle, all the Atmosfactions will now resolve. If all players are properly spread out, then the Atmosfaction should not hit anyone. | 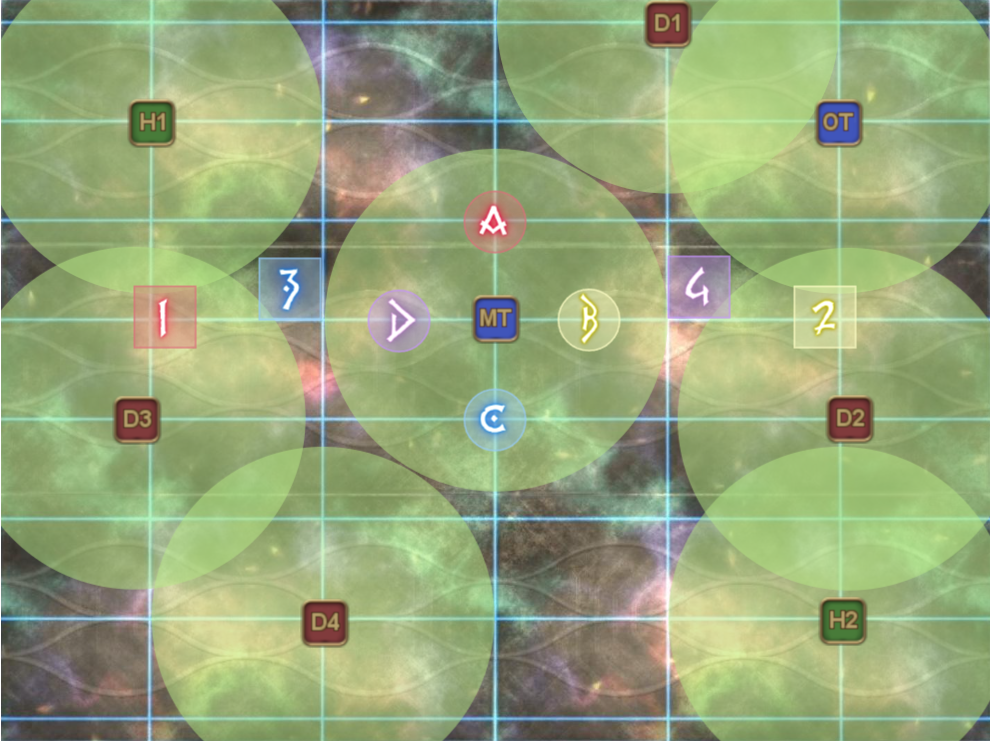 |
| Here is the MT point of view from the beginning until the Atmosfaction resolving. |
Once Caloric 2 is properly resolved, Athena will cast Ekpyrosis that is followed up with Ultima. Heal up and mitigate as needed. Nothing is different from the last time, so the party can resolve this mechanic the same way as last time.