M2S - Honey B. Live: 2nd Beat
Honey B. Lovely casts Honey B. Live: 2nd Beat, transitioning into the live stage again. Once the raidwide is cast, four players will now have 1 heart, while four other players have 0 heart.
Once you've entered her live stage again, the boss will cast either Spread Love or Drop of Love. These work exactly like Splash of Venom or Drop of Venom with the added effect of inflicting a heart, so make a mental note as to whether its spread or partner stack, as this mechanic will resolve later.
Love Me Tender
After she stores her attack, the boss will follow it up with Love Me Tender, which does the following:
- One random DPS and one random support with no hearts will get a stack marker, with each dealing 4 hearts worth of damage.
- The same two players who gets the stack marker will now also drop baited AoE puddles on the ground, which the players need to dodge. There are five baited AoE puddles in total.
- One random DPS and one random support with 1 heart stack will receive a targeted AoE.
- Two towers will spawn at opposites sides, which can either at north/south, or west/east.
- These need to be soaked by players with 1 hearts that did not get any AoE.
Your goal is to resolve all the above mechanics while making sure that everyone does not ever get 3 hearts or more. If done correctly, everyone should have two hearts by the end of this mechanic. The current popular strategy is nukemaru, but there also exists a braindead way of resolving this mechanic. Both are easy to execute, so decide with the party how you want to resolve this.
- Nukemaru (JP)
- Braindead (NA)
The nukemaru strategy has the 0 hearts bait from center to north, after which the pairs split off in order to resolve both stacks as pairs. Nukemaru intends players to take the downtime in order to safely resolve the mechanic, so do be careful if you intend to uptime the boss.
 | 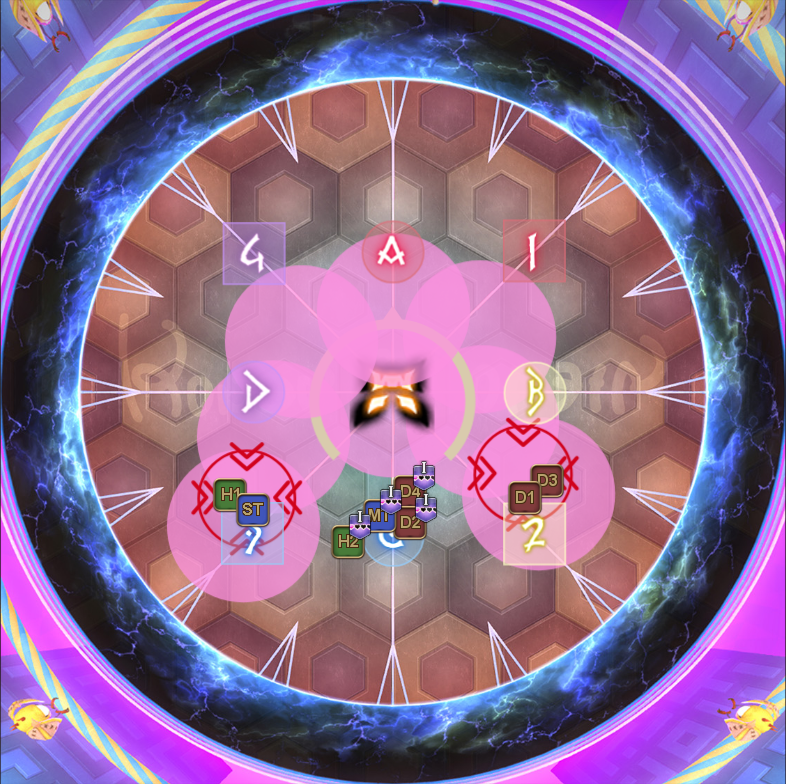 |
| Everyone with 0 hearts stacks in the middle under the boss, while everyone with 1 should stack south of the boss. Once the AoE puddles appears on the floor, the 0 hearts should move up north. From there, supports split off CCW while the DPS splits of CW. When you see the towers and targeted AoEs, do not panic. You have a lot of time before both of them resolves, so wait until the players with the stack markers are done with their mechanic. The stack markers will resolve around the 4th bait. | |
 | 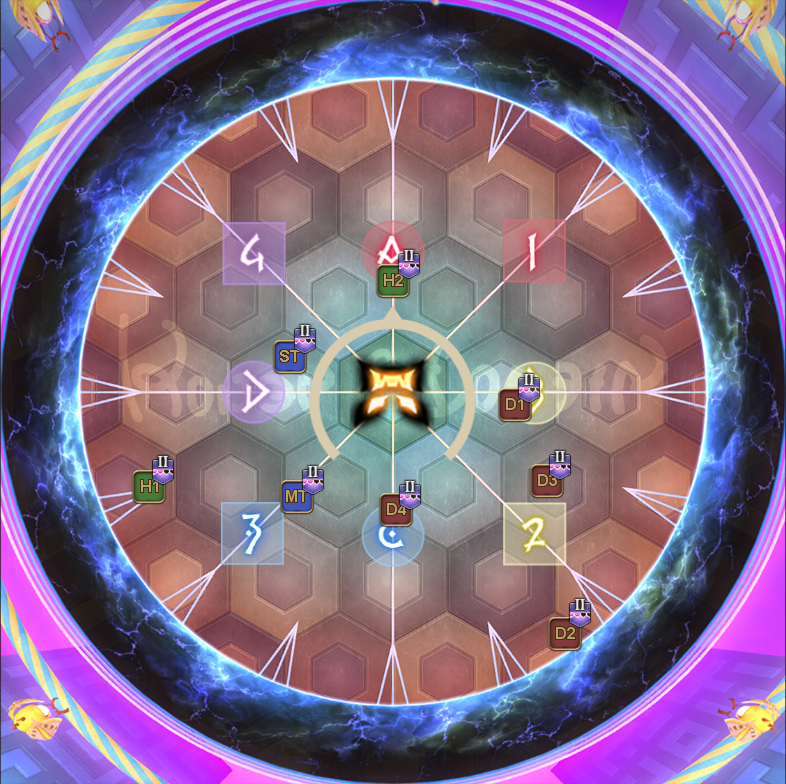 |
| The targeted AoEs and the towers will now spawn. The players who did not get an AoE should now soak the towers. Supports takes north/west, while DPS takes south/east. If everything is done correctly, then every player should now have two hearts. | |
This strategy abuses the fact that the stack markers doesn't inflict any magic vulnerabilities, which means you can stack both stack markers together in order to resolve the mechanic. This is one of the few instances where you can stack multiple stack markers together without consequences. Uptime is guaranteed.
The week 1 variant of this strategy used to have the 0 hearts start north, but NA has decided that they should start south, while OCE starts southwest instead.
 |  |
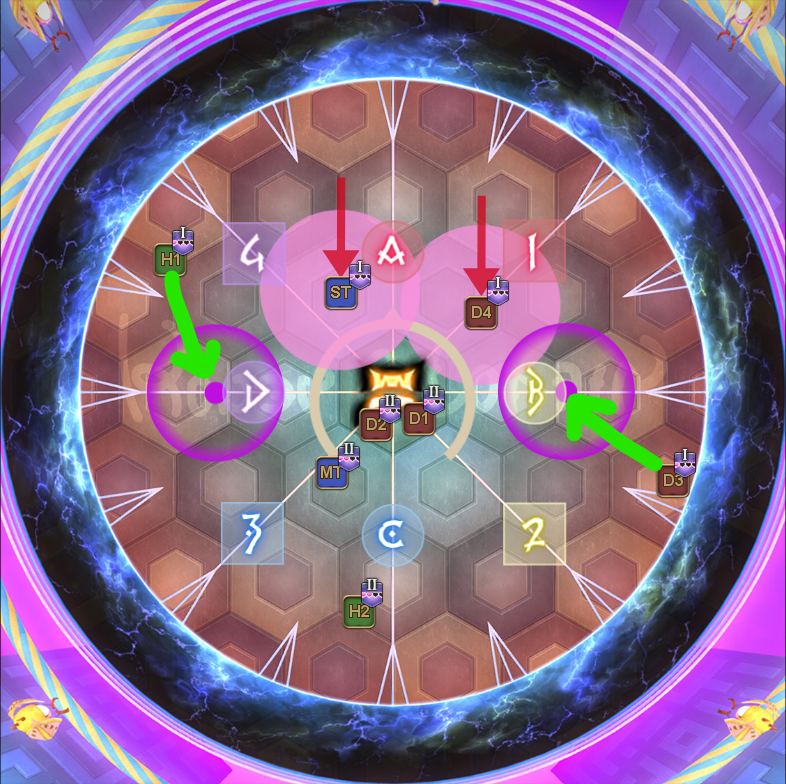
| Everyone with 0 hearts stacks north, while everyone with 1 heart should spread either west or to the edges. Once the AoE puddles appears on the floor, the 0 hearts should rotate around the boss in a clockwise manner to bait all the AoE puddles. When you see the towers and targeted AoEs, do not panic. You have a lot of time before both of them resolves, so wait until the players with the stack markers are done with their mechanic. The stack markers will resolve around the 4th bait. | |
 | 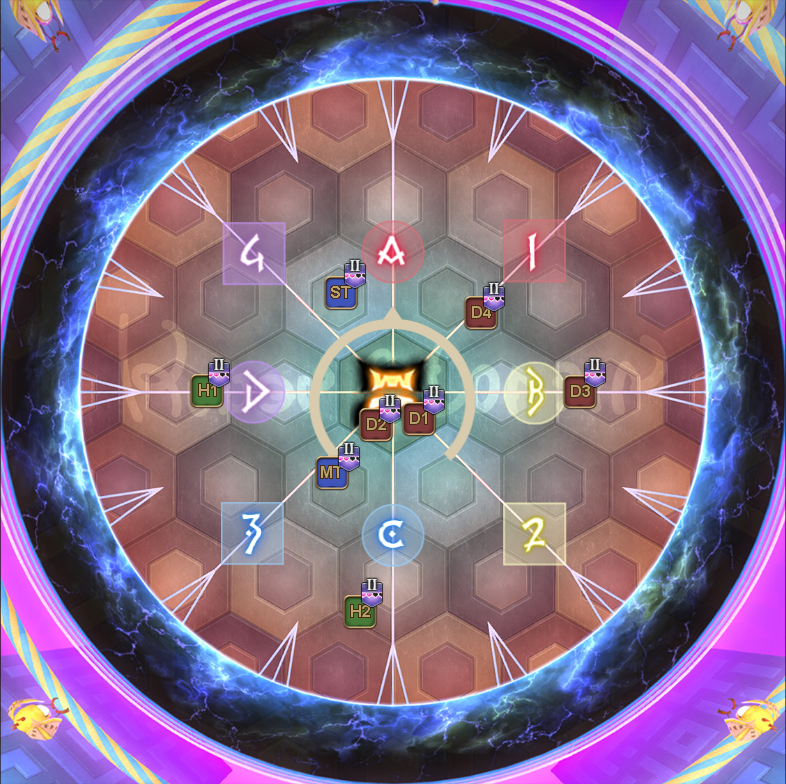 |
| The targeted AoEs and the towers will now spawn. The players who did not get an AoE should now soak the towers. Supports takes north/west, while DPS takes south/east. If everything is done correctly, then every player should now have two hearts. | |
Upon resolving all the mechanics, the boss will now use either Tempting Twist or Honey Beeline to resolve the attack that was stored at the beginning of this live phase. Dodge appropriately whether its spread or drop, and quickly heal up as the boss will follow it up immediately with Honey B. Finale.