M5S - Disco Infernal 1
First of all, both of the tanks should enable their stance and establish the two highest enmity on the boss as soon as possible! Dancing Green will waste no time to show that he means business by immediately tankbustering your party with Deep Cut, which targets the two players with the highest aggro.
Deep Cut will reoccur throughout the fight! If at any time the tanks fails to establish the aggro on the boss, whether due to forgetting his/her stance or not provoking after reviving from death, then the tankbuster will likely target a DPS or a squishy healer instead. It goes without saying that non-tanks will not survive this attack, so tanks be wary and make sure to always have the aggro established at all times.Flip to A/B-Side
The next recurring mechanic that you will encounter throughout this fight is either Flip to A-Side or Flip to B-Side. Dancing Green will randomly cast one of the two and store the attack for later. This attack is then executed every time Dancing Green uses x-snap Twist & Drop the Needle, in which the snap can be randomly 2, 3 or 4 just like in normal mode. Flip to A-Side will randomly target one of each tank, healer and DPS with a protean cone, while Flip to B-Side is a light party line stack AoE that targets healers.
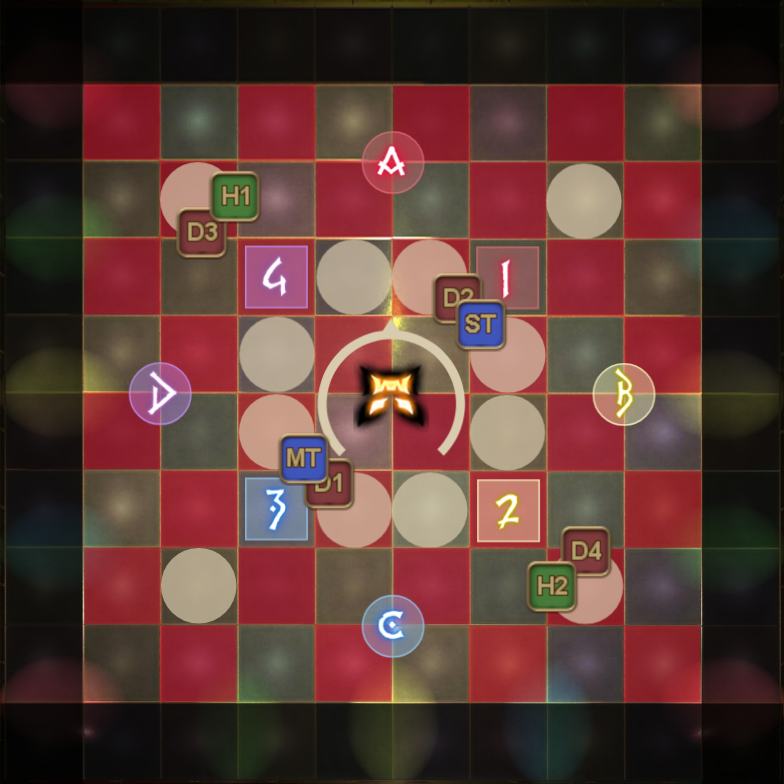
Now, normally this would be a memory check, but the JP players found out that you can just simply braindead this by assigning players to fixed positions relative to the boss. For this strategy, you do not need to remember whether it is Flip to A-Side or Flip to B-Side at all, as long as you remember your own position.
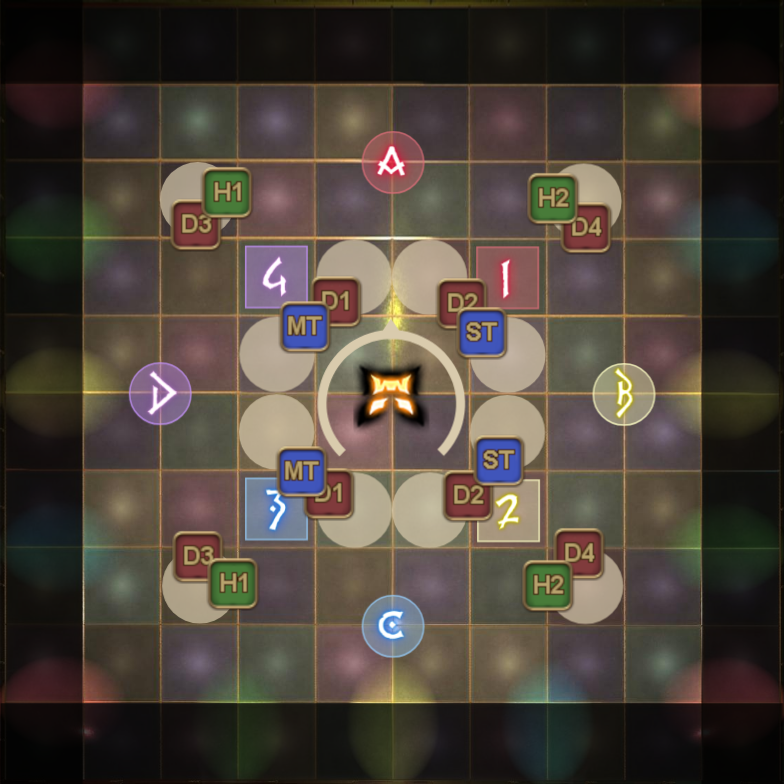
| Whether it is A-Side or B-Side... | ...it does not matter! | ||||
|---|---|---|---|---|---|
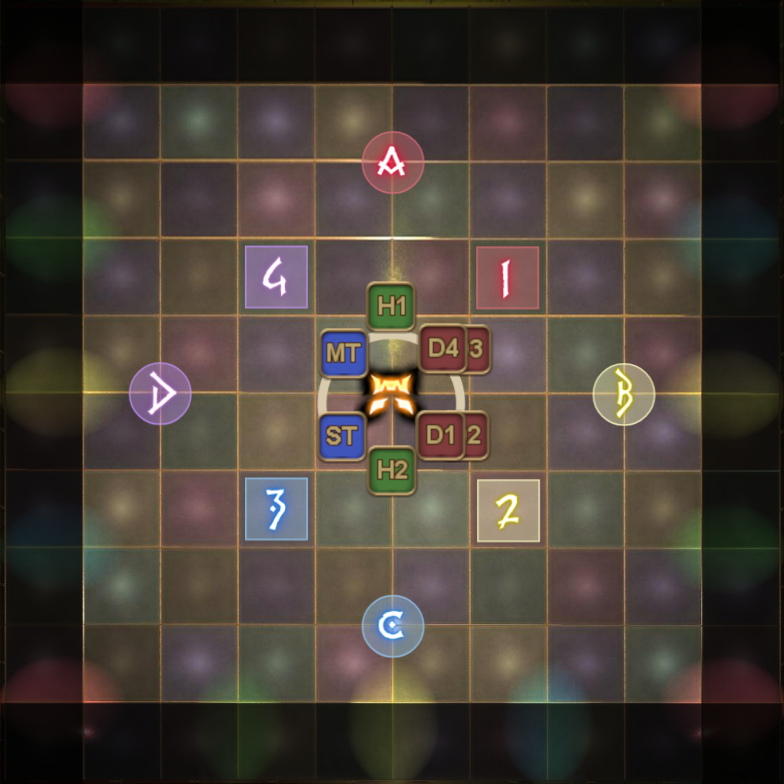 | |||||
Dancing Green will always use both Flip to A-Side and Flip to B-Side at the start, albeit in a random order. Use this opportunity to get your static position correctly, as you will be facing this mechanic quite often throughout this fight.
Disco Infernal
Once you're done with the initial mechanics, Dancing Green will cast Celebrate Good Times, which is the generic raidwide of this fight. Try to time your mitigations here, because the boss will follow this raidwide up with Disco Infernal, which is another raidwide. However, this raidwide will inflict debuffs on your whole party, transitioning you to the first major mechanic of this fight.
| Debuff | Description | Additional Notes |
|---|---|---|
 | Once the timer of this debuff runs out, you are forced to pose under a spotlight. If you fail to pose, either due to taking damage while posing, failing to get under a spotlight or sharing a spotlight with someone else who is also posing, then you will instantly die from Shame. One role group starts with 23s, while the other role group starts with 31s. |  |
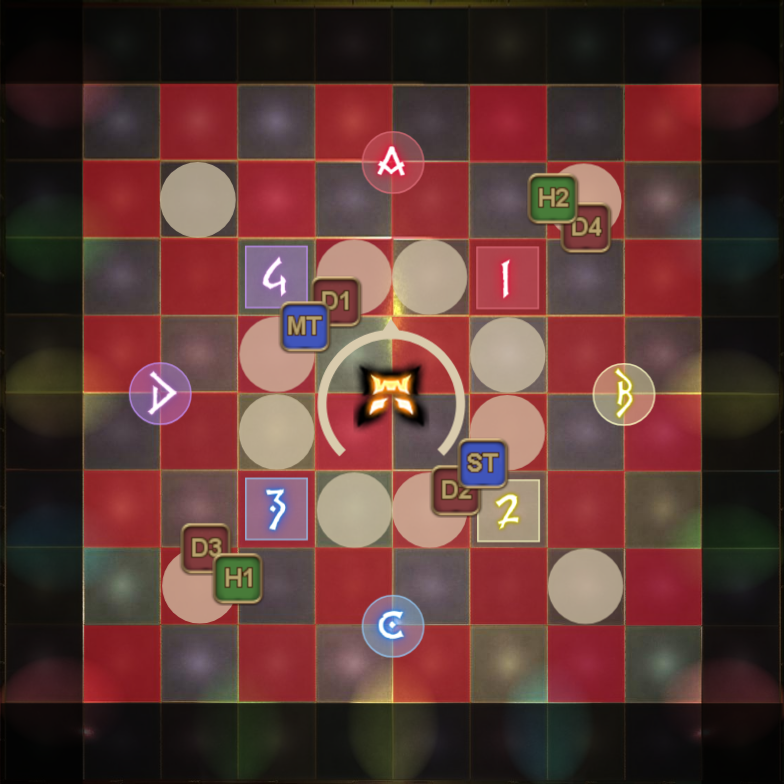
Note that there are 8 spotlights around the arena, but only four of them will ever be safe when the time comes when you have to pose. This is because Dancing Green will now bring back the Funky Floors, which will hit the tiles in an alternating checkerboard pattern. In the image below is shown where the possible spotlight locations are, as well as who the spotlight belongs to.
As mentioned above, the funky floor can instantly kill you if it interrupts your pose, so your first goal is identifying which tiles are safe when you're about to pose. To identify your safespot, you have to observe how the checkerboard pattern starts. As a general rule, your safe spotlight tile will never be safe initially. If it does start safe, then you are to migrate to your other possible safe spot. This applies for both role groups, so it does not matter which timer you start with!
| Pattern 1 | Pattern 2 |
|---|---|
 |  |
Once you've identified your safe tile, good! But Dancing Green will not make it easy for you. In an attempt to make you forget your safe tile, he will either use Inside Out or Outside In. So you won't get confused, Inside Out means chariot to donut, while Outside In means donut to chariot.
| Inside Out | Outside In |
|---|---|
After dodging the donut and chariot, get ready to get into your spotlight! Around this time is when the boss will cast either Flip to A-Side or Flip to B-Side, but you can completely ignore that. You already have a braindead strat to counter it, so there's no need to memorize it. Once both groups have done their pose, Dancing Green will use x-snap Twist & Drop the Needle.
| Example 1 Pattern 1, 2nd pose group  | Example 2 Pattern 1, 1st pose group  | Example 3 Pattern 2, 1st pose group  |
|---|---|---|
If you are the 2nd pose group, then it is recommended to pop sprint here to get back to the center as soon as possible without getting hit by the half-room cleaves. Using a knight jump, if you happen to be familiar with chess terminology, can help close the distance without pausing on an unsafe tile. The funky floors will stop once the Flip to A/B-Side is resolved, after which Dancing Green will wrap things up with a Celebrate Good Times. And to check whether the tanks are properly doing their job, he will follow the raidwide up with a Deep Cut.